Scheduler Templates Editor
Use the
Scheduler Templates vs Specific Date Templates - This article discusses creating and editing Scheduler templates for use with future dates: If you want to change the scheduling screen for an individual date, use the Grid Template Editor, available from the Scheduler ribbon bar. See "Grid Template Editor" for details about using this tool.
You can create a new Scheduler template from scratch, or copy an existing template to use as the starting point for your new one. You then choose the number of columns, time interval, and other screen parameters, and finally, you can classify individual grid cells.
-
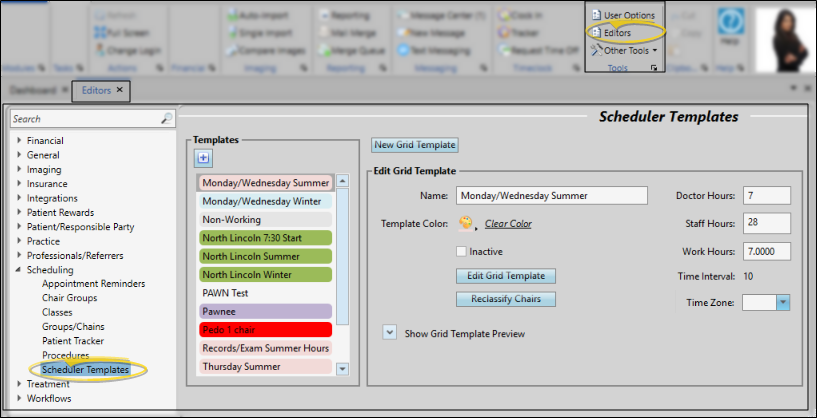
 Open Scheduler Templates Editor - Select Editors from the Tools section of the Home ribbon bar. Then from the Scheduling section, open the Scheduler Templates editor. (You can also use the Search field to look for the editor you want to work with.)
-
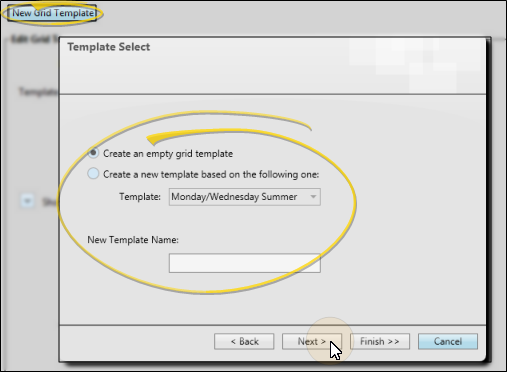
Create / Copy a Template - Click New Grid Template at the top of the editor window, then either choose to create an empty template, or copy an existing template to use as the starting point for your new one. After entering a descriptive name, click Next at the bottom of the window to continue.
-
Chairs / Columns - Specify the number of chairs, or columns, to have in the template. If you change values, click Update to refresh the screen. You can then optionally click in each field to name the chair, and assign a specific doctor, office, assistant

-
Template Time Coverage - Enter the time interval, or number of minutes, allotted for each scheduling cell. (Many offices schedule by 5, 10, or 15 minute intervals)

-
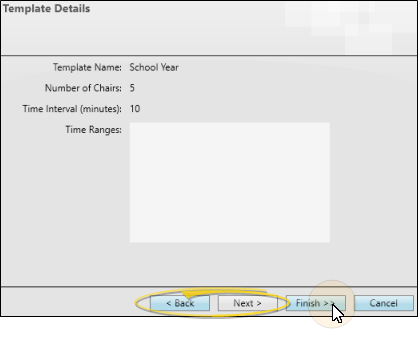
Review and Finish Template - Review the choices you have made for this template. You can use the Back and Next buttons to toggle among the setup windows as needed to make any changes. When ready, click Finish to accept your settings and continue.
-
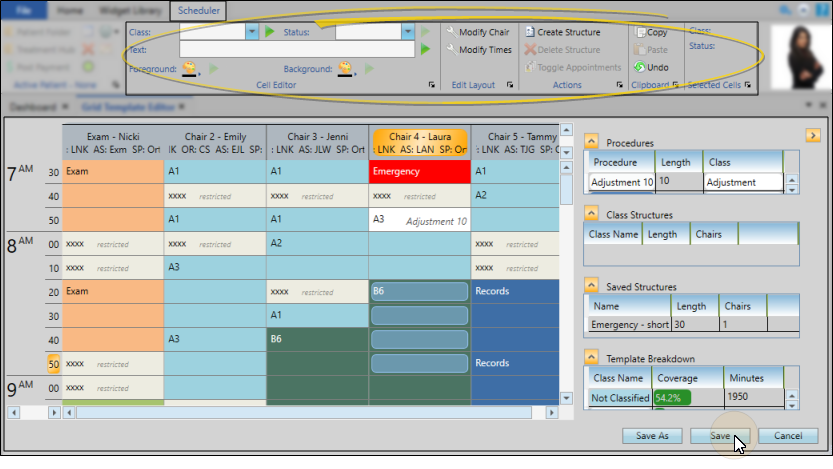
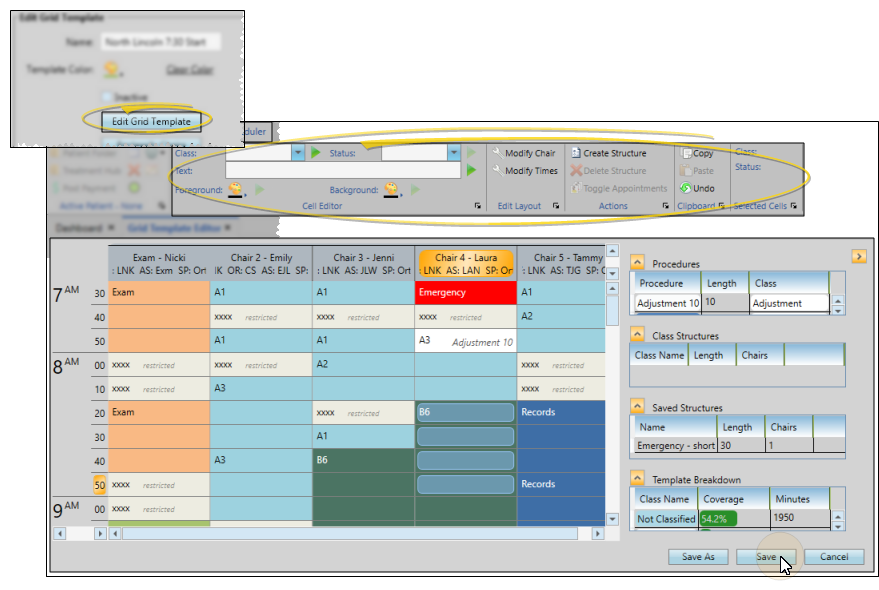
Use Grid Template Editor Tools - After you click Finish, the Grid Template Editor window opens automatically. Use
-
Edit Template Details - After saving changes you made in the Grid Template Editor, you return automatically to the Scheduler Templates editor. Use the fields in the Edit Grid Template section of the window to change the template name, color, and designated work hours.
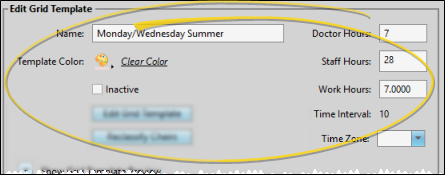
Name - You can type a new name for the template in the Name field at the top of the window.
Template Color - The template color is used with your scheduler's Month View mode and in the status bar at the bottom of your daily schedule, to identify which template you have assigned to which dates. Select a color for the template, or click C
Doctor, Staff, Work Hours - Enter values in these fields to be used for reporting purposes
Template Time - The time interval appears on this screen for your reference: You cannot change the time interval or time ranges for this template here. If you need to change times, click the Edit Grid Template button, and use the Modify Times tool in the Grid Template Editor.
Time Zone - Use this field to specify which zone to use with this template.
Inactive / Active Toggle - Once you create a record, you cannot delete it. You can, however, flag it Inactive. Records you flag as Inactive are not available for general use, but they remain in your system for reporting and other data collection needs. In addition, you can toggle records back to Active whenever needed.
-
Save Changes - Click
 Save in your Quick Access toolbar or File ribbon bar (or press Ctrl+S on your keyboard) to save any changes you have made.
When you edit a scheduling template from the Scheduler Templates editor, any dates that are already assigned to the template are not affected, unless you choose to use the Reclassify Chairs tool to update chair assignments, as described toward the end of this section.
-
Open Scheduler Templates Editor - Select Editors from the Tools section of the Home ribbon bar. Then from the Scheduling section, open the Scheduler Templates editor. (You can also use the Search field to look for the editor you want to work with.)
-
Select Existing Record - Your list of existing records appears at the left. Click the record to work with, then review and edit the details at the right.
You can use the Inactive option in the record details to toggle the active / inactive status of an record. If not all your records appear in the list, use the
 Show / Hide Inactive icon at the top of the window to include both active and inactive records.
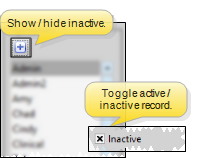
Show / Hide Preview - Toggle the Show Grid Template Preview option to see a preview of the template you have selected. This feature provides a way to determine if you have selected the correct template before you continue with changes. However, keeping the preview open can slow down the processing speed of the editor.
-
Edit Template Details - Use the fields in the Edit Grid Template section of the window to change the template name, color, and designated work hours.
Name - You can type a new name for the template in the Name field at the top of the window.
Template Color - The template color is used with your scheduler's Month View mode and in the status bar at the bottom of your daily schedule, to identify which template you have assigned to which dates. Select a color for the template, or click C
Doctor, Staff, Work Hours - Enter values in these fields to be used for reporting purposes
Template Time - The time interval appears on this screen for your reference: You cannot change the time interval or time ranges for this template here. If you need to change times, click the Edit Grid Template button, and use the Modify Times tool in the Grid Template Editor.
Time Zone - Use this field to specify which zone to use with this template.
Inactive / Active Toggle - Once you create a record, you cannot delete it. You can, however, flag it Inactive. Records you flag as Inactive are not available for general use, but they remain in your system for reporting and other data collection needs. In addition, you can toggle records back to Active whenever needed.
-
Edit Grid Template - Click the Edit Grid Template button to open the Grid Template Editor. Use
-
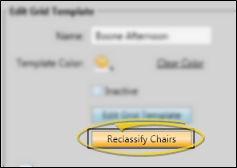
Reclassify Chairs - (Optional.) If you make changes to the chair assignments (Doctor, Office, Assistant, or Chair Group) of a Scheduler Template, you can use the Reclassify Chairs tool to update the chair assignments of dates that are already assigned to that template. This reclassification occurs without disturbing any currently scheduled appointments. You might use this feature, for example, if you have edited a template to assign chairs to a new orthodontist in your practice,or to reassign chairs among your assistants.
-
After returning to the Scheduler Templates editor, be sure your template is still selected, and click Reclassify Chairs.

-
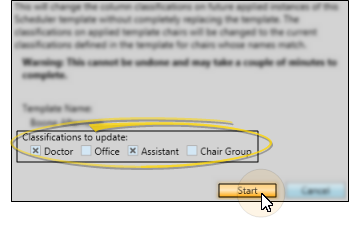
Choose which assignments to update. Then, click Start to initiate the reclassification process.

The reclassification process will update the chair classifications you have selected for each scheduling date that has already been assigned to this template, as well as dates that are assigned to this template in the future. If you made changes to a chair assignment (i.e. Office), but did not choose to update that classification, that classification will not be updated for dates that were already assigned to the template.
-
-
Save Changes - Click Save in your Quick Access toolbar or File ribbon bar (or press Ctrl+S on your keyboard) to save any changes you have made.
![]()
www.ortho2.com │ 1107 Buckeye Ave. │ Ames, IA 50010 │ 800.346.4504 │ Contact Us
Chat with Software Support │ Chat with Network Engineering │ Chat with New Customer Care
Remote Support │ Email Support │ Online Help Ver. 11/11/2019


