Appointment Card / Payment Receipt Email Editor
Use the Form Email Setup tools to set up your online correspondence system. The setup options include specifying your return email address, web site, and logo, as well as creating the text of appointment card and receipt messages.
 Emailed Forms Not Being Delivered
If some or all of your Edge Reminders email messages, Edge Broadcast newsletters, or emailed appointment cards and payment receipts aren't being delivered, they are likely being flagged as spam, or blocked as unverified transmissions by the recipients' email providers. If you have ascertained from patients and parents that the message was not delivered to their spam folder or blocked by their spam filters, you can often resolve the problem by configuring your domain records to allow Edge data center messages in your sender list. See "DMARC/SPF: Undelivered Emails" for details.
Open Form Email Editor - Home ribbon bar > Tools section > Editors > General > Form Email Setup.

Provide Sender Email Addresses - When you open your Form Email Setup editor for the first time, you must enter the "sent from" email addresses to include on your appointment card and payment receipt email messages. You can change these values for individual templates from within the editor at any time.

Show / Hide Preview - Use the  Filter icon at the left edge of the preview panel to show / hide an example of your current email form settings.

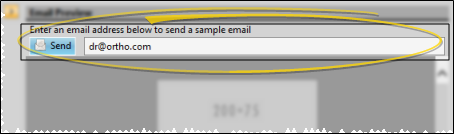
Send Sample - With the preview panel visible, enter your email address in the text box at the top of the panel, then click Send to send yourself an example email with the current form settings.
Set Up Templates - Open the Appointment Card or Receipt tab to select the type of email template you want to work with. Then create a new template, or edit an existing template as needed.
Create a New Template - Click  New to create a new template. Then enter a template name, sender's email address, and the type of template you want to start with. You may choose to start with a standard built-in template, or copy an existing template as your starting point.
Edit Template Details - To edit template details, select a template name at the left of the window. If you just created a new record, it is selected automatically.

Properties - Enter general information to identify this template.
Name - Enter a name to describe this template. This field is for your use only: Email recipients will not see this description.
Sender Email Address - Enter the "sent by", or return email address, to include in your messages.
Setup - Enter your contact information, header properties, and data options to include in this email template.
Phone - Enter the phone number that you would like to appear in the "Contact Info" section of the email message. The recipient will see the number as a link that they can click to call your office. If you leave this field blank, the phone number will not appear in the message.
Email - Enter the email address that you would like to appear in the "Contact Info" section of the email message. The recipient will see the address as a link that they can click to email your office. If you leave this field blank, the email address will not appear in the message. You may use the same email address as the "Sender Email Address", above, or choose a different address.
Footer Link Content / Footer Link URL - Enter the text you want to display as a link in the footer of the email message (such as "Visit Our Web Site"), and enter the URL to go to when the recipient clicks the link (such as your office web site address). Be sure to include the entire URL (i.e. https://ortho2.com). If either the link content or link URL are missing, or the URL is incomplete, the link will not appear in the email message.
Header Background - Use the color drop down icon to select a color for the background of the email message header.
Options - Enable each item of information (i.e. procedure description, reminder, amount due, and insurance info) that you want to include in the message. Your choices depend on whether you are working with the appointment card or receipt form.
Logo - You can optionally include a logo in the header of your email messages.
Show Logo - Enable the Show Logo option in the Setup section of the window to include the selected logo in the header of your email messages. Or, disable this option to remove the logo from the header, without removing the logo settings.
Resize Logo Placeholder - Select the maximum size for your logo by clicking the  Resize icon, then using the slider bars to adjust the maximum width and / or height to use. If your logo graphic is bigger than your maximum settings, it will be reduced proportionally to fit within your parameters; if your logo graphic is smaller than your maximum settings, it will be inserted as-is into the message header.
Resizing the logo placeholder removes any existing logo from the message template: You will need to re-insert the logo file after resizing.
Insert Logo - Click  Add, then navigate to your graphical logo file. The logo will show up in the header of your email messages, as long as the Show Logo option is enabled. The size of the logo may be affected by the placeholder size, described above.
Clear Logo - Click  Clear Logo to remove the logo file from the email message.
Link Buttons - Use this section of your email template to create buttons in your message that link to your web site, social media sites, and any other online resource you wish. The buttons will be listed in the email message in the order they appear in your template.
Define Button Header - Use the Button Header field to enter the text you want to appear above the web button section of the email (such as "Connect With Us"). If you leave this field blank, your buttons will still appear in the message.
Set Up Buttons - Click New Button to add a a new web link button, then use the Content field to enter a description of the button (such as "Facebook"), and use the Link URL field to enter the complete web address. You can then use the Color icon to select a background color for the button.
Delete Buttons - Click the Delete icon beside the button you want to remove.
Change Button Order - Your web link buttons will be listed in the email message in the order they appear in your template. To change the button order, you would need to delete buttons, and re-enter them in the order you wish them to appear.
Email Content - Use this section of your email template to create the text of the message you want to send to your patients and parents.
Subject - Use this field to type the text you would like to include as the subject of your email messages, such as "Reminder From @practiceName". You can optionally type or drag and drop variables, such as @patientFirstName from the variables list at the left of the window into the text box.
Introduction - Use this field to type an introductory greeting, such as "Hello there, @patientFirstName." You can optionally type or drag and drop variables, such as @patientFirstName from the variables list at the left of the window into the text box.
Opening Text - Type an opening sentence. such as "This is just a friendly reminder" in this field. You can optionally type or drag and drop variables, such as @patientName, from the variables list at the left of the window into your opening message.
Summary - (Receipt templates only.) Use this field to insert a summary line underneath the account details section of the email message, such as "Questions? Please call!"
Closing Header - (Receipt templates only.) Use this field to insert a line of larger text above your closing remarks.
Closing - Use this field to type a closing for your message, such as "Please call us at @officePhone if you need any assistance or have any questions". You can optionally type or drag and drop variables, such as @patientFirstName from the variables list at the left of the window into the text box.
Save Changes
Click  Save in your Quick Access toolbar or File ribbon bar (or press Ctrl+S on your keyboard) to save any changes you have made.
Assign Templates to Offices - Use the Form Email Templates section of your Offices editor to select which appointment card and receipt template to use when sending forms via email. Edge Cloud will select the receipt template according to the office assigned in the patient folder, and the appointment card template according to the office assigned to the scheduled appointment (not necessarily the patient's assigned office). See "Office Editor" for details.
Send Appointment Card via Email - Right-click an appointment in the patient's Patient Information Panel, or in your Scheduler, or activate a patient in your Scheduler and select to generate an Appointment Card. When you select the email option, you can then choose to send the message to any email address associated with the patient.
Send Payment Receipt via Email - When you generate a payment receipt, you may choose to print or email it to the responsible party. See "Receipt of Payment" for details.
Review Sent Forms - A copy of the form is saved in the patient's correspondence history: Use the Emailed Forms tab of the patient's correspondence history to review the appointment cards and payment receipts that were sent using the Edge Form Email feature, instead of being printed. (See "Appointment Card / Payment Receipt Email Editor" for details about enabling this feature.)

