Set Up Custom Points List
Use the
How to Get Here
![]() Open Custom Points Editor - Home ribbon bar > Tools section > Editors > Patient Rewards > Custom Point List. (You can also use the Search field to look for the editor you want to work with.)
Open Custom Points Editor - Home ribbon bar > Tools section > Editors > Patient Rewards > Custom Point List. (You can also use the Search field to look for the editor you want to work with.)

Choose Your Settings
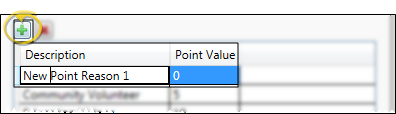
![]() Create a New Custom Points Item - Click
Create a New Custom Points Item - Click  Add. Then enter a description of the action that earns the reward, and the default number of points associated with that action. The descriptions you enter here are the descriptions that will appear in the Manage Patient Points window; both you and the patient will be able to see these messages. (See "Manage Patient Reward Points" for details.)
Edit Custom Points Item - Select an existing Custom Points item column, and change the description and default point value as needed.
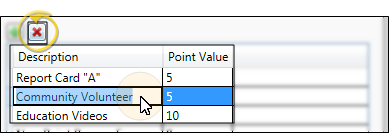
![]() Delete Custom Points Item - Select the item to work with, and click
Delete Custom Points Item - Select the item to work with, and click  Delete. This removes the action from your Custom Point List, but does not remove it from any patient records that have already received the points.
![]() Save Changes - Click
Save Changes - Click  Save in your Quick Access toolbar or File ribbon bar (or press Ctrl+S on your keyboard) to save any changes you have made.

More Information
Award Custom Points to Individual Patients - You manually award points from this table with the Patient Points tab of the Manage Patient Points option. Although the default point value appears when you select the action to award, you can enter a different point value for the patient as needed. See "Manage Patient Reward Points" for details.
Award Custom Points to Subgroups - Use the Assign Points to Subgroup feature to add custom reward points to groups of patient records. See "Award Reward Points to a Subgroup of Patients" for details.
![]()
www.ortho2.com │ 1107 Buckeye Ave. │ Ames, IA 50010 │ 800.346.4504 │ Contact Us
Chat with Software Support │ Chat with Network Engineering │ Chat with New Customer Care
Remote Support │ Email Support │ Online Help Ver. 11/11/2019


