HTML Editing Tools
You can edit the text of your HTML-based mail merge documents, and use merge tools to help personalize the documents even further. When you save the document and exit the editor you return to the
HTML Document Tools![]() - These tools are for working with HTML-based documents. Tools for working with word processing mail merge documents are different. See "Mail Merge Tools" for details.
- These tools are for working with HTML-based documents. Tools for working with word processing mail merge documents are different. See "Mail Merge Tools" for details.
![]() Open the Mail Merge Documents Editor
Open the Mail Merge Documents Editor
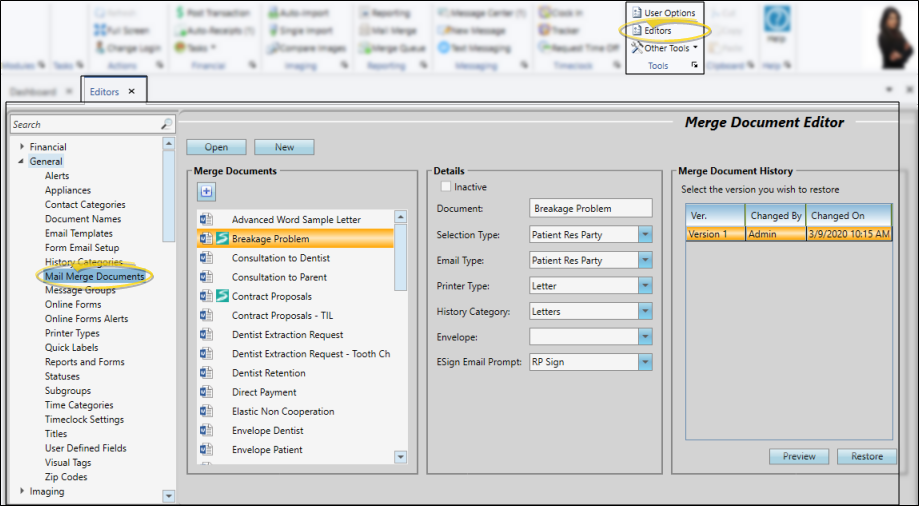
Select Editors from the Tools section of the Home ribbon bar. Then, from the General section, open the Mail Merge Documents editor. (You can also use the Search field to look for the editor you want to work with.)
![]() Create or Edit an HTML Document
Create or Edit an HTML Document
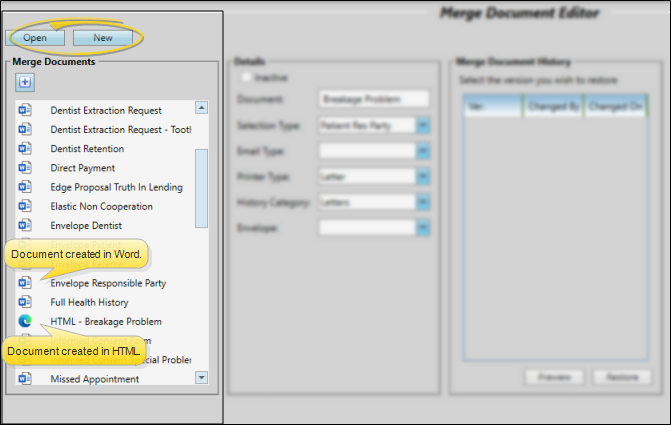
The Merge Documents section of the window shows the names of your existing merge documents alphabetically. You can toggle the  Show/Hide Inactive icon at the top of the window to include / hide inactive documents. The icon beside the name indicates whether it was created with
  Microsoft Word or the
  HTML editor. An
  Edge Signature icon appears beside documents that include Edge Signature variables.
You can choose an existing HTML document and click Open, or click New to create a new document with HTML.
Use the tabs at the bottom of the window to select your editing / viewing mode. Most people will use only the Design and Preview modes.
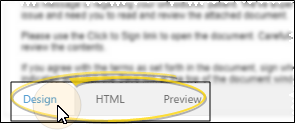
Design![]() - Use this tab to edit and format text, insert images and hyperlinks, and use other design tools.
- Use this tab to edit and format text, insert images and hyperlinks, and use other design tools.
HTML![]() - Do not use this tab unless you are extremely comfortable with editing HTML code. Even small errors could prevent your newsletter from functioning correctly.
- Do not use this tab unless you are extremely comfortable with editing HTML code. Even small errors could prevent your newsletter from functioning correctly.
Preview![]() - Click the Preview tab at the bottom of with window to see what your document will look like. You cannot use any editing tools while in this mode.
- Click the Preview tab at the bottom of with window to see what your document will look like. You cannot use any editing tools while in this mode.
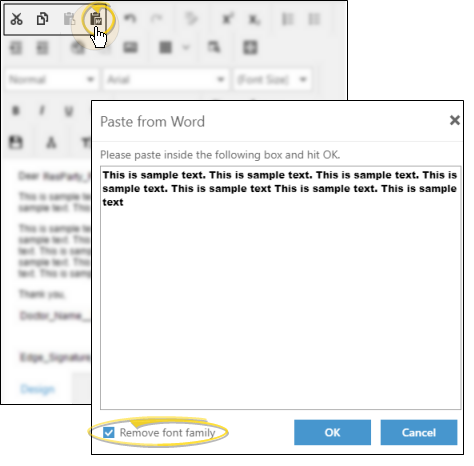
You can type your text, or use the icons on the toolbar, or use standard word processing shortcuts (i.e. Ctrl+C to copy and Ctrl+V to paste) to cut, copy, and paste text, including its properties, into your document. Alternately, you can use the  Paste from Word icon to remove the text font before pasting.
Merge Fields Copy as Text![]() - If you copy from existing word processing mail merge documents, merge tools, such as variables, will be copied into your HTML editor window as regular text, and not as merge fields.
- If you copy from existing word processing mail merge documents, merge tools, such as variables, will be copied into your HTML editor window as regular text, and not as merge fields.
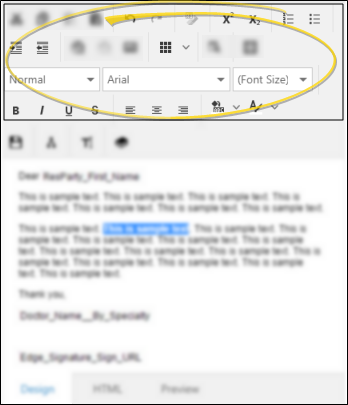
Use the icons at the top of the window to change the text properties and formatting, such as adding bold, italics, font, size, color, superscript, subscript, bullets, numbering, and tables just like a word processor. You can hover over an icon in the HTML editing window to see what each icon is used for.
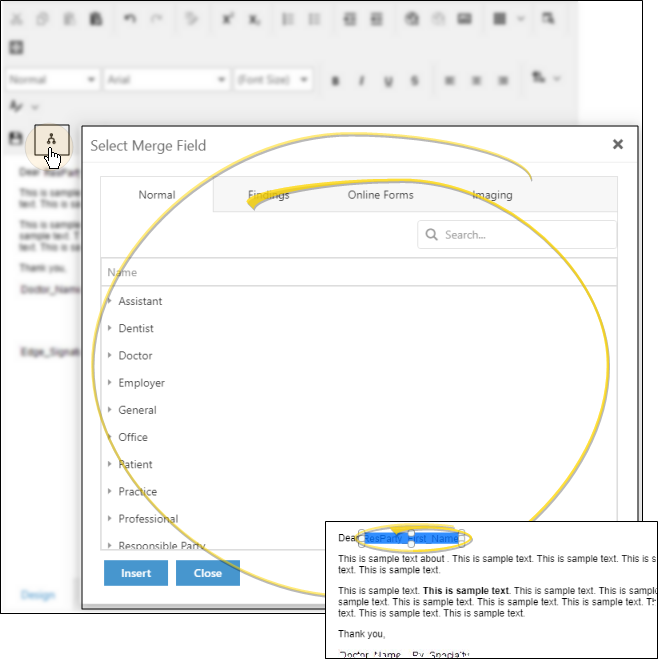
Place your cursor where you want to add a mail merge variable, then click the  Insert Merge Fields icon from the toolbar and select the variable. Click Insert to add the variable to your document, and click Close to exit the merge field window. The variable will appear as an object in your document. You can drag, cut, copy and paste the object wherever needed. But, DO NOT EDIT the object or the variable will not work as intended. See "Mail Merge Variables" for details.
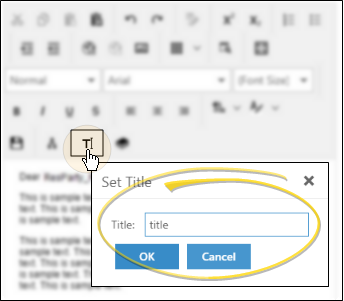
Use the  Title icon from the toolbar to change the document title. When you generate this document as an email, the title will be the email subject. If you do not add or edit a title, the document name will be the email subject.
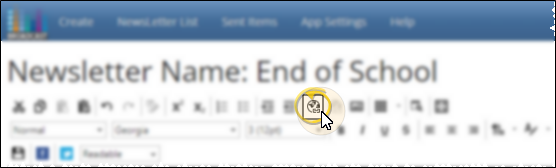
You can include hyperlinks in your documents that open a website, such as your practice home page or a relevant YouTube video, or to open a new email message. You might use the email link, for example, to encourage readers to contact you. To open the hyperlink window, select the text to use as the hyperlink hotspot, or position your cursor where you want the link to appear, then click the  Hyperlink icon from the toolbar (or press Ctrl+K on your keyboard)
Enable the URL option, then enter the details. Be sure the website address for the link includes "http://" or "https://"
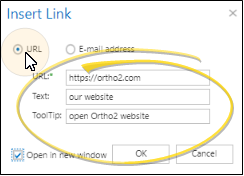
URL![]() - Enter the web address where you want to send readers when they click on the link, including the leading "http://" or "https://".
- Enter the web address where you want to send readers when they click on the link, including the leading "http://" or "https://".
Text![]() - This hotspot text defaults to the text you selected to be the hyperlink hotspot. If you change the text, the original text you selected will change as well.
- This hotspot text defaults to the text you selected to be the hyperlink hotspot. If you change the text, the original text you selected will change as well.
ToolTip![]() - This is what pops up on the screen when a reader hovers over the hotspot without clicking it.
- This is what pops up on the screen when a reader hovers over the hotspot without clicking it.
Open in New Window![]() - Enable this option to open the website in a new browser window when the reader clicks the hotspot. Otherwise, clicking the link will close your document and open the linked website in the same window.
- Enable this option to open the website in a new browser window when the reader clicks the hotspot. Otherwise, clicking the link will close your document and open the linked website in the same window.
Enable the Email Address option, then enter the email details.
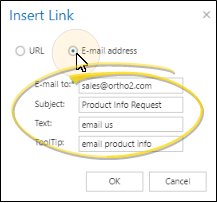
Email To![]() - Enter the email address to whom you want to send a message when readers click on the link. Readers will be able to see this address in the email message.
- Enter the email address to whom you want to send a message when readers click on the link. Readers will be able to see this address in the email message.
Subject![]() - Enter the default subject for the email message. Readers can change the subject if they wish before sending the message.
- Enter the default subject for the email message. Readers can change the subject if they wish before sending the message.
Text![]() - This hotspot text defaults to the text you selected to be the hyperlink hotspot. If you change the text, the original text you selected will change as well.
- This hotspot text defaults to the text you selected to be the hyperlink hotspot. If you change the text, the original text you selected will change as well.
ToolTip![]() - This is what pops up on the screen when a reader hovers over the hotspot without clicking it.
- This is what pops up on the screen when a reader hovers over the hotspot without clicking it.
Remove a Hyperlink![]() - You can use the
- You can use the  Unlink icon in the toolbar (or press Ctrl+Shift+K) to remove a link without removing the link text.
Position your cursor where you want to insert an image, then click the  Image icon from the toolbar (Or press Ctrl+G on your keyboard.) Or, double-click or right-click an existing image or placeholder to open the image editor. The image will be inserted at your cursor location, but you can drag it anywhere within the document.
From Your Computer![]() – Select this tab, then browse to the image file on your computer. Or, drag an image from your computer onto the Insert Image window. Once you use the image in a newsletter, it will be copied to the Image Gallery for future use.
– Select this tab, then browse to the image file on your computer. Or, drag an image from your computer onto the Insert Image window. Once you use the image in a newsletter, it will be copied to the Image Gallery for future use.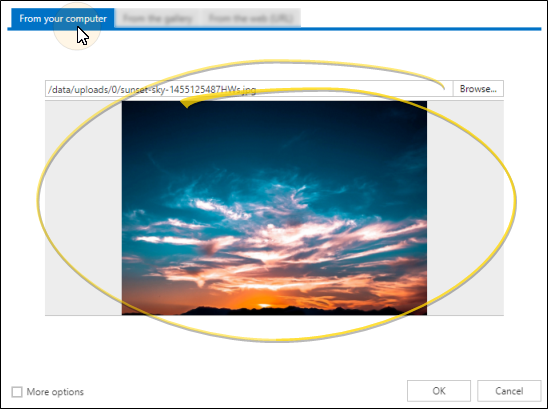
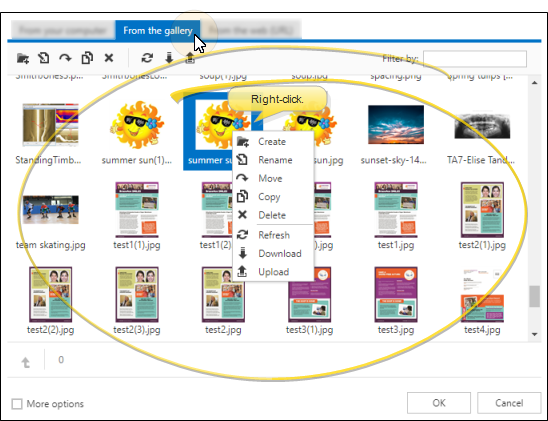
From the Gallery![]() – Select this tab, then click to choose the image you want to use. Any image you have already used is stored in the gallery (with the exception of URL images that are inserted with the Save File to Server option disabled). To manage the images in the gallery, you can use the toolbar at the top of the window, or right-click an image to create folders within the gallery, and rename, move, copy, delete, and download the images. You can also upload images to the gallery that you have not yet used, so that they are easily accessed later.
– Select this tab, then click to choose the image you want to use. Any image you have already used is stored in the gallery (with the exception of URL images that are inserted with the Save File to Server option disabled). To manage the images in the gallery, you can use the toolbar at the top of the window, or right-click an image to create folders within the gallery, and rename, move, copy, delete, and download the images. You can also upload images to the gallery that you have not yet used, so that they are easily accessed later.
From the Web (URL)![]() – To use an image from the Internet, right-click the image on the web page and select Copy Link Address. Then, select this tab, and paste the copied URL into the space provided. To save the image in the gallery for future use, enable the Save File to Server option.
– To use an image from the Internet, right-click the image on the web page and select Copy Link Address. Then, select this tab, and paste the copied URL into the space provided. To save the image in the gallery for future use, enable the Save File to Server option.

Copyright Notice - It is your responsibility to secure authorization for any copyrighted material you use in your publications.
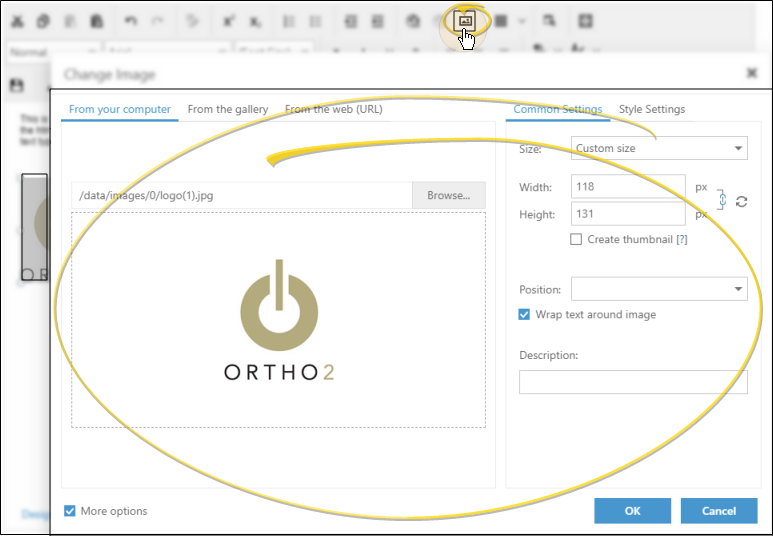
Enable the More Options checkbox at the bottom of the window, then use the Common Settings tab to set the size, text features, and description.
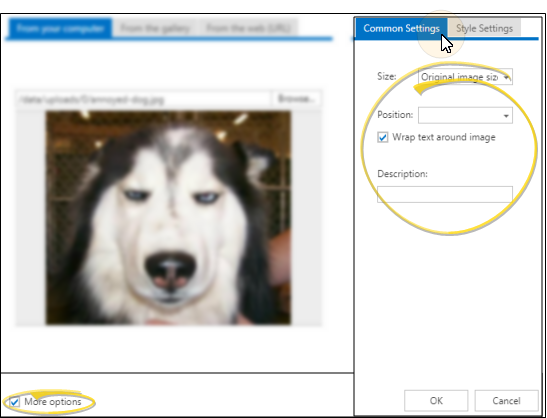
Size![]() - Select to use the image in its original size, or select Custom Size to change the image width and height. If you want to change the width and height proportionally, be sure the aspect ratio tool is enabled (locked). To change the width and height independently of each other, disable (unlock) the aspect ratio tool. You can click
- Select to use the image in its original size, or select Custom Size to change the image width and height. If you want to change the width and height proportionally, be sure the aspect ratio tool is enabled (locked). To change the width and height independently of each other, disable (unlock) the aspect ratio tool. You can click ![]() Refresh to revert the image to its original size. In addition, you can enable the Create Thumbnail option and enter a file name to create a copy of the original image with the new dimensions (which is most often smaller than the original image size).
Refresh to revert the image to its original size. In addition, you can enable the Create Thumbnail option and enter a file name to create a copy of the original image with the new dimensions (which is most often smaller than the original image size).
Position / Wrap Text![]() - Choose to position the image at the left or right edge of the column, or centered within the column. Enable the Wrap Text option to surround the image with text where possible; disable the option to display text above and below the image, but not around it. To change the location of the image, simply click and drag it within the newsletter template.
- Choose to position the image at the left or right edge of the column, or centered within the column. Enable the Wrap Text option to surround the image with text where possible; disable the option to display text above and below the image, but not around it. To change the location of the image, simply click and drag it within the newsletter template.
Description![]() - Enter a brief description of this image. If the image does not appear in the newsletter email, this description will appear instead.
- Enter a brief description of this image. If the image does not appear in the newsletter email, this description will appear instead.
Enable the More Options checkbox at the bottom of the window, then use the Style Settings tab to set the margins, border, and image style.
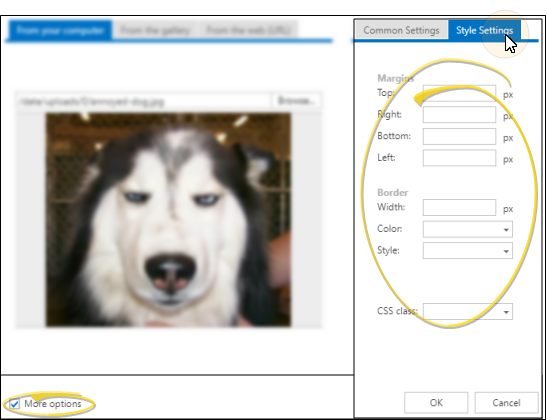
Margins![]() - Use these fields to adjust the amount of space around each edge of the image.
- Use these fields to adjust the amount of space around each edge of the image.
Border Width![]() - Use this field to define the thickness of the border around all edges of the image.
- Use this field to define the thickness of the border around all edges of the image.
Border Color![]() - Select the color for the image border.
- Select the color for the image border.
Border Style![]() - Choose from among several styles, such as "dotted", "solid", or "ridge" to further define what the image border looks like. We suggest you select one border style and use it for all of the images in the document.
- Choose from among several styles, such as "dotted", "solid", or "ridge" to further define what the image border looks like. We suggest you select one border style and use it for all of the images in the document.
CSS Class![]() - If you have a cascading style sheet associated with your document, you can use this field to select the style to apply to the image.
- If you have a cascading style sheet associated with your document, you can use this field to select the style to apply to the image.
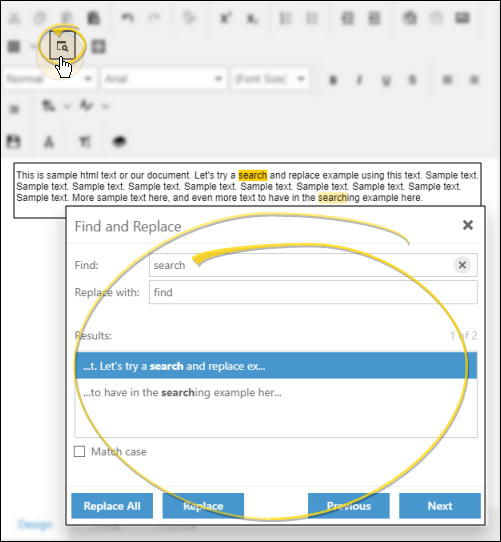
Use the  Search icon to search for text anywhere in the current HTML editor window. You can optionally require exact case matching, and choose to replace one or more or more instances of your search results.
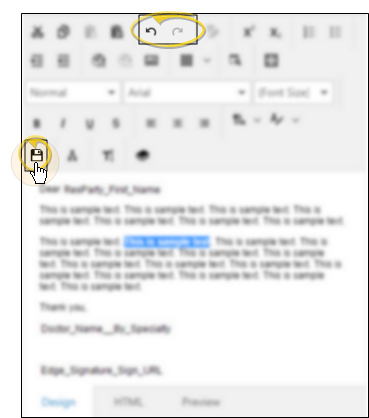
Use the  Save icon (or press Ctrl+S on your keyboard) to save the changes you have made to your document, while leaving the HTML Editor window open. You can continue to use the Undo and Redo icons (or press Ctrl+Z or Ctrl+Y), even after saving, until you exit the editor. When finished, click the X in the upper right corner of the window.