Search Options
Use the Search tab of your User Options window to select the data fields and patient statuses to use when Fast Find searches for patient folders and other records. You can also use the Search options to choose how to display the resulting records list. You may change the settings at any time without affecting any other user. Your security rights must include full access to the User Options Editor setting in the Practice Administration security group for this feature to work for you.
Assign Settings Tool - These settings are specific to you, and will follow you on whatever computer you log into: Other operators may have different settings. If another operator has the settings you want to use, that operator can use the Assign Options tool to copy those settings to you, or vice-versa.
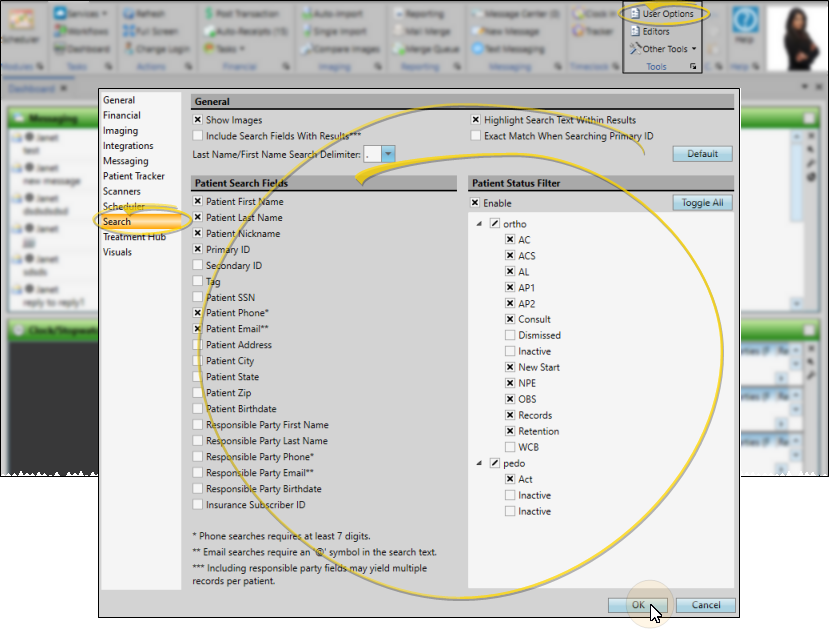
Open the User Options window from the File, Home, Patient, or Scheduler ribbon bar. Then choose the Search tab.
Or, open Search options from the Fast Find window.
General Settings
Use the General section of the window to choose how Fast Find behaves when you are searching for records.
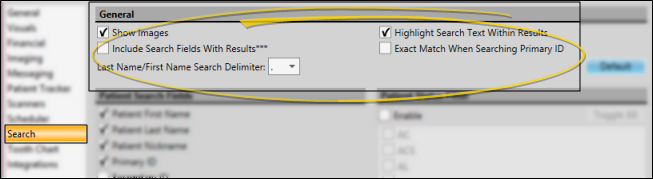
Show Images
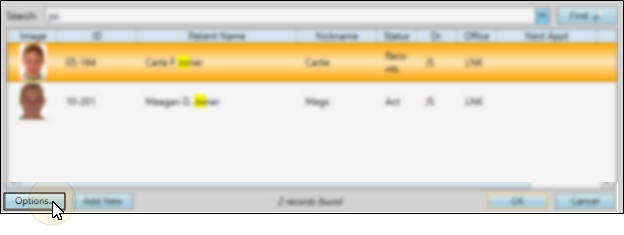
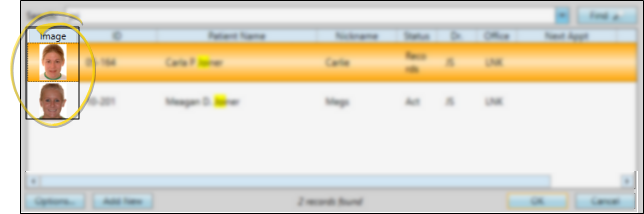
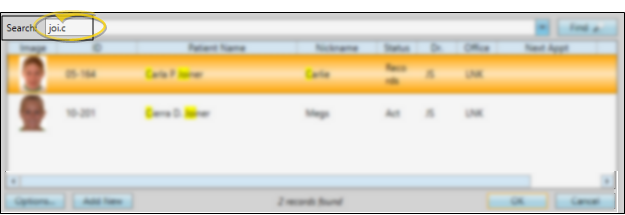
Enable this option to include a photo of the patient in the list of matching patient records. You may want to disable the option to speed up the search, unless it helps you correctly identify certain patients.
Include Search Fields With Results
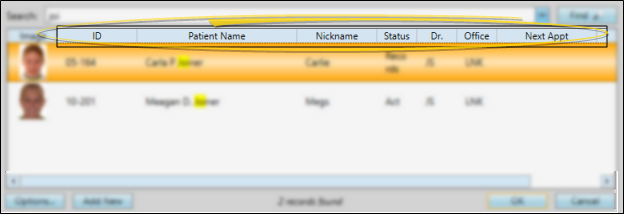
Enable this option to include the data from each search field you have enabled in the patient results window. If you include responsible party search fields, the patient may be listed multiple times in the results window. If this field is disabled, the results window will include basic patient information, such as the patient ID, patient name, nickname, status, assigned orthodontist and office.
Last Name / First Name Delimiter
Choose whether to use a period or a comma between names when you are searching for a patient with all or a portion of the last name / first name. Most offices leave this setting as a period (" . ").
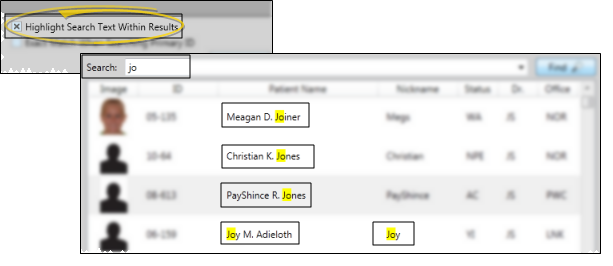
Highlight Search Text Within Results
Enable this option to highlight the text you searched in the results window.
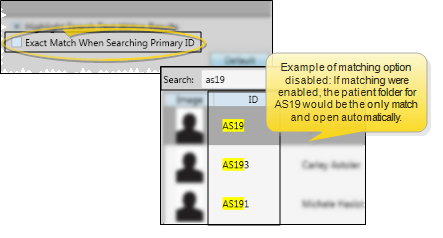
Exact Match When Searching Primary ID
Enable this option to require your search text to exactly match the entire ID when you are searching for a patient by the primary identification code. If you often search by primary id code, this option can help you identify the patient and open the appropriate patient folder more quickly.
Reset Default Settings
Click Default to reset BOTH your General option settings AND your Patient Search fields to the default Edge Cloud settings. Your Patient Status Filter settings are not affected by the Default button.
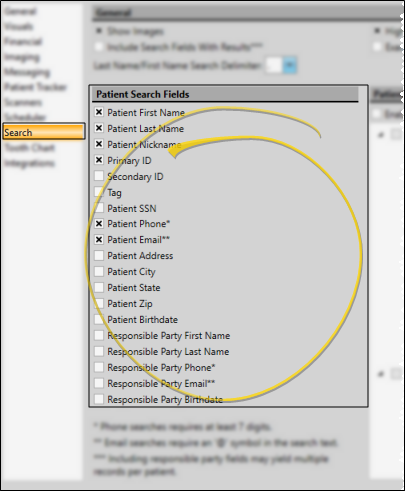
Patient Search Fields
Use the Patient Search Fields section of the Search User Options window to select which patient folder and responsible party fields to use as search criteria: Any other data is ignored. The more search fields you enable, the slower the search can become. If you are having difficulty locating a patient, you can enable additional search fields as needed.
Reset Default Settings
Click Default to reset BOTH your General option settings AND your Patient Search fields to the default Edge Cloud settings. Your Patient Status Filter settings are not affected by the Default button.
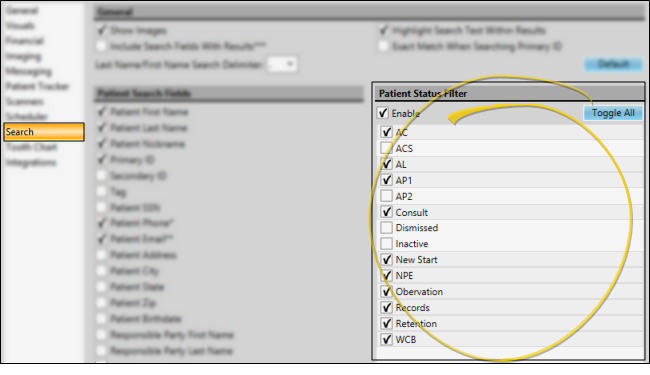
Patient Status Filter
Enable the Status Filter option, then select the patient statuses to include in your searches. You can use the Toggle All button to select / deselect all status descriptions, or select statuses individually. Patients in any other status will be ignored. This feature is particularly useful for speeding up the search process when
you have a large database of patients with a status such as Dismissed.
You can click another User Options tab at the left to work with other Edge Cloud settings, or click Ok to immediately save any changes, and exit the window.