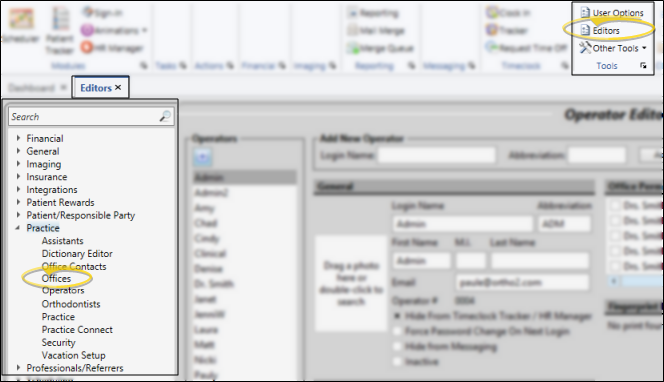
 Editors > Practice > Offices. (You can also search for the editor you want to work with.)
You maintain the list of office locations in your practice in your Office
Home ribbon bar - Editors > Practice > Offices. (You can also search for the editor you want to work with.)
Click Editors from the Tools section of the Home ribbon bar.

Select Practice in the list at the left and choose the Offices option.
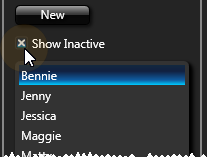
Choose Record to Work With - Your list of existing records appears at the left. Click the record to work with. The details for that record appear at the right.
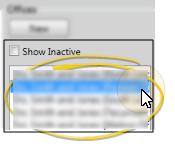
Display active / inactive records - You can choose whether to include inactive records in your list by enabling / disabling the Show Inactive option at the top of the list.
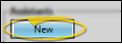
Create new office - Click New. Then enter the office's details, described below.
Edit office details - Select a record to work with. If you just created a new office, that record is selected automatically.
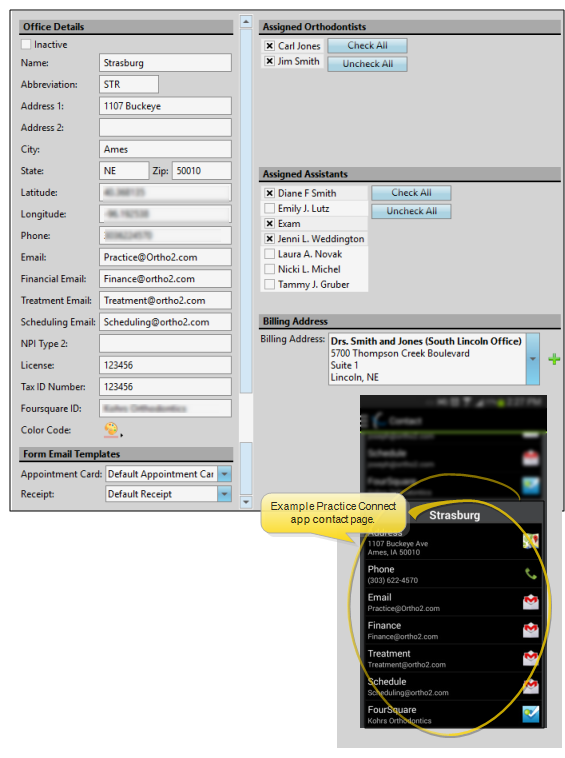
Name - Enter the name of this office. If you have multiple offices, be sure the name is different enough so it is easy to select the correct location for your patient folders. The name also appears as a heading on the Contact page of your Practice Connect app.
Abbreviation - Enter an abbreviation for this office. Again, make sure the abbreviation is easy to distinguish from other office abbreviations. This information is not linked to your Practice Connect app.
Address, city, state, zip, phone - Enter the local street address and phone number for this location. This data appears under the heading for this office on the Contact page of your Practice Connect app.
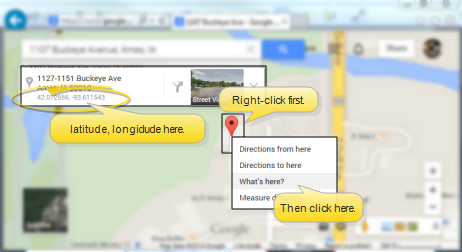
Latitude / Longitude - Enter the latitude and longitude of this office to allow patients to sign in for their appointment once they come within a certain distance of your office. To find the coordinates, go to www.maps.google.com and enter your street address. Right click the location on the map and select What’s Here? Under the search box, an information card with the coordinates will appear. Latitude is listed first, then longitude.
Email addresses - You can enter several email addresses specific to this office to facilitate routing messages to the correct staff member. Each email address will appear under the heading for this office on the Contact page of your Practice Connect app.
NPI Type 2 - The NPI (National Provider Identifier) field complies with the Health Insurance Portability and Accountability Act (HIPAA), allowing a 10 digit number. You may be required by law to have this number appear on paper and/or electronic insurance claims. This information is not shared with your Practice Connect app.
License & Tax ID numbers - Record the appropriate tax and license identification numbers for this location. This information is not shared with your Practice Connect app.
Foursquare id - Enter the foursquare id for this location. This information appears under the heading for this office on the Contact page of your Practice Connect app.
Assigned orthodontists - Select the orthodontists that practice at this office. Note that if an operator does not have rights to access this office's data, that operator will not be able to access the assigned orthodontist's data, including patient, appointment, and financial information. (See "Set Up Operator Accounts" for details about assigning offices to operator accounts.)
Assigned assistants - Select the assistants that work at this office. Note that if an operator does not have rights to access this office's data, that operator will not be able to access the assigned assistant's data, such as patient appointment information. (See "Set Up Operator Accounts" for details about assigning offices to operator accounts.)
Save Changes![]() Click
Click  Save in your Quick Access toolbar or File ribbon bar (or press Ctrl+S on your keyboard) to save any changes you have made.
Print an office list - You may want to print this list as a report for reference. See "Office List" for details.
 │
│
Ortho2.com │1107 Buckeye Avenue │ Ames, Iowa 50010 │ Sales: (800) 678-4644 │ Support: (800) 346-4504 │ Contact Us
Remote Support │Email Support │New Customer Care │ Online Help Ver. 8/3/2015


