 Editors > Practice > Practice Connect. (You can also search for the editor you want to work with.)
Use the Practice Connect editor to create and manage the content to show in your Practice Connect app.
Home Ribbon Bar - Editors > Practice > Practice Connect. (You can also search for the editor you want to work with.)
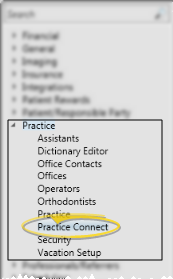
Click Editors from the Tools section of the Home ribbon bar.

Select Practice in the list at the left and choose the Practice Connect option.
Initial Setup Note - The information you provide via the Practice Connect customization form that you submit online (described in Get Started, above), as well as the information you provide via the Practice Connect editor (described below) work together to create the content that your patients and parents see when they download and use your app. Both the customization form and editor must be completed before Ortho2 can build and submit your app to the app marketplaces. Note that it can take several weeks for your app to initially publish in both the Apple and Android marketplaces. Your customized app will work with Android devices version 4.0 and greater, and Apple devices version 7.0 and greater.
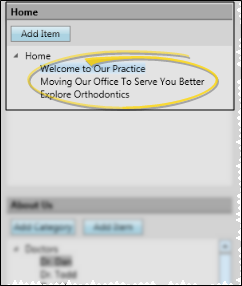
"Home" Section Category - The Home section of the Practice Connect editor is like the Home page of your Practice Connect app: The items listed underneath the Home category heading are the sections of text and images that will appear on the app's home page. Note that the category name, Home, must remain static for your Practice Connect app to function correctly. You can, however, add and remove graphics from the Home category, as described below.
Add Home Page Graphics - Click the Home category name, then click Add and navigate to the image you want to include on the page. You can add one or multiple images: If you choose to have multiple images, the images will scroll through the app header while on the Home page. For best results, use images with the same aspect ratio. If you do not include a graphic in an item page (described below), your Home page graphic(s) will appear instead.

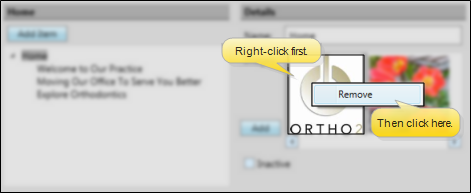
Delete Home Page Graphics - To remove a graphic, you can either click the graphic and press the Delete key on your keyboard, or right-click the graphic and select Remove.
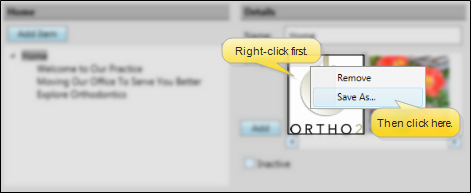
Save Graphic - To save a graphic to another location on your computer, right-click the graphic and select Save As. Then navigate to the location where you would like to store the picture, and enter the complete filename (i.e. OurLogo.png).
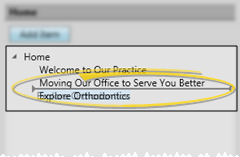
"Home" Section Items - The items listed under the Home category of your Practice Connect editor are the sections of information and images that will appear on your app's Home page.
Select an Item to Work With - Click an item listed under the Home category to select it. The details for that item appear at the right of the window, as described below.
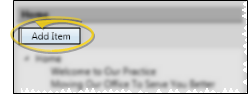
Add a New Item - Click Add Item, then complete the details for the new item, described below.
Item Details - The item details are the contents of your Practice Connect app that are available from the home page.
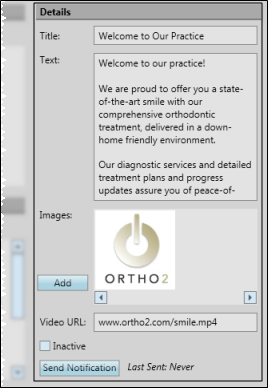
Title - The title will appear as the header for this section of your app.
Text - Enter all the text you want to include on the page. The first portion of the text, along with the image, will appear on the Home page of your Practice Connect app. You can click on the text or the image to open the entire page in the app.
Images - Use the Add button, and navigate to the graphic you want to include on the page. If you choose multiple images, they will scroll through the app header while on that particular page. For best results, use images with the same aspect ratio. Note that if you do not have an image associated with an item, the Home category images will be used instead. To remove a graphic, you can either click the graphic and press the Delete key on your keyboard, or right-click the graphic and select Remove. To save a graphic to another location on your computer, right-click the graphic and select Save As. Then navigate to the location where you would like to store the picture, and enter the complete filename (i.e. OurLogo.png).
Video URL - If you wish to include a video, provide the URL where it can be found. Note that YouTube URLs will not work with Practice Connect. It is recommended you put your desired video on your website and use the URL from that. Contact your website designer on how to obtain the video URL.
Inactivate an Item - You cannot delete an item once it has been saved. Instead, you can flag it as Inactive. Inactive items do not appear in your Practice Connect app. Remember also that you can always change details and images, and re-order items whenever you wish, creating what looks like new pages out of old items.
Send Notification - Click Send Notification to generate a notification message about this item for everyone who has the app downloaded. You generally do this to introduce a new item you just added. After you send a notification, a Last Sent timestamp appears to let you know when the notification was sent. Note that you must save your item before you can send the notification.
Re-Order Items - You can drag and drop the items underneath the category heading to re-order the way they will appear in your Practice Connect app.
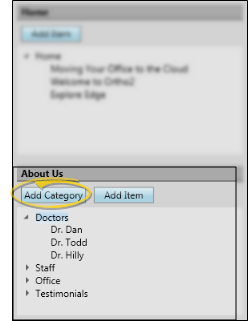
"About Us" Section Categories - The categories in the About Us section of your Practice Connect editor are the sections listed on the About Us page of your Practice Connect app. The default categories are: Doctors, Staff, Office, and Testimonials.
Select a Category to Work With - Click a category heading to select it. The details for that category appear at the right of the window, as described below.
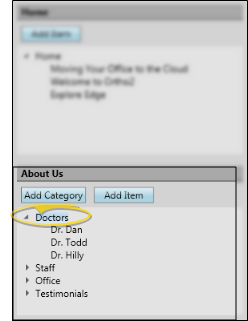
Add a New Category - Click Add Category to create a new category, or app page. The details for that category appear at the right of the window, as described below.
Category Details - The category details appear as click-able sections of your Practice Connect app About Us page.
Practice Connect editor About Us category details:
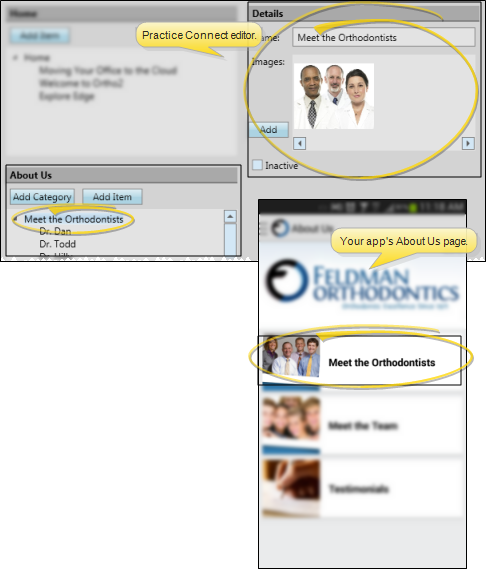
Practice Connect app About Us page:
Name - Enter a name for the category.
Images - Use the Add button, and navigate to the graphic you want to include on the page. If you choose multiple images, they will scroll through the app header while on that particular page. For best results, use images with the same aspect ratio. Note that if you do not have an image associated with an item, the Home category images will be used instead. To remove a graphic, you can either click the graphic and press the Delete key on your keyboard, or right-click the graphic and select Remove. To save a graphic to another location on your computer, right-click the graphic and select Save As. Then navigate to the location where you would like to store the picture, and enter the complete filename (i.e. OurLogo.png).
Inactivate a Category - You cannot delete a category once it has been saved. Instead, you can flag is as Inactive. Inactive categories do not appear in your Practice Connect app.
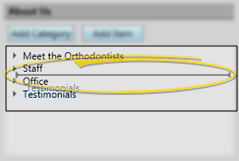
Re-Order Categories - You can drag and drop the category headings in the About Us section to re-order the way they will appear in your Practice Connect app.
"About Us" Section Items - The items listed underneath each category heading in the About Us section of your Practice Connect editor become pages of information available in your Practice Connect app.
Select an Item to Work With - Click an item listed under a category heading to select it. The details for that item appear at the right of the window, as described below.
Add a New Item - Click Add Item, then complete the details for the new item, described below.
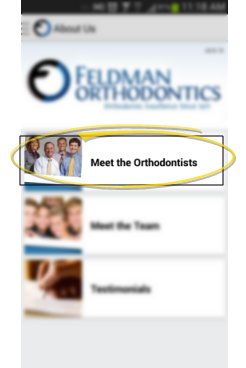
Item Details - The item details become the contents of a Practice Connect app page.
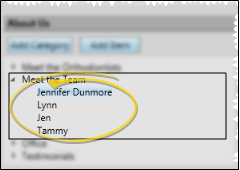
Example Practice Connect editor About Us item details:

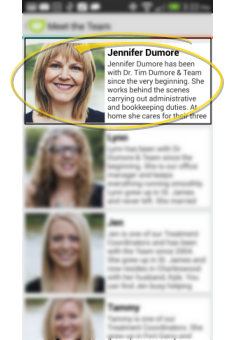
Example Practice Connect app > About Us > Meet the Team page. Click the link to open the app page with all the item details included.
Title - The title will appear as the header for this section of the app.
Text - Enter all the text you want to include on the page. The first portion of the text, along with the image, will appear on the associated About Us page of your Practice Connect app. You can click on the text or the image to open the entire page in the app.
Images - Use the Add button, and navigate to the graphic you want to include on the page. If you choose multiple images, they will scroll through the app header while on that particular page. For best results, use images with the same aspect ratio. Note that if you do not have an image associated with an item, the Home category images will be used instead. To remove a graphic, you can either click the graphic and press the Delete key on your keyboard, or right-click the graphic and select Remove. To save a graphic to another location on your computer, right-click the graphic and select Save As. Then navigate to the location where you would like to store the picture, and enter the complete filename (i.e. OurLogo.png).
Video URL - If you wish to include a video, provide the URL where it can be found. Note that YouTube URLs will not work with Practice Connect. It is recommended you put your desired video on your website and use the URL from that. Contact your website designer on how to obtain the video URL.
Inactivate an Item - You cannot delete an item once it has been saved. Instead, you can flag it as Inactive. Inactive items do not appear in your Practice Connect app. Remember also that you can always change details and images, and re-order items whenever you wish, creating what looks like new pages out of old items.
Send Notification - Click Send Notification to generate a notification message about this item for everyone who has the app downloaded. You generally do this to introduce a new item you just added. After you send a notification, a Last Sent timestamp appears to let you know when the notification was sent. Note that you must save your item before you can send the notification.
Re-Order Items - You can drag and drop the items underneath the category heading to re-order the way they will appear in your Practice Connect app.
Save Changes![]() Click
Click  Save in your Quick Access toolbar or File ribbon bar (or press Ctrl+S on your keyboard) to save any changes you have made.
 │
│
Ortho2.com │1107 Buckeye Avenue │ Ames, Iowa 50010 │ Sales: (800) 678-4644 │ Support: (800) 346-4504 │ Contact Us
Remote Support │Email Support │New Customer Care │ Online Help Ver. 8/3/2015


