Tooth Chart Options
Use your Tooth Chart user options to choose your primary tooth numbering method, and determine how your tooth chart is displayed in patient folders. Your security rights must include full access to the User Options Editor setting in the Practice Administration security group for this feature to work for you.
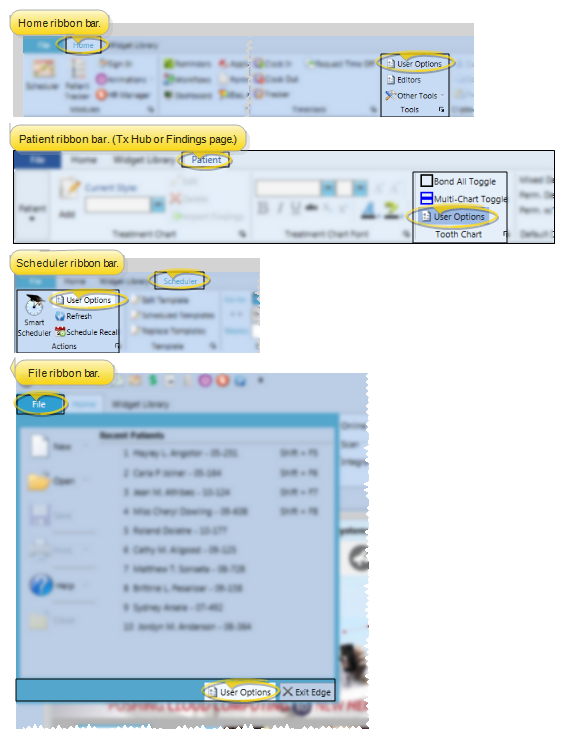
Open the User Options window from the File, Home, Patient, or Scheduler ribbon bar. (If the icon does not appear on the ribbon bar, click the corner drop down icon (  ) to view all tools available in that section of the ribbon bar. See "Customize Edge Cloud Ribbon Bars" for details.) Then choose the Tooth Chart tab.
These settings are specific to you: Other operators that log into Edge Cloud with a different username and password may have different settings. (If another Edge Cloud user has the settings you want to use, that user can use the Assign Options tool to copy those settings to you, or vice-versa.)
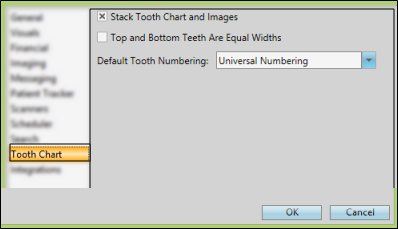
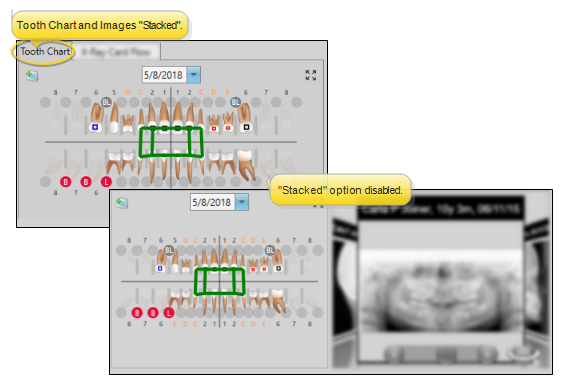
Stack Tooth Chart and Images - Use your Tooth Chart user options to choose whether to stack the patient's tooth chart and images, or show them side-by-side.
Default Tooth Numbering - Select your preferred tooth numbering method. Although this setting will be your default, you can always change the numbering method while viewing the tooth chart.
Orthodontics: Tooth Chart Dental Procedure Mode - If you enable the Tooth Chart Dental Procedure Mode option in your Tooth Chart user options, you can select the mode you want to apply to procedures as you enter them into the tooth chart: Red = planned; green = existing; blue= completed. If the procedure mode option is disabled, procedures will be entered as "planned".
Save Your Changes - Click Ok to save any changes to your user options and exit the window. If another Edge Cloud user has the settings you want to use, that user can use the Assign Options tool to copy those settings to you, or vice-versa.