Subgroup Widget
Use the Subgroup widget to keep a specific list of patients easily available to you. You can customize the fields to display in the widget, group and aggregate the data for any displayed column, and add a link that will open the selected patient folder to a specific page.
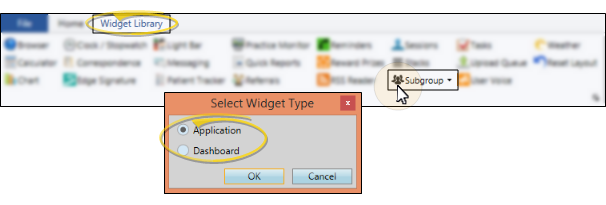
 Open Last-Selected Subgroup - Widget Library ribbon bar >
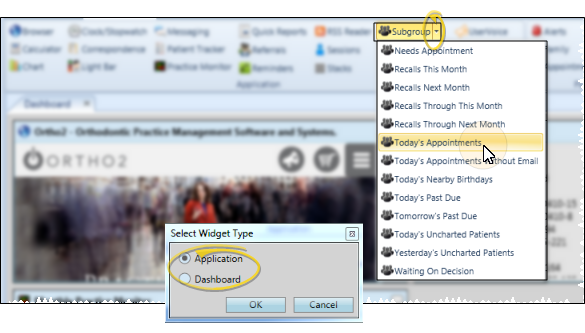
  Subgroup Icon > Dashboard or Application widget. (Be sure you click the icon, and not the drop down button to open the most recently viewed subgroup.)
Open Commonly-Used Subgroup - Widget Library ribbon bar > Subgroup drop down > Choose a subgroup > Dashboard or Application widget.
After the widget is open, you can change the selected subgroup whenever you wish.
Choose Your Settings - Click the  Settings icon on the Subgroup widget tool panel to select your widget settings, including the subgroup data to view, grouping options, and patient folder link.
Choose Subgroup - Use the list of subgroups on the left side of the settings window to choose the subgroup you want to view in the widget. See "Subgroup Editor" for detailsabout creating subgroups.

Identify Result Type - Use this field to choose how you would like to recognize each instance of the subgroup criteria. Generally, the subgroup widget selects the appropriate result type for you automatically.

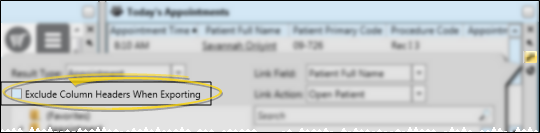
Exclude Column Headers When Exporting - Enable this option to include just the list of data when you export the widget results to a file, described below. If this option is disabled, the exported output will include the column headers as well as the data.
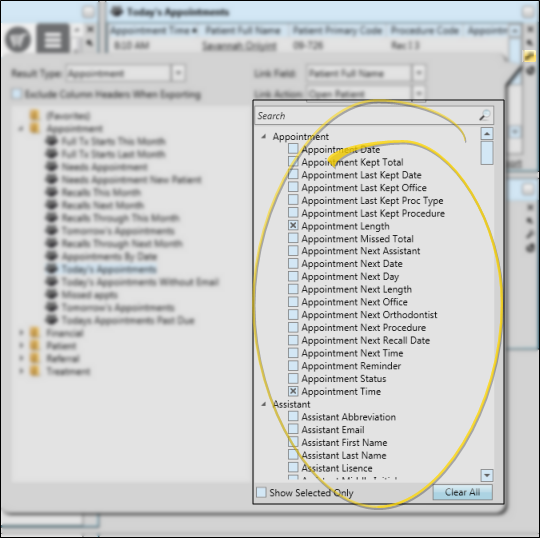
Choose Fields to Display - Enable each field on the right side of the settings window to select the information you want to display in your widget. Keep in mind that the more fields you include, the more scrolling you will have to do so see all the information.
You can use the Search bar to look for the fields you want to include. You can also enable the Show Selected Only option at the bottom of the window to include only fields you have already chosen in the list, and click the Clear All button to disable all fields and start again.
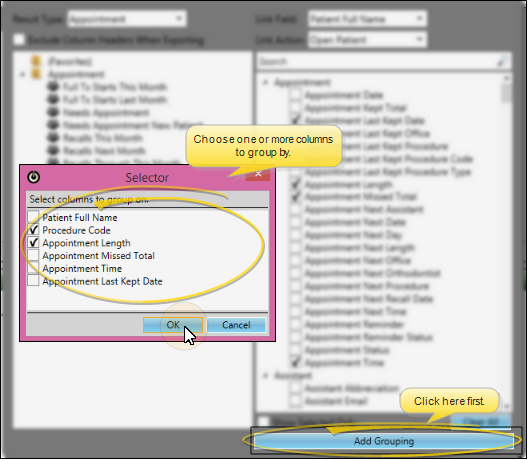
Add / Remove Grouping - You can optionally group the data by any field you have selected to display, resulting in the widget showing you only the grouped columns and total number for each grouping.
Apply Grouping - Click Add Grouping at the bottom of the window, then select one or more columns to group the data by. Only columns you have chosen to display in the widget are available to you.
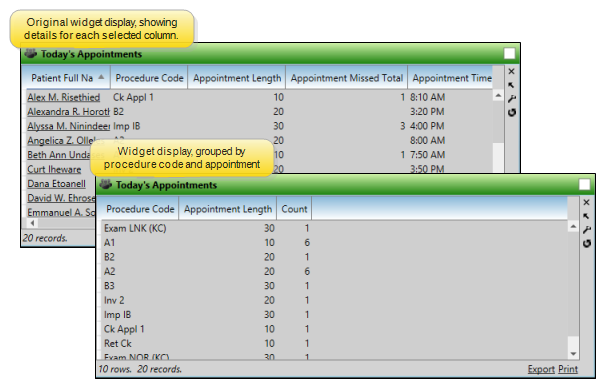
View Results - The widget is updated to show you the results of your grouping choices.
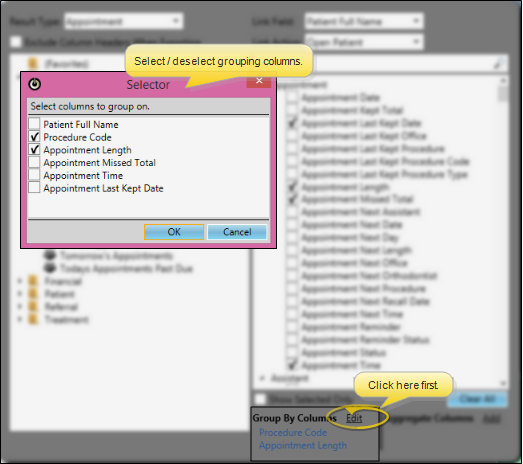
Remove Grouping - Return to the Settings window, and click Edit beside the Group Columns section of the window to either select different columns, or to remove grouping from the widget.
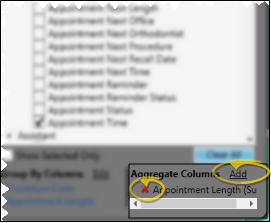
Add / Remove Aggregate Options - If you have chosen to group by at least one column, and your widget display includes at least one column of numerical data, you can use the Aggregate Columns tool to further analyze the data.
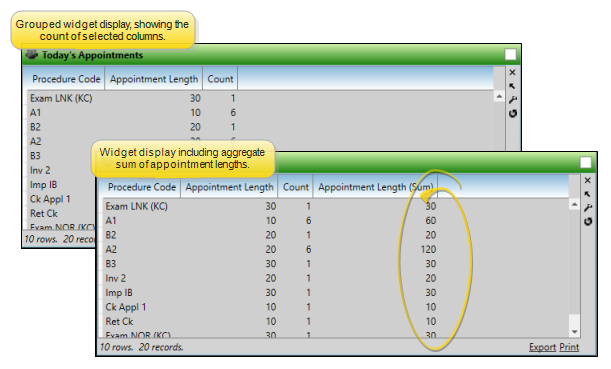
Apply Aggregate - Click Add beside the Aggregate Columns section of the window. Then, select the column you want to work with, and the type of function to apply to that column: Choose Maximum , Median, Minimum, or Sum. Only columns you have chosen to include in the widget display, and that contain numerical data, are available to you.
View Results - The widget is updated to show you the results of your aggregate choices.
Edit / Remove Aggregate Option - Return to the Settings window, and click Add beside the Aggregate Columns section of the window to select different columns to analyze. Or, click the red X beside an existing aggregate option to remove it from the widget.
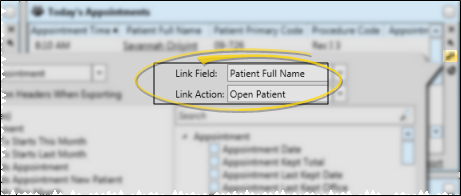
Link Field / Link Action - Choose a field to be the link, and choose which page of the patient folder to open when you click the link. You can make any field you have chosen to display in your widget to be the link.
Save & Exit - When you are happy with your widget settings, click anywhere on your screen, or press Enter on your keyboard to exit the window.
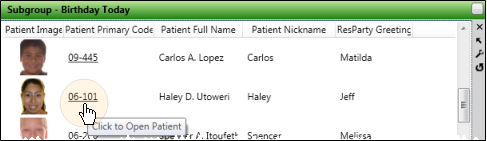
Open a Patient Folder Page - If your widget is set up to do so, you can click a link in the widget to open a specific page of the patient folder. (See the Link field & action setting instructions, above, for details.)
Adjust Columns - You can adjust both the width and location of the columns in the window. Unlike other widgets, the columns of your Subgroup widget retain your settings even after you refresh your Edge Cloud system.
Adjust Column Width - Click the bar between two columns to reallocate the column space. Be aware that it is possible to adjust a column to be so narrow that you no longer see it.
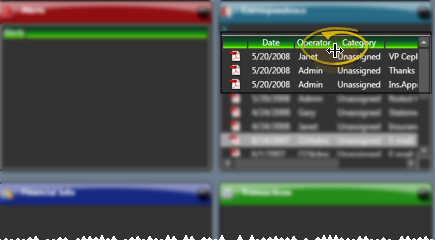
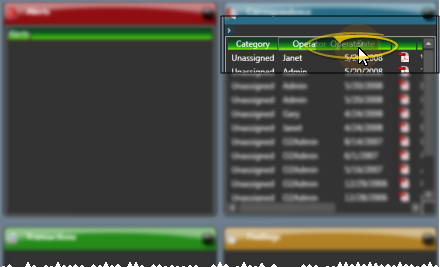
Change Column Order - Click a column heading and drag it to a new location within the window. Other columns adjust accordingly.
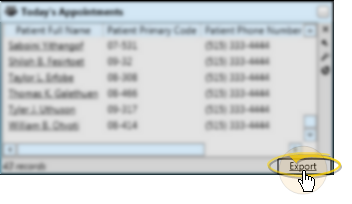
Export Results - Click the Export link at the bottom of the widget to save the data in .csv format. Use the widget settings, described above, to choose whether to include / exclude the column headers in the exported results.
Print Subgroup Results - Open Subgroups as a Dashboard widget, and expand the panel, if needed. Click  Print from your File ribbon bar or Quick Access toolbar (or press Ctrl+P on your keyboard) to print a copy of the current screen contents. (See "Printing from Edge Cloud" for details.)
Widget Panel Options - Depending on your device and panel format, you can expand and minimize widget panels, move the widget location on your screen, float them in their own windows, refresh and print data, and close the widget when you no longer need it. See Application widgets or Your Dashboard for details about using these features.