Set Up Edge Animations
Use the Edge Animations settings to fine-tune your video presentation options.
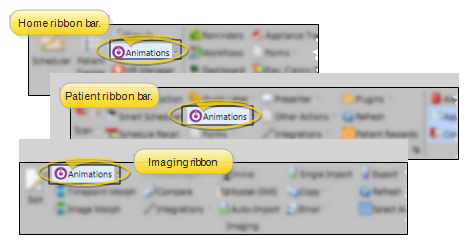
Select the  Animations icon from the Home, Patient, or Imaging ribbon bar. (You can also open this feature from the Quick Access toolbar at the top of your Edge Cloud system window.) When it is running, the Animations icon appears in your computer's notification area.
Opening Edge Animations for a Specific Patient - If you plan to work on or present filmstrips or videos that contain images or treatment information about a specific patient, it is best to open the patient folder first, then launch Edge Animations. This way, you can integrate the patient’s images into your filmstrip and customize them with your patient findings.
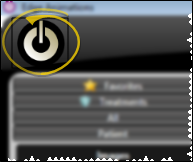
Patient Compliance Vs. Edge Animations - When you click the Edge Animations icon, your comprehensive Edge Animations module opens; You can optionally click the arrow beside the icon, then select to open either about-edge-animations.htm or the standard Compliance Animations video list.
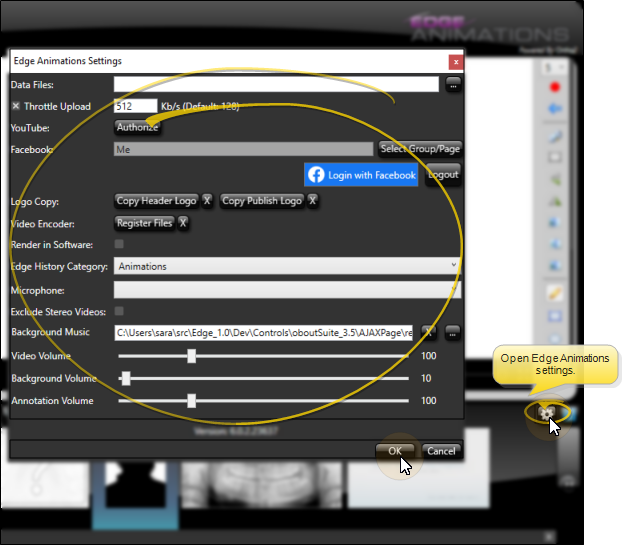
Click the  Settings button at the lower-right corner of your Edge Animations window.
Use this window to set up your Edge Animations data file location, publishing credentials, and default volume settings.
Set this field to a shared location where all of your videos are loaded and shared / accessed by all of the computers in your office. If left blank, files will be saved to your default Edge Animations file location.
Use this field to optimize your bandwidth load. Most often, we suggest you enable this option, and set the field to 128 Kb/s to minimize the use of bandwidth while uploading your videos.
Click Authorize beside the YouTube field, then sign into the You Tube account you want to use for publishing videos. You will also need to use the Copy Publish Logo option in your Edge Animations settings window before you can publish a video.
If you plan to publish videos directly to a Facebook page, log into Facebook from the Edge Animations settings window, then select the page name yo want to publish to. Due to potential security issues, you must post to your professional practice Facebook page: Facebook will not allow outside applications to post to personal Facebook pages. You will also need to use the Copy Publish Logo option in your Edge Animations settings window before you can publish a video.
To select or change the logo you want to use as the header of your Edge Animations main screen, click Copy Header Logo, then navigate to the location of your office's logo graphic (or any graphic you want to use), in .PNG format. The graphic file you select will be copied to the Assets folder in your Data Files location, with the filename logo-header.png. Any previous header logo file will be overwritten. You can also click the X beside the Copy Header Logo button to remove the graphic file from your Assets folder, and remove the header from your Edge Animations window. You must exit and re-enter Edge Animations to see the results of any changes you make.
Required Setting - This is required for publishing videos you create with Edge Animations.
To select or change the logo you want to publish along with your videos, click Copy Publish Logo, then navigate to the location of your office's official logo graphic, in .PNG format. The graphic file you select will be copied to the Assets folder in your Data Files location, with the filename logo-publish.png. Any previous publish logo file will be overwritten. You can also click the X beside the Copy Publish Logo button to remove the graphic file from your Assets folder. However, a logo-publish.png file is required for copyright purposes if you plan to publish videos you create with Edge Animations. Your publish logo will appear in the lower-right corner of your published videos.
Click Register Files to register all files that are required for playing encrypted videos. You can also click the X beside the Register Files button to remove the registrations.
If your Compliance Animations and Edge Animations videos have a strange look to them, such as garbled artifacts showing on an image, enable the Render in Software option in the settings window. This will render your videos directly in the software, rather than on your monitor's video card, and produce a cleaner-looking result. However, when this option is enabled, you may have a choppier video presentation.
Edge Cloud Only - Applies only if you use the Edge Cloud practice management system.
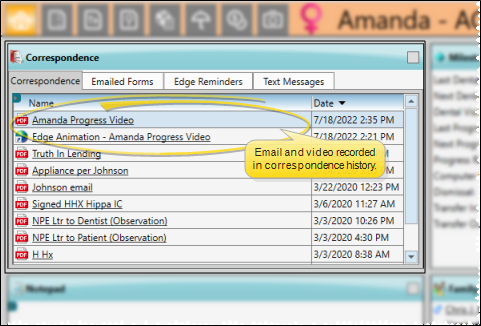
Select the Correspondence History category to use for Edge Animations videos that you email to a patient.
Select the microphone to use for recording voice annotations with your Edge Animations videos.
Enable this option to exclude 3D stereoscopic videos from your filmstrip list. You can still download 3D videos from the Asset Manager, but you must then disable this option to select them in Edge Animations. In the Edge Animations library, these videos include the label "3D" at the end of the description.
Select a soundtrack to play along with your animation. The track will play only after the video is published. You may use any .mp3 or .wav audio file available to your computer. You set up the default audio file in your general Edge Animations settings, but you can choose a different audio file for individual videos with the filmstrip Properties settings. If you have additional audio in the animation, such as recorded annotations or voice-overs, be sure to set the background volume fairly low.
Overwrite Warning - Background music is set up in two places. There is a background music field in Edge Animations settings, and one in the Filmstrip Properties. Adding music in the Filmstrip Properties panel will allow the music to play behind the filmstrip when exported. You can set a different track for each filmstrip, and when you save the filmstrip to Favorites, the background music track will be stored in the saved file. Adding a background audio track in Settings will result in that track being added to every video you export. The track added in Settings overwrites a track that was added in the Filmstrip Properties.
Copyright Notice - It is your responsibility to secure authorization for any copyrighted material you use in your publications.
The Video Volume setting controls a voice-over track; the Background Volume setting controls the background music track; the Annotation Volume setting controls any voice recordings you have made for filmstrip images. You set up the default volume levels in your general Edge Animations settings, but you can choose different volume levels for individual videos with the filmstrip Properties settings.
Click Ok to save the changes you have made and close the editing window. Some of your changes may require you to exit and reopen the application to take effect.