General Imaging Editor
Use the Image General editor to set up your imaging display preferences and label preferences, and to specify certain imaging format and size options.
System-Wide Settings - All of the settings in this editor are system-wide: When you change a setting, it changes for all Edge Cloud users and computers in your system.
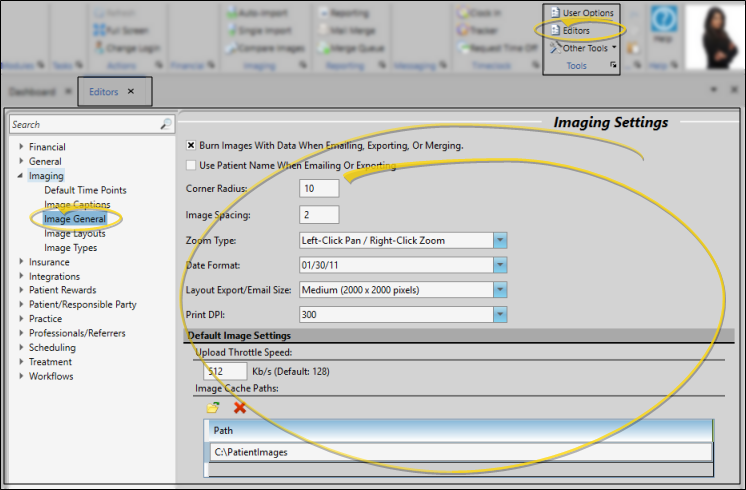
Select Editors from the Tools section of the Home ribbon bar. Then, from the Imaging section, open the Image General editor. (You can also use the Search field to look for the editor you want to work with.)
 Burn Images with Data
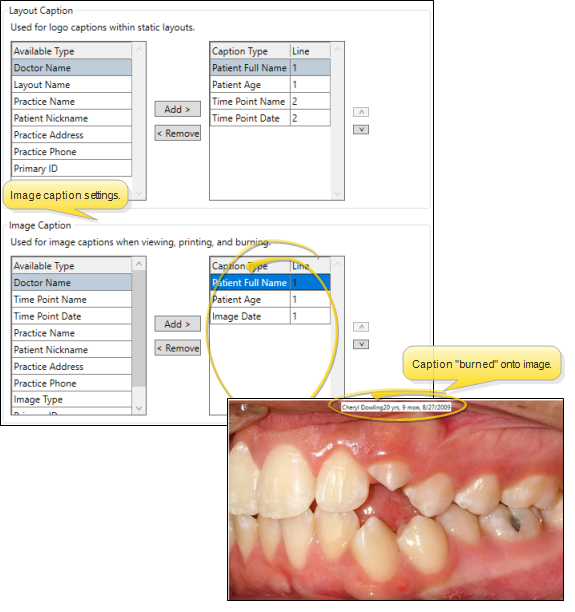
Enable this option to include the information you have selected for your Image Caption (as set up in the Image Caption editor) on patient images that you email, export, and print in mail merge documents.
Use Patient Name When Emailing And Exporting
Enable this option to include the patient's name and the image description in the file name when you email and export images. Otherwise, the file name includes the patient id number, timepoint description, and image type number.
Corner Radius
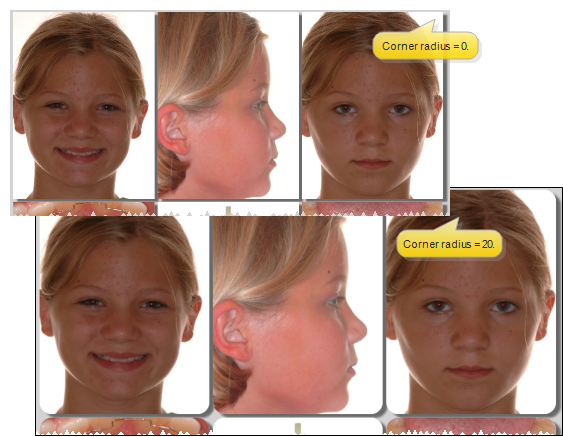
Enter the degree of curve to use at the edges of your images. The larger the number, the more pronounced the curve. To display image edges as square, enter the value "0" (zero). Note that this option does not apply to card flow layouts.
Image Spacing
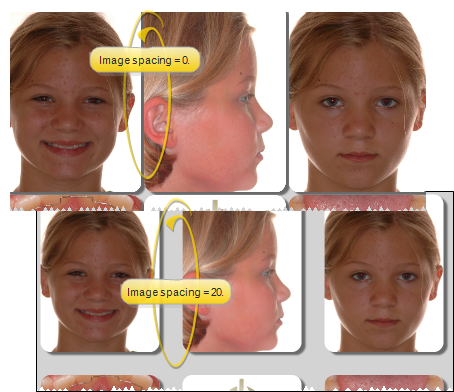
Enter the distance to use between images. The larger the number, the farther apart the images will display. To display images as close together as possible, enter the value "0" (zero). Note that this option does not apply to card flow layouts.
Zoom Type
Select how you want to control image panning and zooming with your mouse buttons.
Date Format
Choose the format you want dates to appear in your image layouts, and on identification labels you burn onto images.
Layout Export / Email Size
Choose the image size to use when you export or email a layout. The bigger the size, the better quality image you get, but also a bigger file.
Print DPI
Choose the print quality to use when sending images to a printer.
Upload Throttle Speed
You can set up a default throttle speed for uploading patient images to the server, for the purpose of minimizing the bandwidth used for those uploads and enhancing the overall speed of your system. You can choose to use the default for all workstations, or set individual throttle upload speeds as needed in your General User Options.
Default Image Cache Paths
Designate one or more locations that can be used for new and changed images waiting to be uploaded to your server, and for archived images to remain linked to your patient folders. Then, if your workstation does not have a local image cache location set up in your Imaging User Options, or if the location is not available when you log onto your system, Edge Cloud,will auto-fill the local image cache field with the first Image Cache Path that is available to the workstation at that time. See "Imaging User Options" for details about setting up the local image cache path.)
Click  Save in your Quick Access toolbar or File ribbon bar (or press Ctrl+S on your keyboard) to save any changes you have made.