Compare Images
You can view multiple images side-by-side in a single window for comparison purposes. The images may be of the same patient, or different patients.
Comparison Layout Type vs. Compare Images Feature - Use the Comparison layout type to view specific image types from multiple time points for an individual patient in a set format. You might use this layout, for example, to showcase "before" and "after" images during patient progress evaluations. Use the Compare Images feature to select up to 5 image types and / or time points to view side-by-side. These images can from an individual patient or from multiple patients. You might use this feature to evaluate individual progress, or compare and contrast the outcomes of similar cases. This article describes the Compare Images feature: See "Image Layouts Editor" for details about the Comparison layout type.
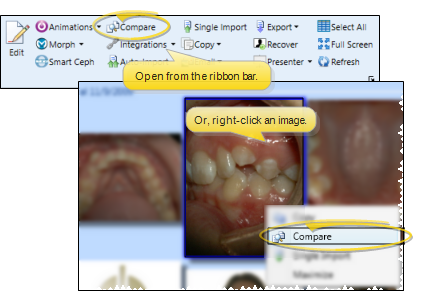
From the Imaging section of the Home or Imaging ribbon bar, select  Compare. Or, simply right-click an image and select Compare.
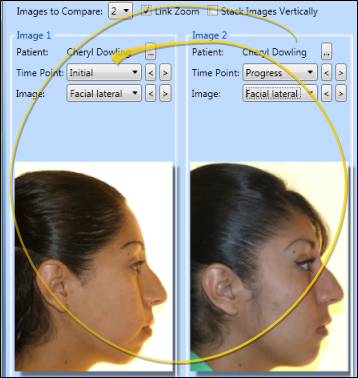
When you initiate the compare feature while viewing a patient's images, the current image is presented on the left side of the screen. In addition, the next timepoint of the same image type (if available) is automatically presented on the right. You can choose to compare other patients, timepoints, and image types as well.
 Choose a Patient
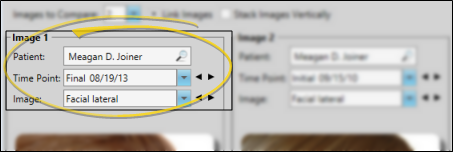
To change the patient to work with, click in the Patient field to open Fast Find and search for a different patient. This provides an efficient way to work with multiple patients in one session.
Timepoint
Choose the timepoint to work with. You can use the arrows beside this field to progress through all available timepoints. The date appears along with the timepoint description to help identify the timepoint you want.
Image Type
Choose the image type to view. You can use the arrows beside this field to progress through all available image types.
Initially Edge Imaging presents 2 images for comparison. You can, however, compare up to 5 images simultaneously. You can also link, or synchronize, image display movements, and choose to view the comparison vertically or horizontally on your screen.
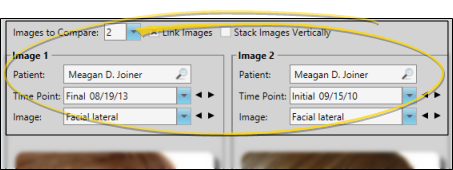
Number of Images
Choose to view up to 5 images simultaneously.
Link Zoom
Enable this option if you want all images to zoom / pan in tandem. Disable this option to magnify only the image you have selected to work with.
Stack Images Vertically
Enable this option to display the images vertically: Disable the option to display the images horizontally in the window.
Enable this tool, then click and drag to move the image within its window. Or, right-click and drag to increase / decrease the image size (or, use the tracking wheel on your pointing device). When you use this tool while viewing an image or image comparison, your changes are ignored when you exit the screen. However, when you use this tool while in editing mode, you can choose to save the changes. In addition, you can choose to swap the left-click / right-click actions in your Image General editor so that the panning (moving) and zooming (resizing) tools use the opposite click type. Enable the Link option, described above, to move all images in tandem when you pan or zoom any image in the Compare window, or disable the option to pan / zoom only the selected image.
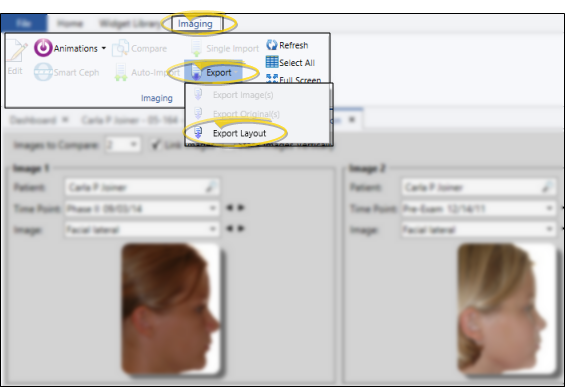
Choose Export, then select Export Layout from the Imaging section of the ribbon bar to save the comparison as a graphical file that you can then save, print, email, or use in another application.
When you initiate the  Print function while comparing images, all images will appear on one page, similar to printing an image layout.