Online Forms Editor
Use the Online Forms editor to select a style for your online forms, categorize form questions, assign Patient Reward points for completing a form, and link mail merge documents to processed forms. You can also create office and doctor specific links for your forms from this editor. These links can contain ad hoc metadata to help you track and filter your forms.
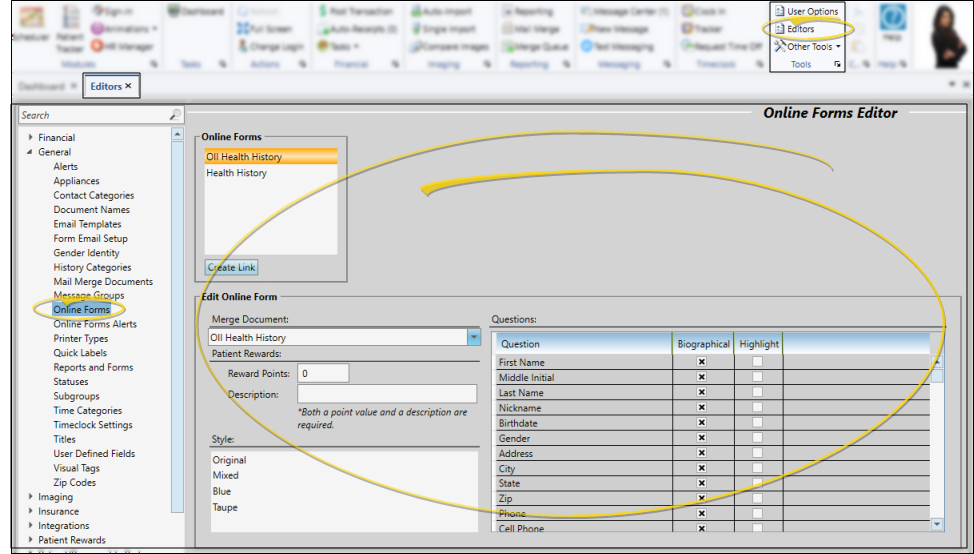
Select Editors from the Tools section of the Home ribbon bar. Then, from the General section, open the Online Forms editor. (You can also use the Search field to look for the editor you want to work with.)
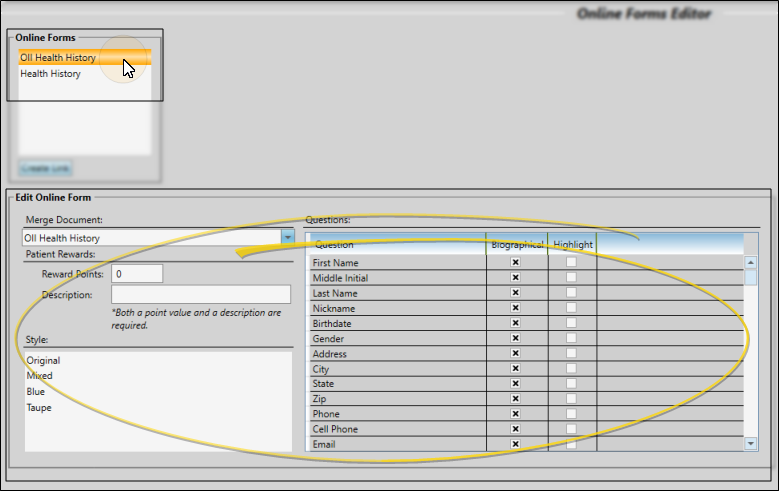
If you have more than one online form, first select the form you want to work with at the top of the window. Then review and edit the settings at the bottom of the screen.
 Merge Document
Use the Merge Document section of the Online Forms editor to select the letter or document you want to assign to each of your online forms. Whenever a patient folder is linked to a completed online form, the linked mail merge document will be placed in your Online Forms Letter Queue, waiting to be merged. See "Online Form Letter Queue" for details.
Ready-To-Use Merge Document - The OII Health History letter, supplied with your system, creates a standard health history form and merges it with the patient's responses. Contact Ortho2 if this letter is not available in your list of mail merge documents.
Online Forms Variables - You can include online forms variables in mail merge document to automatically include those details in the letter.
Patient Rewards
You can award your patients points for completing online forms the first time, and for each time they update a form. The points are awarded when the form is downloaded and linked to the patient folder.
You can also enter a reward description that both you and the patient can see from the Manage Patient Points window. (See "Patient Reward Management" for details.)
Select Form Style
Choose a color scheme from the list of available styles.
Questions
Use the Questions section of the window to differentiate which questions duplicate data in your Edge Cloud patient folders, and which are specific to your online form. Enable the Biographical option for each question that can be found elsewhere in your database, such as the patient name and phone number. Otherwise, the question is considered to be specific to the online form. You can also enable the Highlight option for questions that are especially important. The results of these questions will be given special visual attention in the patient folder.
You can use your Online Forms editor to create data-specific links that you can add to your website and send in patient emails. The links can be specific to an individual doctor, office, and/or ad-hoc metadata that you can use to track and filter the forms however you wish.
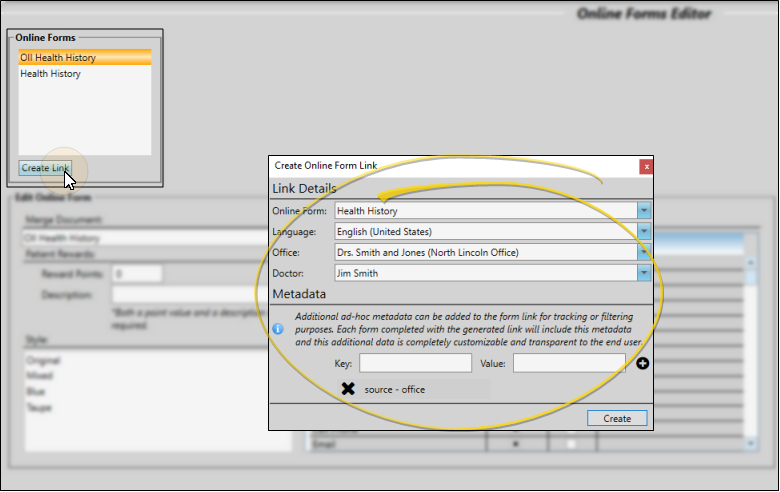
To create this type of link, open the Online Forms editor and click Create Link from under your list of online forms to open the Create Link window.
From the Create Link window, choose the online form, doctor, and office you want to work with. You can optionally create your own metadata key (i.e. "source") and value (i.e, "office") that you can use the track and filter submitted online forms. After entering a description in the Key and Value fields, click the "+" icon to add the metadata to the link. You can repeat the process to add as many metadata filters as you wish to the link. To remove metadata from the link, click the "X" beside the data to delete.
When finished. click Create Link.
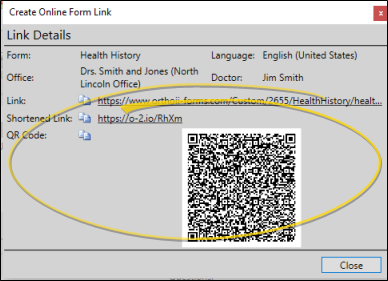
You can then click the icon beside the Link, Shortened Link, or QR code to copy that type of link to your clipboard. The copied link can then be sent to a patient via email, or added to your website. When the patient clicks the link and submits the form, their information will be associated with the doctor / office and metadata included in the link details. So, if you use filters when you work with your online forms, you will see only those associated with the doctors, offices, and other data that you choose.
Click  Save in your Quick Access toolbar or File ribbon bar (or press Ctrl+S on your keyboard) to save any changes you have made.