Set Up Default Scheduling Templates
Use the Scheduled Templates feature to set up the default scheduling template to use for each day of the week. You can use the same defaults over and over, or create multiple weekly sets of defaults to provide for rotating and changing scheduling needs.
Replace Templates vs Default Template Schedule - Use the Replace Template feature to swap one scheduling template for another.You can choose to swap the template for the currently displayed date, or swap all future occurrences of a template with another template. If scheduled appointments do not fit into the new template, they will be moved to your Scheduler Bar automatically. See "Replace a Scheduling Template" for details.
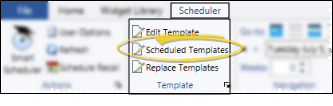
Click Scheduled Templates from the Template section of the Scheduler ribbon bar. (Get help opening your Scheduler.)
You can open this feature in multiple ways: Use the method that's most convenient for you.
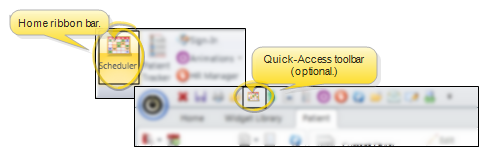
 Home ribbon bar or Quick Access toolbar
Clicking the  Scheduler icon from either the Home ribbon bar or your Quick Access toolbar while a Scheduler session is already active can either bring the open Scheduler tab to the front of your Edge Cloud window, or open another Scheduler tab. See "Scheduler User Options" for details about setting up this option.
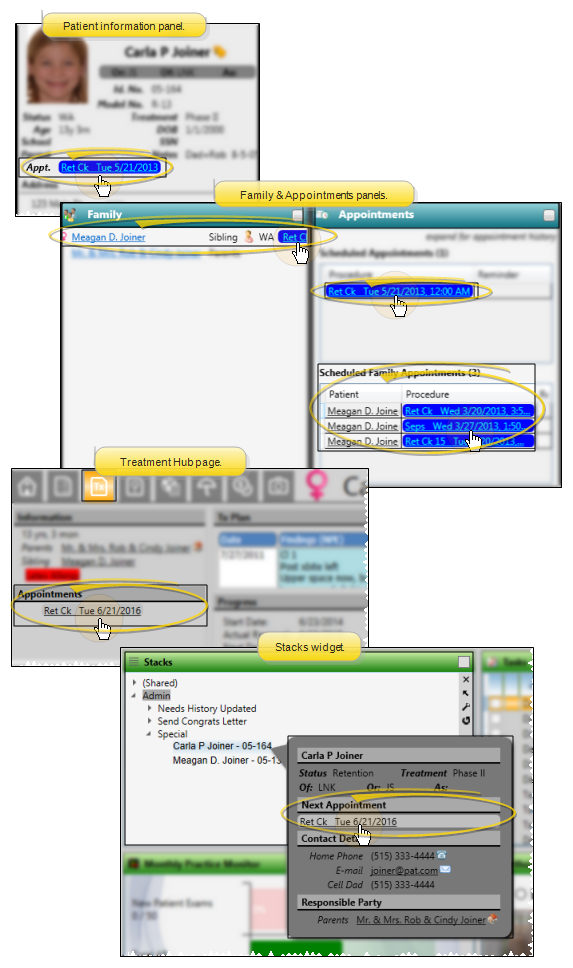
Patient Folder
You can open your Scheduler to a specific appointment by clicking the appointment link wherever it appears in the patient folder, such as on the Patient Information Panel, the Family panel, or the Appointments panel of the patient folder Home page, on the Treatment Hub page, or by hovering over the patient name in your Stacks widget.
Arranging Multiple Scheduler Tabs - If you have multiple Scheduler tabs open, clicking a patient appointment link will bring the left-most tab to the front of your Edge Cloud window. Note that before you click the link, you can reorder your tabs by simply dragging them into place, thus selecting which Scheduler tab you want to work with. See "Scheduler User Options" for details about enabling/disabling the multiple Scheduler option.
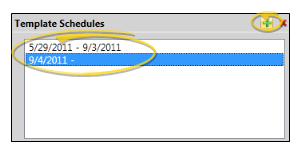
If you have set up schedules for multiple date ranges, choose the schedule you want to work with. Or, click  Add New Schedule to start a new schedule.
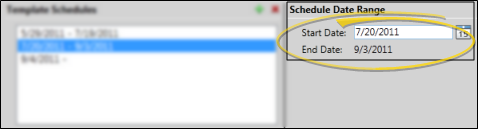
When you create a new schedule, the default starting date is "today", and the day before the starting date becomes the ending date of the previous schedule. If needed, you can change the starting dates of your schedules, and Edge Cloud will adjust the corresponding ending date appropriately.
You cannot add an ending date to the final schedule, and you cannot have any missing dates. In addition, schedules with ending dates in the past are removed automatically.
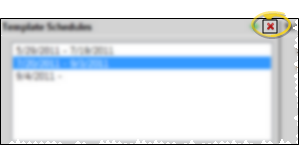
Select the schedule to work with, then click  Delete Template Schedule. All associated weeks (described below) are also removed.
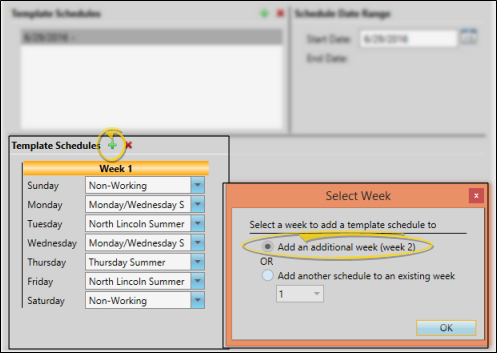
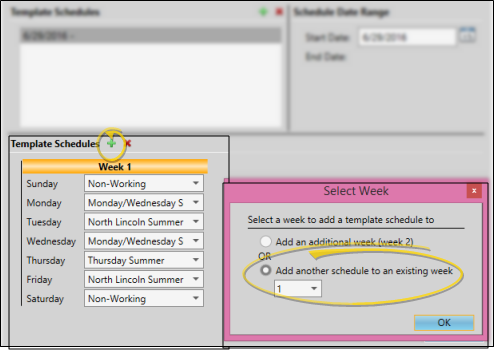
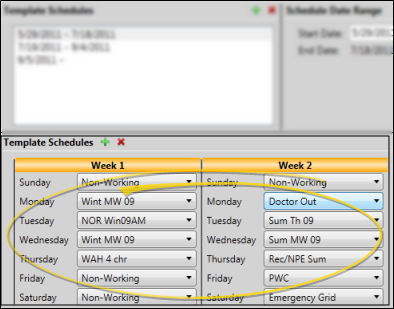
By default, each Template Schedule you add to your system includes one "Week". If you do not work the same schedule every week, but regularly rotate among two or more schedules, first select the schedule you want to work with, then click Add Week in the bottom portion of the window, and select Add an additional weekto create those weeks. As your schedule progresses, Edge Cloud will rotate through the templates automatically.
For example, you might create a two-week schedule if you work every day in one office for a week, then work certain days in a satellite office every other week. If your schedule is less regular, set your basic schedule here, then use Replace Template tools to assign templates to the non-standard days.
If you want to be able to select from two or more default templates for any day of the week, choose the schedule and the week you want to work with, then click Add Week, and select Add another schedule to an existing week, and select the week to work with (if needed). As you encounter new dates in your Scheduler, Edge Cloud will offer you the choice of your default templates.
To delete a week you don't need any more, select the schedule to work with, then click Delete Last Week. The weekly schedule you added most recently will be deleted.
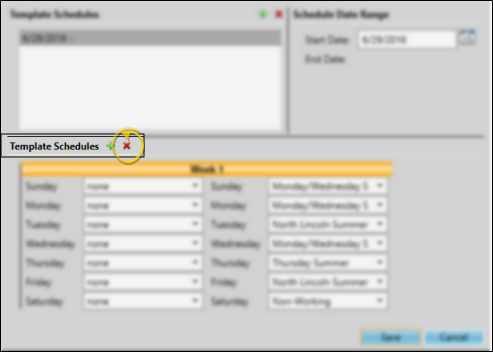
Select the schedule and week to work with, then assign the default grid template for each day of the week from your list of active templates. If your system includes multiple schedules and weeks, be sure to select an appropriate template for each day.
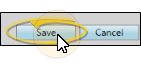
Click Save to save the changes you have made and close the editing window.