Add Findings to Treatment Plan / Chart
Use the Import Findings tool to add data from the Findings page of a patient folder to a treatment chart or treatment plan record. To function, you need a treatment chart style column with either the Text Only or List and Text column type.
![]() Open the Patient's Treatment
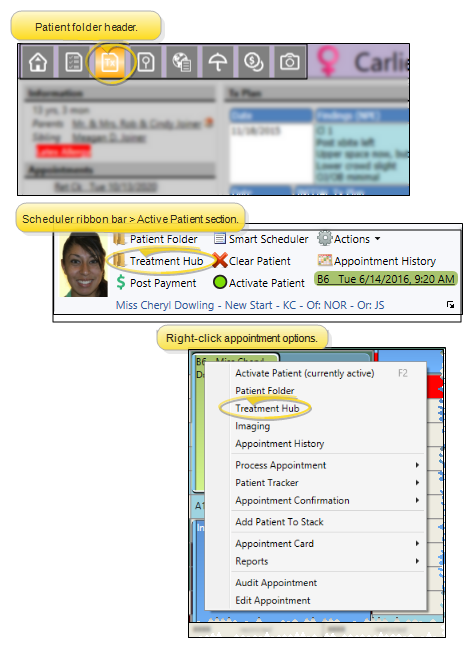
Open the Patient's Treatment
You can open the patient's Treatment Hub page by clicking the Treatment Hub icon from the patient folder header or the Scheduler ribbon bar, or by right-clicking the patient appointment in your Schedule.
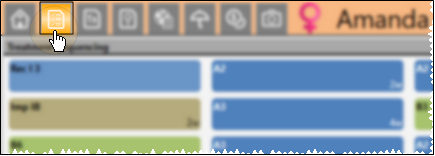
Open the patient folder and select the  Treatment Plan tab in the patient folder header. The treatment sequence appears at the top of the window, and the treatment plan appears in the bottom portion of the window.
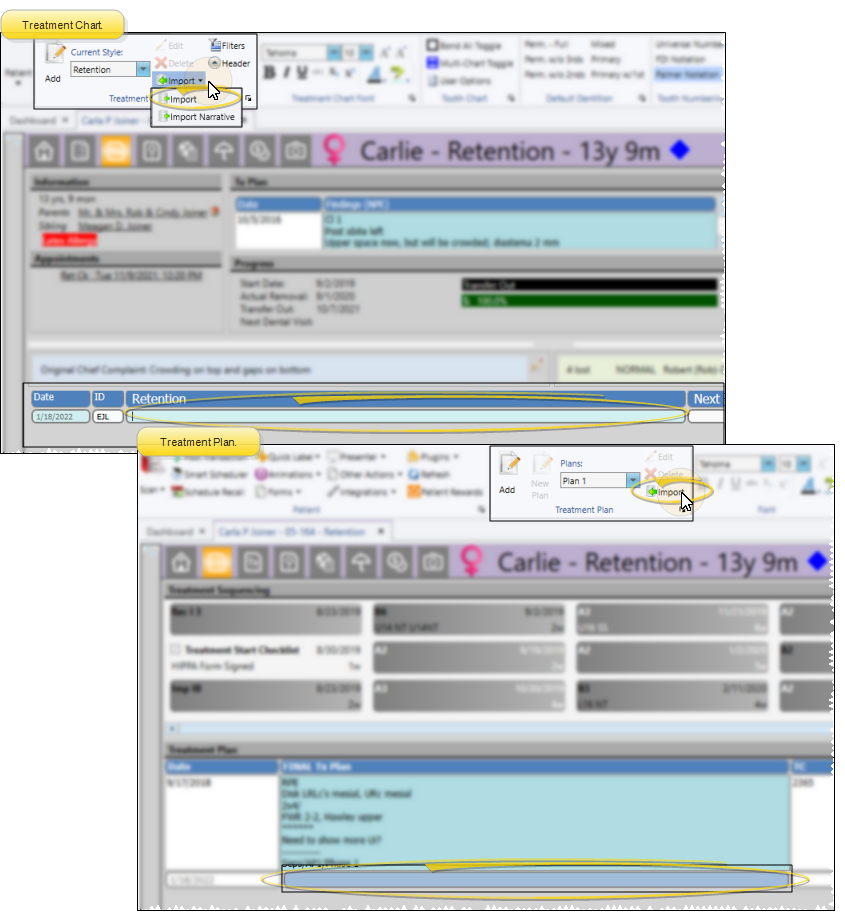
First, create a treatment chart or treatment plan record with a style that contains a column that accepts Text Only or List and Text input. With your cursor in that column, click  Import from the Treatment Chart or Treatment Plan ribbon bar. Or, select Import from the Import dropdown options of the Treatment Chart ribbon, or press F2 on your keyboard.
Edge Cloud remembers these settings the next time you import findings. If another operator has the settings you want to use, that operator can use the Assign Options tool to copy those settings to you, or vice-versa.
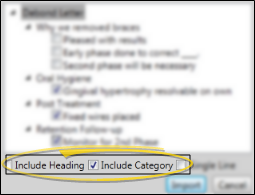
Include / Exclude Headings - Enable the Include Heading and/or Include Category options to include the top-level section and / or category headings in the import. Disable the one or both options to omit the headings from the import.
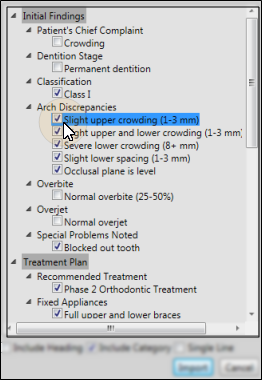
Select Data to Import - The import tool defaults to including the categories you have flagged for export in your Findings editor. However, you can select / deselect any item to identify what you want to import at this time.
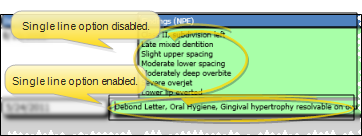
Choose Import Mode - Enable the Single Line option at the bottom of the import window to import your selections as one line, separated by a comma. Or disable the option to have the selections appear as a list.
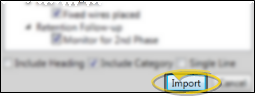
Click Import to add your findings selections to the record.
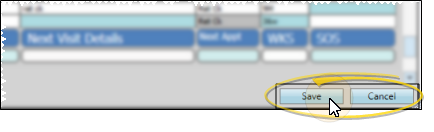
Click Save in your Quick Access toolbar, or at the bottom of the window, or press your Tab key after the final column of the record to save it.
Records Become Permanent After 24 Hours - Once a treatment chart or plan record is 24 hours old, or after a chart record has been signed, even if that happens before 24 hours have passed, it cannot be edited or deleted. You may exit a new record you have not yet completed by pressing the Esc key on your keyboard, clicking Cancel at the bottom of the window, or exiting the patient folder before you tab out of the final column of the record. After 24 hours, or after signing a chart record, you can no longer edit the text, although you can still change the way the text looks.