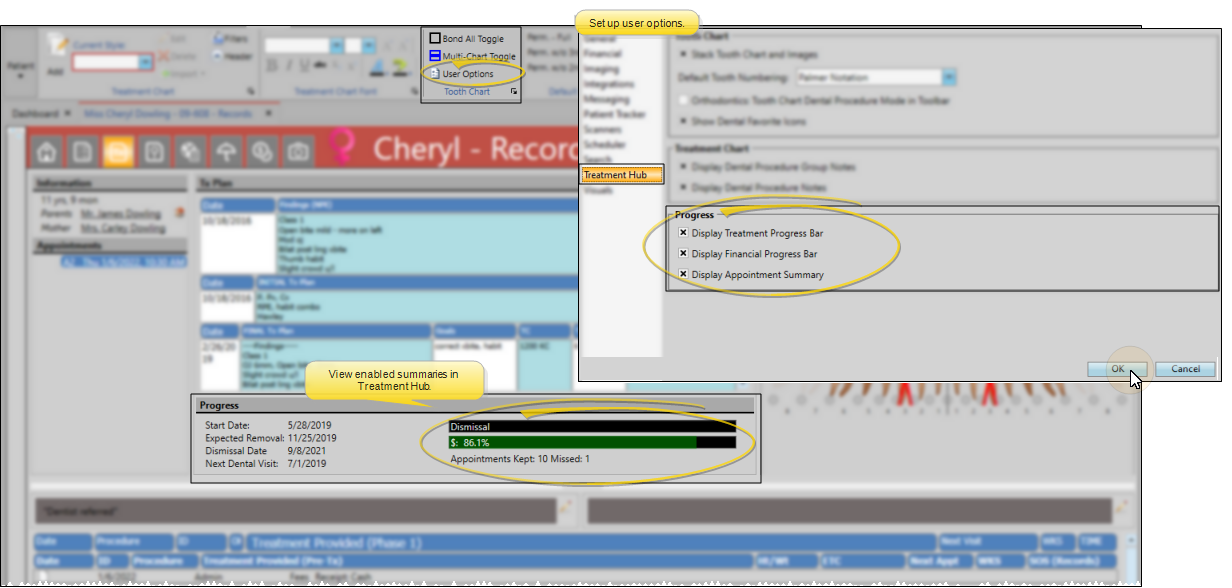
Treatment Hub User Options
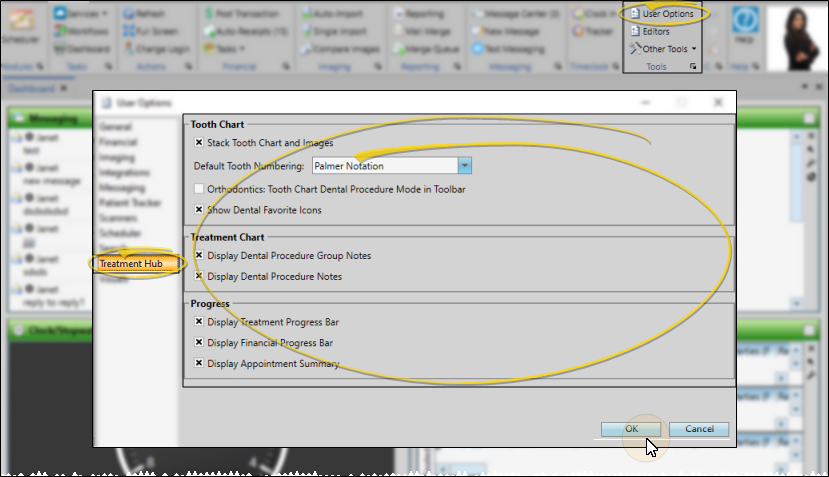
Use your Treatment Hub user options to choose your primary tooth numbering method, determine how your tooth chart is displayed in patient folders, and choose additional details to include on the Treatment Hub screen. Your security rights must include full access to the User Options Editor setting in the Practice Administration security group for this feature to work for you.
Assign Settings Tool - These settings are specific to you, and will follow you on whatever computer you log into: Other operators may have different settings. If another operator has the settings you want to use, that operator can use the Assign Options tool to copy those settings to you, or vice-versa.
Open the User Options window from the File, Home, Patient, or Scheduler ribbon bar. Then choose the Treatment Hub tab.
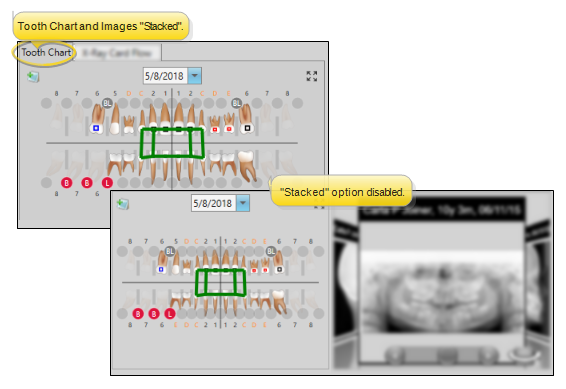
Stack Tooth Chart and Images
Use your Treatment Hub user options to choose whether to stack the patient's tooth chart and images, or show them side-by-side.
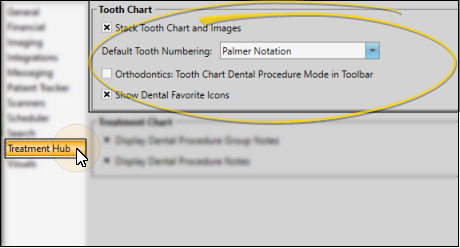
Default Tooth Numbering
Select your preferred tooth numbering method. Although this setting will be your default whenever you open a tooth chart, you can always change the numbering method temporarily while viewing the tooth chart.
Orthodontics: Tooth Chart Dental Procedure Mode
If you enable the Tooth Chart Dental Procedure Mode option in your Treatment Hub user options, you can select the mode you want to apply to procedures as you enter them into the tooth chart: Red = planned; green = existing; blue= completed. If the procedure mode option is disabled, procedures will be entered as "planned".
Show Dental Favorite Icons (Edge Specialist users only)
Use the Show Dental Favorite Icons option in your Treatment Hub user options to show / hide a panel of favorites icons beside the patient's pediatric dentistry tooth chart. Even if this panel is disabled, your favorite conditions, procedures and procedure groups appear in the Favorites section at the top of the Conditions and Procedures list.
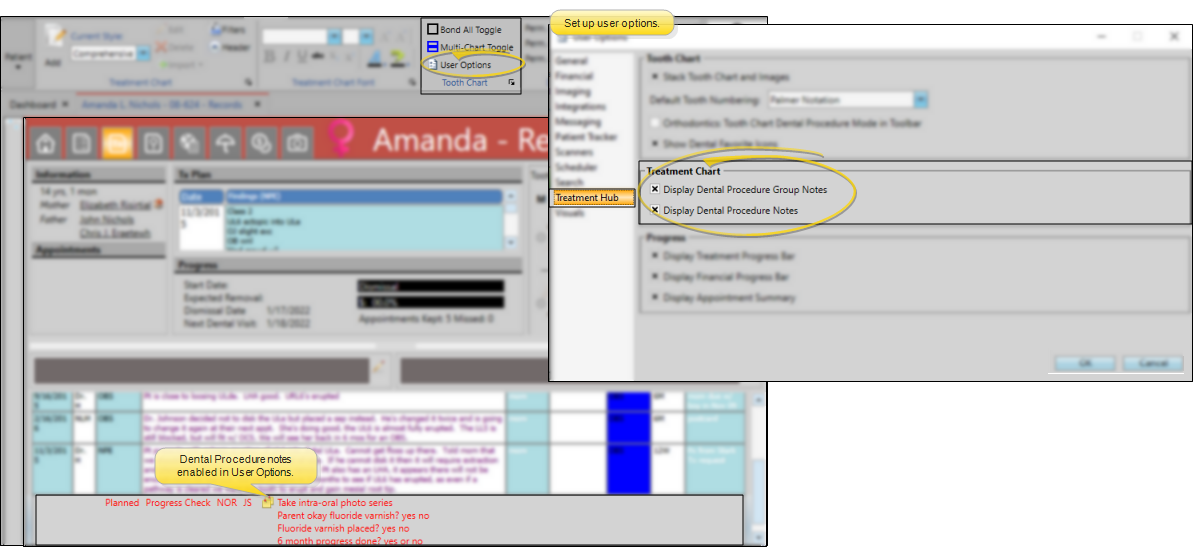
Use the Treatment Chart section of your Treatment Hub user options to choose whether to show or hide dental procedure notes and dental procedure group notes within your Treatment Chart records. If displaying notes is disabled, the  Notes icon will still appear in the Treatment Chart record when the procedure or group contains notes.
Use the Progress section of your Treatment Hub user options to choose which progress summaries to show / hide on the header of your Treatment Hub screen.
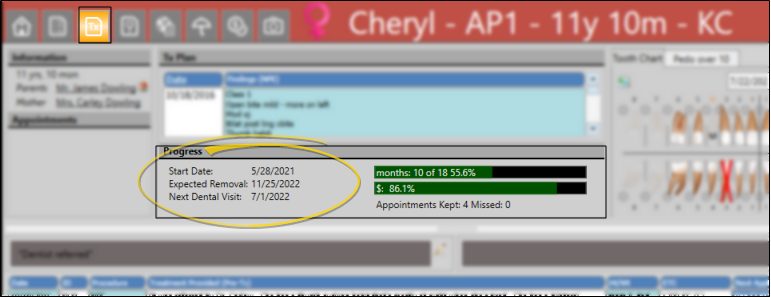
Treatment Dates
The left side of the Progress section of the window shows you key dates for the patient's current treatment phase, including the start date and expected removal date from the patient's Findings page, and next dental visit date from the Milestones panel of the patient's Home page.
Treatment Progress Bar
If enabled in your Treatment Hub user options, the treatment progress bar shows you the patient's percentage of treatment time that has taken place, as calculated from the start date and expected or actual removal date. The progress bar changes color to indicate how treatment is progressing relative to the estimate. Green = at or below estimate; Red = Over estimate; Yellow = Patient treatment completed.
Transfers- When you enter a transfer out date on the Milestones panel of a patient's Home page, the treatment progress bar on the Treatment Hub page changes to include the transfer date.
Practice Connect Tip - You can optionally provide a way for patients and parents to see the treatment progress graph via your Practice Connect app. See "Practice Connect" for details.
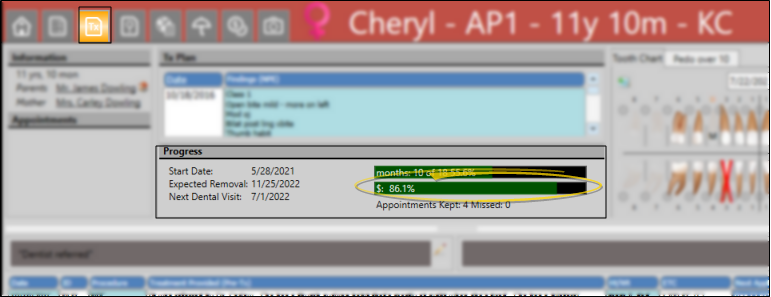
Financial Progress Bar
If enabled in your Treatment Hub user options, the financial progress bar shows you the percentage of the contract fee that has been paid so far. The progress bar changes color to indicate how payments are progressing relative to the estimated treatment dates. Green = at or below estimate; Red = Over estimate; Yellow = Patient treatment completed.
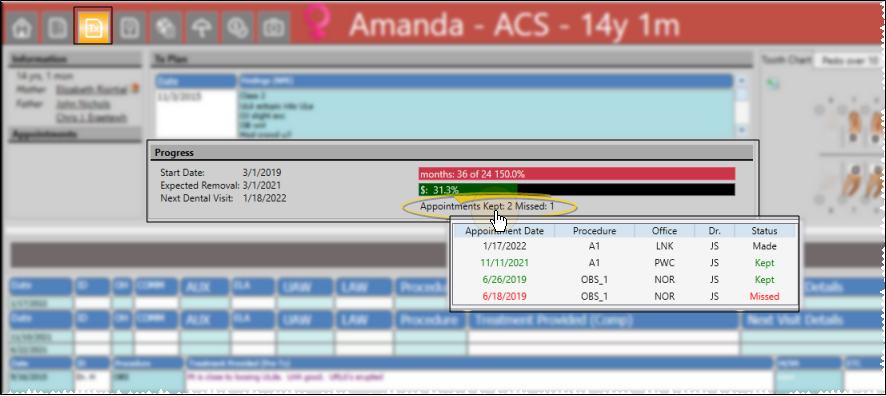
Appointment Summary
If enabled in your Treatment Hub user options, the appointment summary shows you the number of kept and missed appointments for the patient's current treatment phase. You can hover over the summary to see the appointment details for this phase of treatment.
You can click another User Options tab at the left to work with other Edge Cloud settings, or click Ok to immediately save any changes, and exit the window.