Practice Connect
The Practice Connect app is an optional Edge Cloud product, branded with your practice name, logo, and customizable content for your patients and parents. Available for both iOS and Android devices, patients and parents can download your personalized Practice Connect app, and instantly access their appointments, images, animations, and rewards. The app also provides for personalized appointment notifications, automatic GPS patient check-in, and makes patient referrals simple and rewarding. In addition, you can track real-time usage of the app with your Edge Cloud practice monitor and chart widgets.
Obtain Practice Connect - Practice Connect is an optional product that connects your practice to your patients' and parents' iOS and Android mobile devices. Please contact Ortho2 for further information about obtaining this app for your practice.
Create Apple Developer Account - In order for us to distribute your app in the App Store, you will need to create an Apple developer account and assign Ortho2 as an admin. See Creating an Apple Developer Account for Practice Connect for more information.
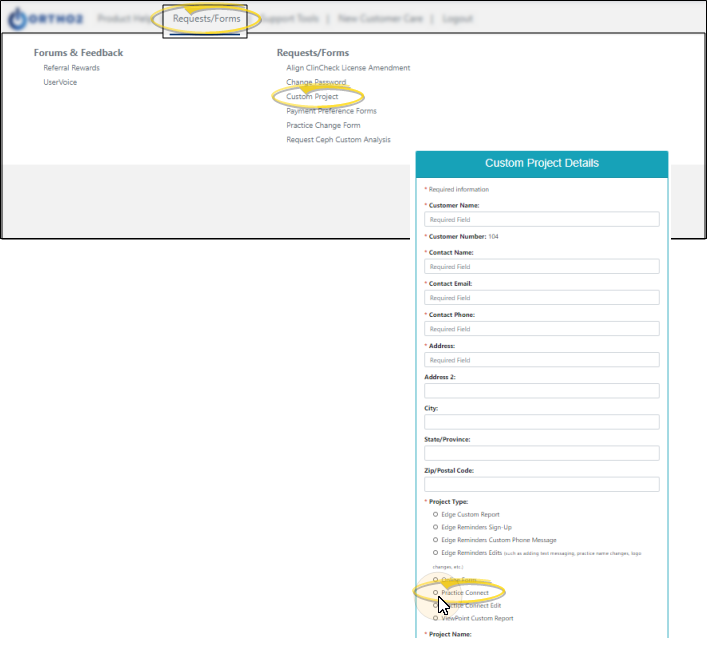
![]() Submit Practice Connect Customization Form - Open the Custom Project window, from the support.ortho2.com website, and select the Practice Connect project type. Then complete the form, and submit the details required for Ortho2 to create the template for your app.
Submit Practice Connect Customization Form - Open the Custom Project window, from the support.ortho2.com website, and select the Practice Connect project type. Then complete the form, and submit the details required for Ortho2 to create the template for your app.
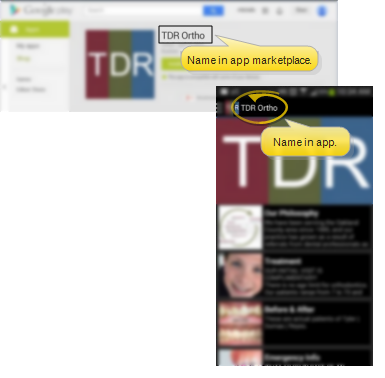
Name - Type a name for your app in this field - it can be anything you like. This name will appear in the app marketplace, and in your app heading. Examples include Smith and Jones Orthodontics, or S&J Ortho – Chicago.
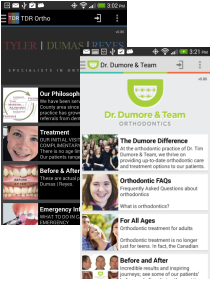
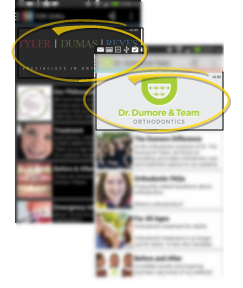
Theme - Choose either a dark or light theme.
Main Background Image - Use the Choose File button in this section of the customization form to select the image to upload as the background in your app. We recommend an image with a resolution of at least 900 x 600. To find the image resolution, right click on the image you want to use and click Properties. Navigate to the Details tab. Your image dimensions are located under Image. This image will be used as a screen banner, so we highly recommend a landscape image. It doesn’t need to be a specific aspect ratio. Note that we may be able to work with a smaller image resolution. If the image quality and shape of the image are unacceptable, we will contact you for a larger image.
Application Icon Image - Use the Choose File button in this section of the customization form to select the image to upload to use as the icon in both the app marketplace and in your personalized app. We recommend an image with a resolution of at least 1024 x 1024. The icon will be seen as a square shape. If you submit a graphic that is not square, we will need to adjust it. Note that we may be able to work with a smaller image resolution. If the image quality is unacceptable, we will contact you for a larger image.
![]()
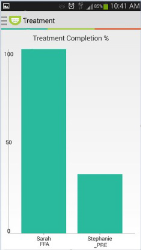
Treatment Info Option - Select whether to let patients see a visual graph of their treatment completion percentage. This will be a graphical representation of the time passed between their start date and their expected appliance removal date. While many patients would enjoy monitoring their progress through the expected treatment time, some practices prefer not to provide a specific completion end date due to unavoidable variations in treatment time. (You can also view the treatment progress graph from the patient's Treatment
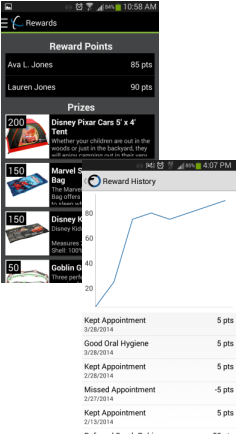
Patient Rewards Option - Select whether to let patients see Patient Rewards information in the app, including the patient's point balance, how the points were earned, and the prizes available. Patients can also redeem points for prizes directly from the app. This information only works with the Edge Cloud Patient Rewards system. (See "Patient Rewards" for details.)
Sign-In Option - Select whether to allow patients to sign in for their appointment when they come within a certain distance of your office, and within a certain time before their scheduled appointment. (The time settings are the same as those used within Edge Cloud. See "General Sign-In Settings" for details.)
Edge Cloud Login Server Address - (Locally-hosted Edge Cloud systems only.) If you are a locally-hosted customer, please provide your server address. To find this, start Edge Cloud, but don't log in. Click the drop down arrow by the Server field, and select Configure Login Servers. Copy the address from the Address field as your Edge Cloud Login Server Address.
Store Description - Use this section of the customization form to provide a description to include in the app marketplace describing your app. You may use the description below, with your personalized information, or provide one of your own.
<Name of App> provides everything you need to learn about or interact with <Doctor’s Name(s)> orthodontic practice. New to our practice? You can tour our offices, meet our doctors and staff, read about our services, and even request a consultation. As a patient or responsible party, you can view or schedule reminders for your appointments, make payments, see your images, animations, view and select your rewards, and more.
Submit Form - When you have completed the Practice Connect customization form, click Submit to send it to Ortho2.
![]() Set Up Practice Connect Editors
Set Up Practice Connect Editors
Practice Connect Content - Use the Practice Connect editor to create and manage the content to show in your Practice Connect app. See "Practice Connect Editor" for details.
Online Details - Use the Practice editor to supply your Practice Connect app with links to your web site, Facebook, and Twitter pages. See "Practice Editor" for details.
Office Details - Use the Office editor to supply your Practice Connect app with the address, phone, and email contact information for each of your office locations. See "Office Editor" for details.
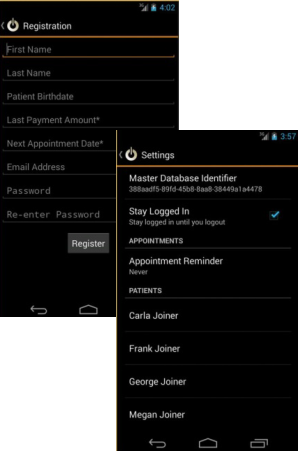
Responsible Party & Patient Registration - After they download your app, responsible parties should register within Practice Connect to get a more personalized experience. Tap the menu button (this is located in different places based on your phone) and select Login. Once on the Login screen, tap Register. Responsible parties will need to fill in the registration form, including their first name, last name, patient's birthday, email address, and phone number. Now, in the Settings page, responsible parties can see each patient associated with them. At this point, they can also assign a login for the patient. Simply tap the patient’s name and fill in an email address and password. Patients will be able to see the same items as the responsible party except the Finance tab. Once logged in, responsible parties can make payments (must have a payment on file), review upcoming and kept appointments, view patient reward balances, watch compliance animations, and see patient images.
Register for Practice Connect - Use the  Register for Practice Connect icon in the Responsible Party ribbon bar to initiate a Practice Connect account for this person. If no Practice Connect account exists yet, the party will receive temporary credentials and a verification code. The party must have a valid cell phone number and email address (as defined in your Contact Category editor) in their Edge Cloud responsible party record to be able to register for Practice Connect.
Monitor App Downloads - Use the Practice Monitor widget or Chart widget to monitor how many unique devices have downloaded your app, tracked by registered responsible parties, registered patients, and other users.