General Sign-In Settings
Use the General tab of your Sign-In Settings editor to set up your sign-in password, as well as special alerts and notification messages.
How to Get Here
-
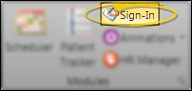
 Open Sign-In Settings - Home ribbon bar > Modules section >
  Sign-In > Password > Log In > Main > Settings.
 -
Open General Tab - Click the General tab at the top of the Sign-In Settings editor.


Choose Your Settings
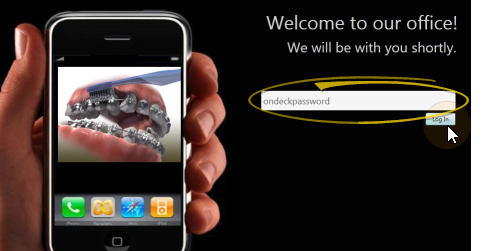
![]() Password - Type a new password in the New Password field, then type the exact same password in the Confirm Password field. Click Change to verify that the passwords match, and complete the change.
Password - Type a new password in the New Password field, then type the exact same password in the Confirm Password field. Click Change to verify that the passwords match, and complete the change.

![]() Accessiblity - Enable the Use On-Screen Keyboard option to pop up a keyboard on your Sign In screen that can be used with either touch screen or a pointing device (such as a mouse).
Accessiblity - Enable the Use On-Screen Keyboard option to pop up a keyboard on your Sign In screen that can be used with either touch screen or a pointing device (such as a mouse).

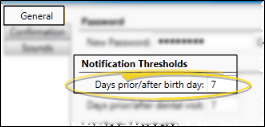
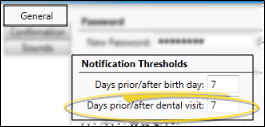
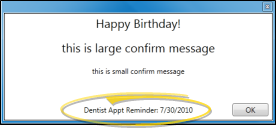
![]() Birthday Notice - Enter the number of days until / since the patient's birthday to include a special birthday message. Setting the number of days to 0 disables the message.
Birthday Notice - Enter the number of days until / since the patient's birthday to include a special birthday message. Setting the number of days to 0 disables the message.
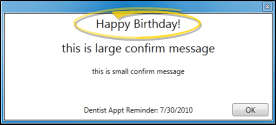
![]() Dental Visit Notice - Specify the number of days before a dental visit is due
to display a reminder message . To disable the message, set this option to
0 (zero).
The message includes the dental visit date suggested on the Milestones panel of the patient folder Home page and cannot be edited.
Dental Visit Notice - Specify the number of days before a dental visit is due
to display a reminder message . To disable the message, set this option to
0 (zero).
The message includes the dental visit date suggested on the Milestones panel of the patient folder Home page and cannot be edited.
![]() Filters - Use the Filters option to restrict Patient Sign-In to a specific office. If no filter is applied, patients with appointments for any office will be allowed to sign in. If a filter is applied, and a patient from a different office attempts to sign in, that patient will see your "No Appointment" message.
Filters - Use the Filters option to restrict Patient Sign-In to a specific office. If no filter is applied, patients with appointments for any office will be allowed to sign in. If a filter is applied, and a patient from a different office attempts to sign in, that patient will see your "No Appointment" message.

![]() Late Arrival Options - Several settings work together to display a special message when patients are late for their appointments, and optionally prevent them from signing in. 1) Use the Late Arrival Minutes field to enter the number of minutes after the scheduled appointment time you consider a patient late. 2) Enter the text you would like to display in the Late Arrival Message field. 3) Enable the Allow late patients to sign in option if you want patients to be able to sign themselves in anyway. To disable the message, set the number of minutes to 0 (zero). Setting the late arrival minutes to 0 also enables late patient sign in.
Late Arrival Options - Several settings work together to display a special message when patients are late for their appointments, and optionally prevent them from signing in. 1) Use the Late Arrival Minutes field to enter the number of minutes after the scheduled appointment time you consider a patient late. 2) Enter the text you would like to display in the Late Arrival Message field. 3) Enable the Allow late patients to sign in option if you want patients to be able to sign themselves in anyway. To disable the message, set the number of minutes to 0 (zero). Setting the late arrival minutes to 0 also enables late patient sign in.


![]() Early Arrival Options - Several settings work together to display a special message when patients are too early for their appointments
Early Arrival Options - Several settings work together to display a special message when patients are too early for their appointments


Save Your Changes - Click Save to save the changes you have made and close the editing window.
More Information
Change Password Regularly - We suggest changing your password regularly to maximize its security potential.
Practice Connect Option - You can optionally allow patients to sign in for their appointment with your Practice Connect app when they come within a certain distance of your office, and within a certain time before they scheduled appointment. See "Practice Connect" for details.