Use the Settings window of your Patient Tracker to choose which patients to include in your display. You may choose to filter patients by orthodontist, office, or assistant, as well as include or exclude entire Patient Tracker sections, such as patients that are Arriving or in Checkout. Your choices are operator-specific, and can be different for the Patient Tracker module and Patient Tracker widget.
How to Get Here
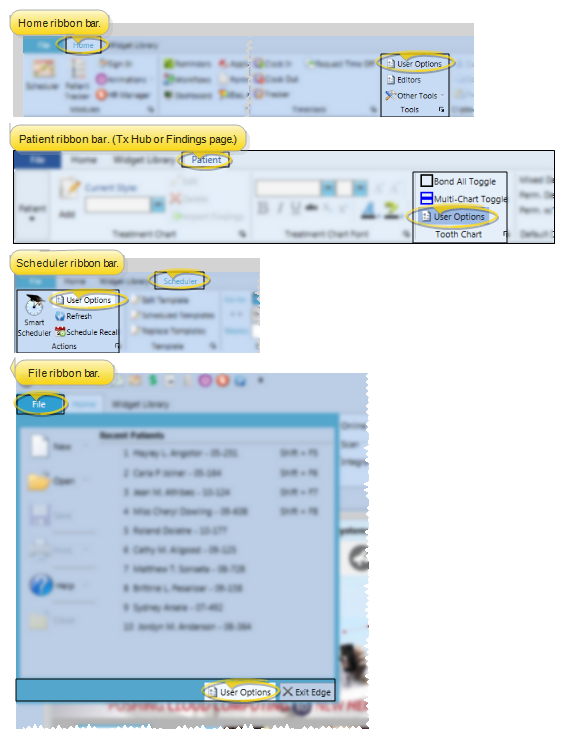
User Options - File, Home, or Scheduler ribbon bar > User Options > Patient Tracker.
Choose Your Settings - Patient Tracker settings are specific to you: Other Edge users may have different settings. In addition, you can use different settings for your Patient Tracker module and Patient Tracker widget . Also, not all settings are available for the Patient Tracker widget, as noted below.
Office, Doctor, Assistant - Select to view all patients, or only those whose appointments are assigned to a specific doctor, office, and / or assistant.
Show / Hide Patient Thumbnail Image - Choose whether to include a patient photo in the Patient Tracker. This is a single setting that affects all sections of the Patient Tracker.
Font Size - (Patient Tracker module setting only.) Enter a font size between 8 and 24 to select how big the words will appear on your Patient Tracker. You might consider using a large font size when you need to be able to view the Patient Tracker from across your operatory.
Arriving Interval - The Arriving section of the Patient Tracker automatically notifies you of patients whose appointment time is approaching, but who have not yet signed into your office. Use the Arriving Interval setting to enter the number of minutes before your patients' appointments are scheduled to being that you want their names to appear in the Arriving section.
Sections to View - Enable each section of the Patient Tracker that you wish to include. For example, staff members that use the Patient Tracker at the front desk might enable the Arriving, Waiting, and Checkout sections, while staff members that use the Patient Tracker in the operatory might enable the Waiting, Seated, and Checkout sections.
"View" to Display - Your Patient Tracker "View" defines which details you see on your Patient Tracker, such as the patient name, appointment procedure, and waiting time. You can create as many views as you wish, and switch among them easily. When using the Patient Tracker module, you can choose a different view for each section, However, when using the Patient Tracker widget, you choose one view to use for all sections. (See "Set Up Patient Tracker" for details about setting up your Views.)
Format - (Patient Tracker module setting only.) - Choose how to display the patient data in your Patient Tracker: The Table format shows you each patient's information in a single row; the Card format shows you each patient's information in business card style; the Cardflow format also uses a business card style, but you includes additional details. You can choose a different format for each section of your Patient Tracker module. The Patient Tracker widget always uses the Table format.
Save Your Settings - Click Ok at the bottom of the User Options window to save the changes you have made. If you are working with your Patient Tracker widget, your changes are saved when you click out of the settings window.
More Information
User Settings / Assign Options Tool - The settings you choose here are specific to you; Other operators that log into Edge with a different username and password may have different settings. However, you can use the Assign Options tool to copy your settings to other operators (and vice-versa) if needed. (See "Assign Your Settings to Other Users" for details.)
 User Options > Patient Tracker.
 Settings button at the top of the Patient Tracker window. (See "View & Update Patient Tracker" for details about opening your Patient Tracker module.)
 │
│