Electronic Insurance
After creating electronic insurance forms for your patients, use the Electronic Claims window to review and submit claims, resubmit rejected claims, and review past claims.
Generate Claims to Submit
Depending on your office protocol, you may accumulate electronic insurance claims throughout the day or week. You then choose to transmit the pending claims to the processing clearinghouse as described below. See "Electronic Insurance Forms" for details.
After accumulating electronic insurance forms for your patients, open the Electronic Claims window, and choose the claims you want to submit to the insurance clearinghouse. Be sure to review the claims and correct any omissions and errors before submitting to minimize the chance of rejection. You can also delete claims that were created in error, or no longer need to be submitted.
-
 Open Electronic Claims WIndow - Select the
  Electronic Claims icon from the tasks section of the Home ribbon bar. (The window also opens automatically whenever you create an electronic insurance form for a patient.)
-
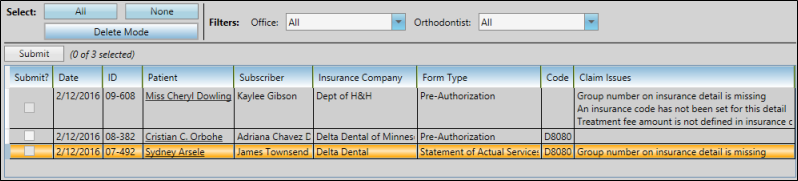
Enable Submit Claims Option - If needed, click to enable the Submit Electronic Claims option at the top of the window.

-
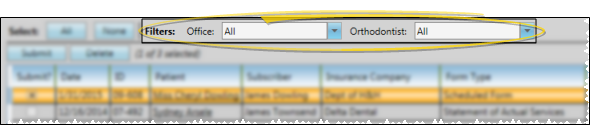
Filter Claims to Review - Use the Office and Orthodontist filters to review only certain claims, or select to view all pending claims.
-
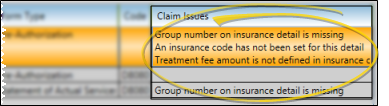
Review Claim Issues - To avoid rejections, you cannot submit claims that are missing required information. The Claim Issues column lists the corrections you must make before the claim would be accepted. You will need to correct the information, delete this claim from the list (as described below), and re-select it for submission.
-
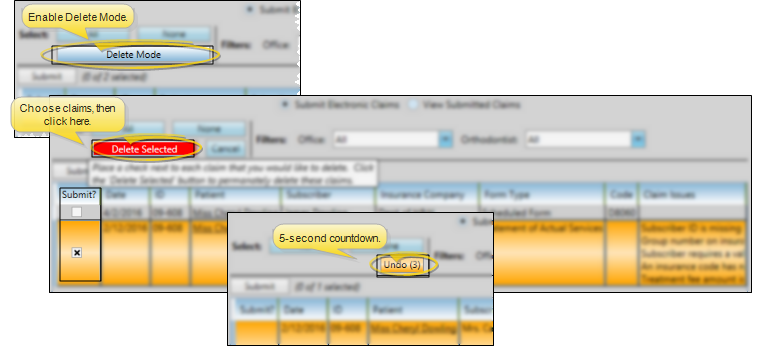
Delete Claims - Enable Delete Mode, then choose the claim(s) you want to remove from the list (such as claims with errors in the Claim Issues column). Click the red Delete Selected button to remove the claims. You then have 5 seconds in which you can click the Undo button to change your mind and reinstate the claims you just removed. After that point, the claims are permanently deleted, and you will need to select them again when you are ready to send them.
-
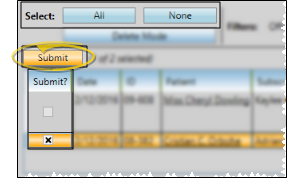
Select and Submit Claims
- You can select claims individually by checking the box beside the claim, or choose Select All or Select None. (You cannot select claims that contain errors.) After making your selections, click Submit.
-
What Happens Now? - As your insurance claims are being uploaded, you will see messages pop up in your computer's notification area to indicate that the claims were successfully received, and that they have been added to each patient's correspondence history.
DentalXChange Website - Submitting electronic claims also opens the DentalXChange website. You may log into the website if you wish, or simply close your browser: Your electronic claims are uploaded either way.
Findings Omissions - If the Findings Response descriptions in the patient's Insurance page are too long, the text will be omitted from electronic insurance submissions. Review the saved form in the patient's Correspondence History to verify the information has been included. See "Patient Correspondence History" for details.
It is important to verify that your claims have been submitted successfully. Twenty four hours is usually required for feedback on your claims to be posted.
-
Submit electronic insurance claims, described above.
-
Wait 24 hours.
-
Log into www.dentalxchange.com.
-
Click Claim Search under the Submission heading.
-
Select to View All Problem Claims or search for individual submissions and check status.
-
If needed, correct errors in your data and resubmit, or send additional information as required, described below.
After submitting electronic claims, be sure to clean up any transmission or records errors, and re-submit if needed.
-
View Errors - Return to the Electronic Claims window after transmitting electronic forms to review any claims that were not processed successfully. (Unsuccessful transmissions will remain in the pending insurance form list.) Review the details in the Claim Issues column to determine the reason the claims were not successful. In addition, you may retrieve rejected claim information when you verify electronic insurance transmission, described above.
-
Correct Errors - Go to the appropriate patient folders or other areas of your system to fix any record-keeping or other errors. Common errors include incorrect state abbreviations, mismatched relationship data, and missing employer and group number data.
2-Letter State Abbreviations - Electronic claims require the postal-approved 2-letter state abbreviation for all addresses on the insurance form. Review the patient and responsible party pages of your patient folders, as well as your Insurance Company and Employer editor for correct state abbreviations.
Relationship=Self - If the Relationship field on the Insurance detail page is Self, the subscriber name must match the patient name EXACTLY.
Employer Required - The employer field on the insurance detail page of the patient folder cannot be blank: We recommend that you create an employer record for Self in your Employer editor to handle self-employed patients.
Group Number Required - The Group No. field on the Insurance detail page of the patient folder cannot be blank: Enter 999999 if the employer is Self.
-
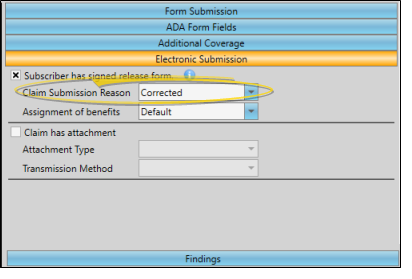
Flag Claims for Resubmission - If you have insurance claims that were uploaded, but then rejected by the clearinghouse or insurance company and need to be sent as re-submissions, go to the Insurance detail page of the patient folder, and set the Claim Submission Reason field in the Electronic Submission section of the window to Corrected. The claim will then be marked as a re-submission, rather than a first-time submission.
-
Select & Resubmit Electronic Claims - Re-generate the insurance form(s) you need to resubmit, and open the Electronic Claims window again. Select the claim(s) to transmit (described above), and click Submit. The claims will be marked as resubmissions, rather than first-time submissions for the processing clearinghouse.
After you generate either electronic or paper insurance forms, a copy of the claim is saved in the patient's correspondence history. In addition, you can view prior electronic claims from the View Submitted Claims option of the Electronic Claims window.
-
Open Electronic Claims WIndow - Select the Electronic Claims icon from the tasks section of the Home ribbon bar. (The window also opens automatically whenever you create an electronic insurance form for a patient.)
-
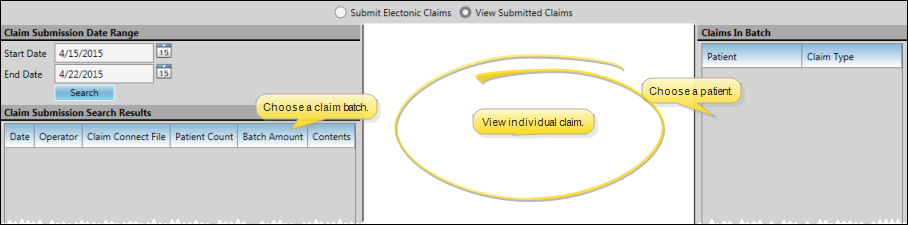
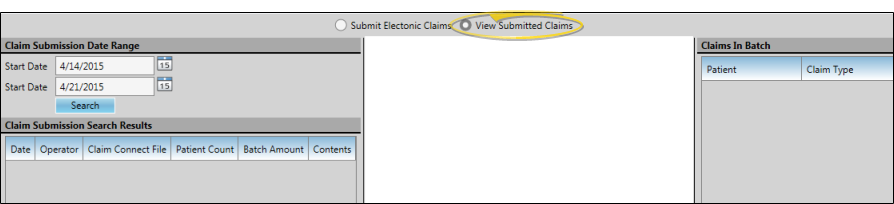
Choose to View Submitted Claims - Enable the View Submitted Claims option at the top of the Electronic Claims window.
-
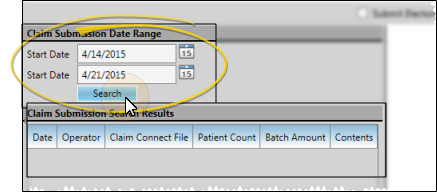
Select Claim Dates - Enter the first and last dates to include, and click Search. All electronic claim batches submitted within your date range will appear in the Claim Submission Search Results section of the window, detailing the date the batch of claims was submitted, the operator that submitted the claims, and the Claim Connect filename, number of patients included, and total amount.
-
View Individual Claim Details - Select an electronic claim batch in the Claim Submission Search Results section of the window. The list of patients included in that batch, along with the type of insurance claim filed for each patient, appears in the list at the right of the window. Click a patient name to see a copy of that claim in the center section of the window.