Edge Signature
Edge Signature provides a way for your mail merge documents to be digitally signed (or initialed) by one or more parties, including the patient, responsible party, orthodontist, professional, operator, and assistant.
 Add Edge Signature Fields to Mail Merge Documents - Add Edge Signature variables to your mail merge documents wherever you need a patient, responsible party, orthodontist, professional, operator, or assistant to digitally initial or sign the document.
-
Create or Edit a Document - You can add merge tools to new documents, or documents that you have already created. See "Create and Edit Mail Merge Documents" for details.
-
Position Your Cursor - Place your cursor where you need someone to initial or sign the document.
-
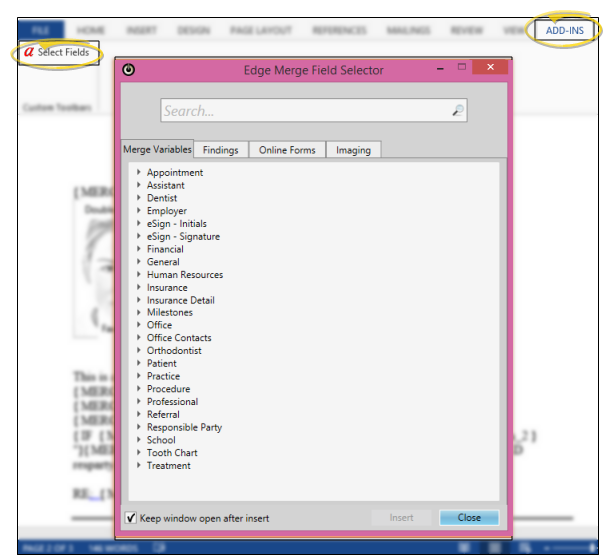
Open Variable Menu - Open the Add-Ins menu (if needed). Choose the Select Fields option to open the Edge Cloud Merge Field Selector window. Be sure you are viewing the Merge Variables tab.
-
Insert eSign Variable - Choose the eSign - Initials or eSign - Signature variable that corresponds to the person that needs to initial or sign the document, and click Insert. Then type a description of the intended signer, such as "Patient", "Parent or Guardian", or "Doctor". Click Ok to insert the variable into the document. You may insert as many initials and signatures as needed.

-
Save & Exit - Click the X in the upper right corner of the Word document window. As you exit, you have the opportunity to save the document. When you return to the Mail Merge Documents editor, you will see a Signature icon beside the document name.
Merge Edge Signature Documents - Mail merge documents that support digital initials and / or signatures include an  Edge Signature icon beside the name. When you merge one of these documents, you will be prompted to specify who should sign and / or initial the document. The document is then added to the list of Edge Signature documents waiting to be digitally signed.
-
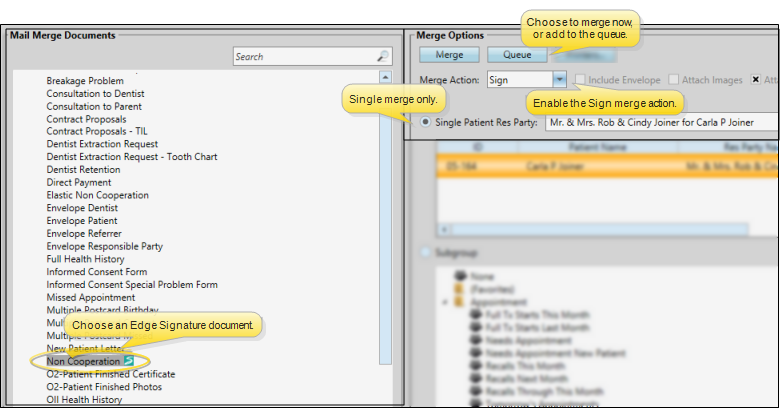
Select an Edge Signature Document and Recipient - Initiate your Mail Merge feature, and select an Edge Signature document. Then choose the recipient, and select the Sign merge action. You can choose to merge the document immediately, or add it to your Merge Queue.
(Tell me more about choosing mail merge documents and recipients)
-
Initiate Mail Merge - Home ribbon bar > Reporting section > Mail Merge. (You might also be able to open this feature from the Quick Access toolbar at the top of your Edge Cloud window.)
-
Choose Document to Merge - Select a document name from your Favorites or Documents list, at the left of the Mail Merge window. (You can also use the Search field to find the document(s) you want to work with.)
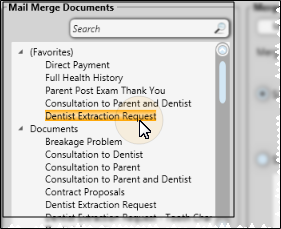
To add or remove a document from your "Favorites" list, simply drag and drop it from the Documents list. Adding a document to "Favorites" does not remove it from the "Documents" list.
-
Choose Recipient(s) - Choose whether to merge the document for all records, a subgroup of records, or a single record. The choices you have for selecting recipients depend on the "selection type" of the document you chose to merge. (See "Create and Edit Mail Merge Documents" for details about assigning document properties.)
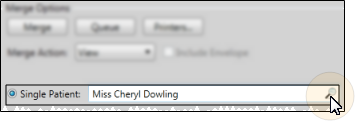
Single record - Select this option to generate the document for an individual record. If a patient folder is open when you initiate mail merge, that patient is the default, and the Mail Merge window tab displays that patient's name for your reference.
You can use the Search field to look for a different patient, if needed. The document's "selection type" property determines whether you will search for a patient, responsible party, or other party, and whether additional information, such as the patient's scheduled appointments, is included in the search.
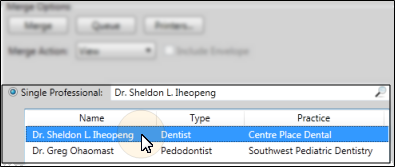
In addition, if you selected a document with the "selection type" property of Professional, Responsible Party, Patient Professional, or Patient Responsible Party, the list of records associated with the active patient appears for you to choose from.
In this example, the default patient is automatically selected. You can click the Search icon to look for a different patient.
This example shows the active patient's professional records, for merging a Professional type letter. The active patient's name remains on the Mail Merge tab for your reference.
Note the difference between 1) a Professional or Responsible Party type letter and 2) a Patient Professional or Patient Responsible Party letter type: When you merge a document for the first letter type, the document will merge for each patient who is associated with the selected professional or responsible party. However, when you merge a document for the second letter type, the document will merge only for the active patient, addressing the professional or responsible party you selected. See "Create and Edit Mail Merge Documents" for details.
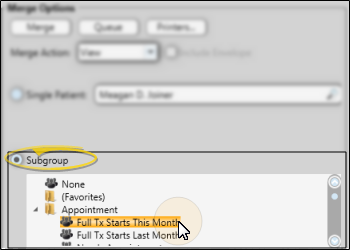
Subgroup -Select this option, then choose the subgroup to send the document to. See "Subgroup Editor" for details about creating subgroups.
Single Merge Only - You can merge only one Edge Signature document at a time: You cannot merge an Edge Signature document for a subgroup.
Sign Merge Action Required - Be sure to enable the Sign merge action before selecting to Merge or Queue the document: If you select any other merge action, you will not be able to digitally sign the document. (The Sign merge action is available only if you have chosen an Edge Signature document.)
-
Specify Expiration and Signature Providers - If you merge the document immediately, you will be prompted to enter an optional expiration date for the document, as well as specify who needs to provide the digital signature(s). If you add the document to your Merge Queue, you will be prompted for these details when you complete the document processing. Once the signers have been selected, the document is added to list of Edge Signature documents waiting to be signed.
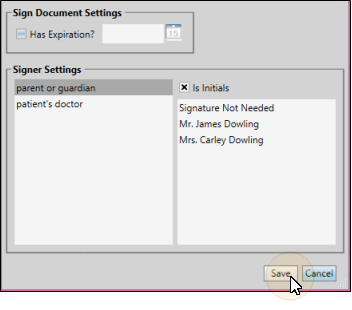
Expiration Settings - (Optional.) Enable the Has Expiration option, then enter the date the document will expire. If the document has not been digitally signed by that date, it will be removed from the list of pending Edge Signature documents. This feature is especially useful for time-sensitive materials, such as consultation forms and truth in lending agreements If you do not enter an expiration date, an unsigned document can remain in the Edge Signature queue indefinitely, or until you manually delete it.
Signer Settings - Use the Signer Settings section of the window to identify the people that need to sign and / or initial the document. You can also choose to "skip" a signature that is not required for this instance.
Choose Signature / Initial to Work With - The left side of the window lists all of the Edge Signature initials and signatures required by the document. The descriptions are the prompts you typed as you inserted Edge Signature variables into your mail merge document. The Is Initials option indicates whether the variable you inserted was for initials only.
Choose / Skip Signing Party - The list at the right of the window includes all the people associated with the patient folder that fit the type of initials/ signature you have selected at the left. For example, if your document calls for responsible party initials, all the responsible parties associated with the patient appear in the list, and the Is Initials option will be enabled. You can click to select the person who should provide the signature / initials, or select Signature Not Needed to "skip" this signature / initial location. This might happen, for example, if you have inserted an eSign - Signature variable for "mom", and another eSign - Signature variable for "dad", and the patient has only one parent.
Save Signer Settings - After you have selected or skipped the signer for each signature / initials location in the document, click Save (or, click Cancel to start over). Once saved, the document is added to list of Edge Signature documents in progress.
Use the Edge Signature Service - Use the Edge Signature Service to view and sign documents in progress, as well as view completed documents.
Open Edge Signature Service - You can open this feature in multiple ways: Use the method that's most convenient for you.
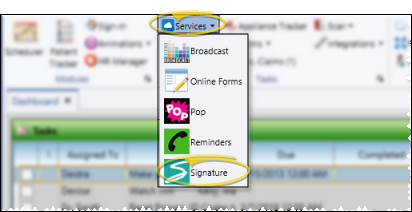
Home Ribbon Bar - Tasks section > Services drop down > Signature.
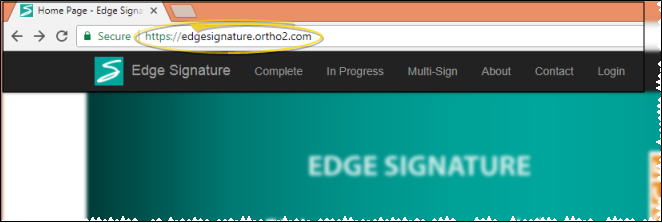
Web Browser - https://edgesignature.ortho2.com (we suggest you bookmark this site for faster access).
Log In - Use your Edge Cloud credentials to log into the Edge Signature service. You must have both an Edge Cloud operator username and password to use Edge Signature: If your office protocol does not require you to have an Edge Cloud password, you will need to update your Operator account to add one.
Keep Logged In Option - After signing a document, you are automatically logged out of Edge Signature so that others can log in and add their signature or initials to the documents as needed. However, if you are simply reviewing completed documents, or perusing the list of documents in progress, you can enable this option to keep you logged in when you exit and re-enter the service. This requires cookies, so that Edge Signature can recall your credentials when you return to the service.
Sign Documents In Progress - Open the In Progress window to view and sign pending Edge Signature documents. Most often, an iPad or similar tablet device is used for signing, because it can easily be handed back and forth between the doctor, parents, treatment coordinator, and others needing to sign an individual document.
-
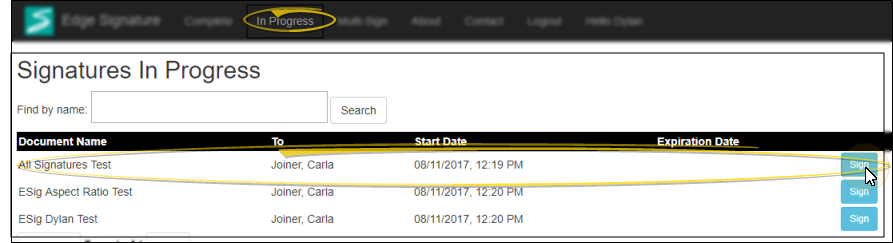
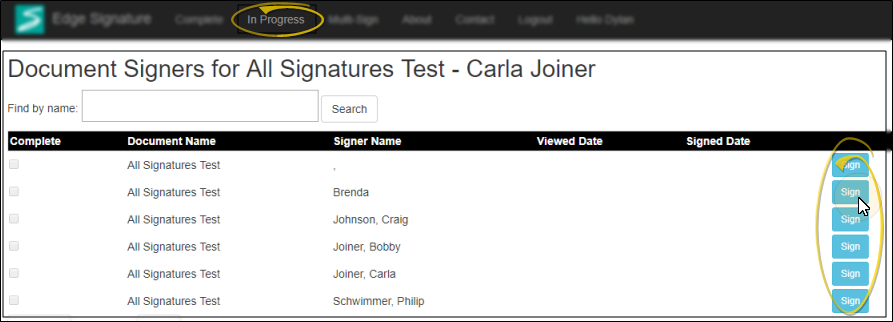
Choose Document to Work With - Open the In Progress tab at the top of the Edge Signature window. Scroll through the list, or use the Search field to choose the document you want to work with. Then click Sign at the right of the document..
-
Choose Signer - If multiple signatures / initials are required for the document, select the signer to work with, and click Sign. The list also shows whether a signer has already opened the document, and completed their signature.
-
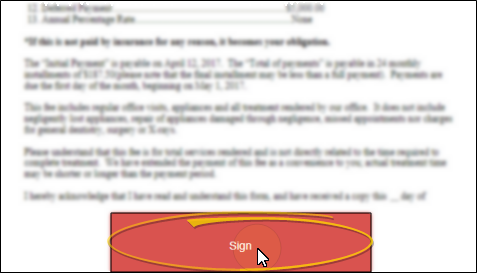
Sign the Document - The document opens on your screen. You cannot change any text, but be sure to review the contents before signing. When you are ready, click Sign and complete your signature / initials.
-
Review the document. When you are ready, click Sign to open the signature pad.
-
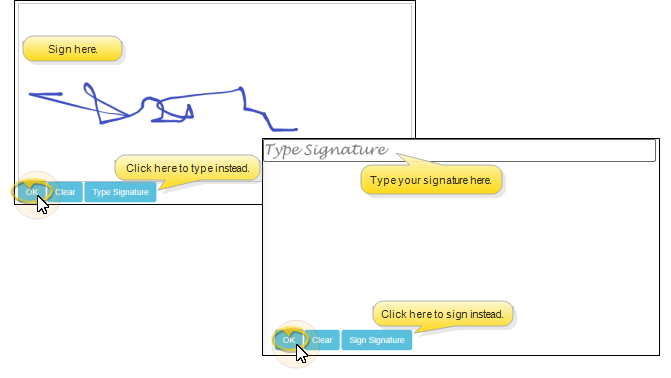
Sign or initial the signature pad. Depending on the type of device you are using, you may use your finger, a stylus, or another pointing device (such as a mouse) to sign the signature pad. If you prefer, you can click Type Signature, then type your signature or initials on your keyboard. You can toggle between signing and typing. When finished, click Ok at the bottom of the signature pad.
-
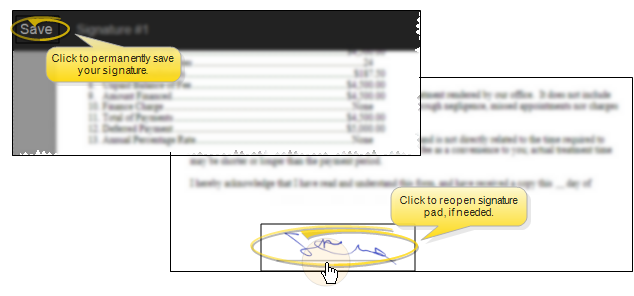
Save your signature. The document appears on your screen again, along with your signature. If you're satisfied, click Save at the top of the document window. Or, click the signature area to open the signature pad again and start over.
Additional signatures - If you need to sign the document in multiple places, a list of the signatures appears at the top of the window. Click a signature link to view and sign that area of the document. When you have completed all signatures, the document is flagged as being completed.
-
Finish - As soon as you save your signature (or all of the signatures required from you) you are prompted to close the document. You are automatically logged out of Edge Signature so that the next signer, if any, can log in and complete their signature. When all signatures are complete, the document is added to the patient's correspondence history.
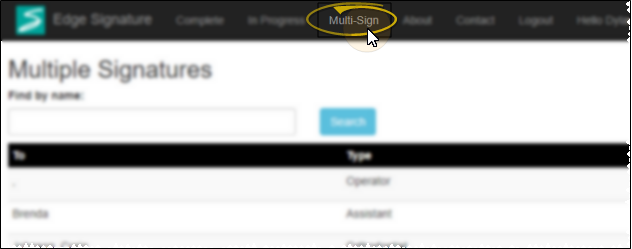
Use Multi-Sign - If you have multiple documents that need your signature or initials, you can choose to process all of them in one session. Open the Multi Sign tab, click Sign beside your name, and provide your signature. (As described in Sign in Progress Documents, above.) When you click Continue, the next document will appear for your signature. Continue until all the documents you need to sign are processed. If a document requires another signature, such as a parent, the document remains in the In Progress tab of the Edge Signature service.
Review Completed Documents - Open the Complete tab of the Edge Signature service to review documents that have all signatures. The list includes the signers' names, the date the document was first merged, and the date the signature(s) were obtained. You also see the patient's next appointment date.
Signed documents will appear in the patient and / or responsible party correspondence history, in PDF format. You can double-click to open the document. To obtain a paper copy, first open the document from the correspondence history, then print it to a printer available to your workstation. See "Patient Correspondence History" for details.

Edge Signature Widget - Use the Edge Signature widget to digitally sign documents, as well as review complete and deleted Edge Signature documents. See "Edge Signature Widget" for details.
Trigger a Workflow - Use the Sign Document Complete workflow trigger to activate a workflow whenever an Edge Signature document has been signed.
View & Edit, Then Sign Option - You can also first view and edit a merged document before adding it to your Edge Signature documents in progress. This feature is especially useful if you need to make changes to the final output before permanently adding it to the patient's record. See "View Mail Merge Documents" for details.
I Can't Digitally Sign a Document - When you merge an Edge Signature document, you must select the Sign merge action in order to sign the document digitally. If you choose a different merge action (i.e. View or Print), you will not be able to use Edge Signature to sign the document. In this case, you can print the document and manually sign as needed, obtaining a paper copy of the document instead. Then, scan the document into the correspondence history. The document will be in the correspondence history twice: Once with the blank signatures, and one with your manual signatures.