Mail Merge Queue
Use the Merge Queue to store mail merge documents waiting to be sent to patients, dentists and other professionals. Depending upon your office protocol, you may require that pending documents be verified before they are completed.
 Add Documents to the Queue - After you select mail merge documents and recipients, click Queue. You will be prompted to select the final output type. The document is then sent to your mail merge queue, rather than completing the merge immediately.
(Tell me more about choosing mail merge documents and recipients)
-
Initiate Mail Merge - Home ribbon bar > Reporting section > Mail Merge. (You might also be able to open this feature from the Quick Access toolbar at the top of your Edge Cloud window.)
-
Choose Document to Merge - Select a document name from your Favorites or Documents list, at the left of the Mail Merge window. (You can also use the Search field to find the document(s) you want to work with.)
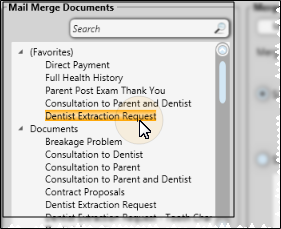
To add or remove a document from your "Favorites" list, simply drag and drop it from the Documents list. Adding a document to "Favorites" does not remove it from the "Documents" list.
-
Choose Recipient(s) - Choose whether to merge the document for all records, a subgroup of records, or a single record. The choices you have for selecting recipients depend on the "selection type" of the document you chose to merge. (See "Create and Edit Mail Merge Documents" for details about assigning document properties.)
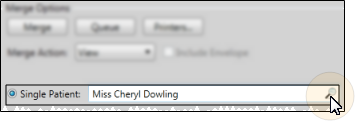
Single record - Select this option to generate the document for an individual record. If a patient folder is open when you initiate mail merge, that patient is the default, and the Mail Merge window tab displays that patient's name for your reference.
You can use the Search field to look for a different patient, if needed. The document's "selection type" property determines whether you will search for a patient, responsible party, or other party, and whether additional information, such as the patient's scheduled appointments, is included in the search.
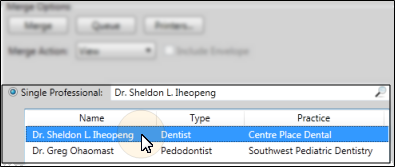
In addition, if you selected a document with the "selection type" property of Professional, Responsible Party, Patient Professional, or Patient Responsible Party, the list of records associated with the active patient appears for you to choose from.
In this example, the default patient is automatically selected. You can click the Search icon to look for a different patient.
This example shows the active patient's professional records, for merging a Professional type letter. The active patient's name remains on the Mail Merge tab for your reference.
Note the difference between 1) a Professional or Responsible Party type letter and 2) a Patient Professional or Patient Responsible Party letter type: When you merge a document for the first letter type, the document will merge for each patient who is associated with the selected professional or responsible party. However, when you merge a document for the second letter type, the document will merge only for the active patient, addressing the professional or responsible party you selected. See "Create and Edit Mail Merge Documents" for details.
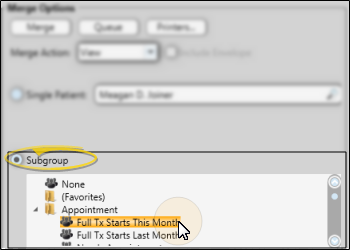
Subgroup -Select this option, then choose the subgroup to send the document to. See "Subgroup Editor" for details about creating subgroups.
View Then Queue Option - You can also choose to view a mail merge document first, then select Edge Cloud Queue from the Add-Ins menu of your word processor to add the document, including any changes you have made, to the queue. See "View Mail Merge Documents" for details.
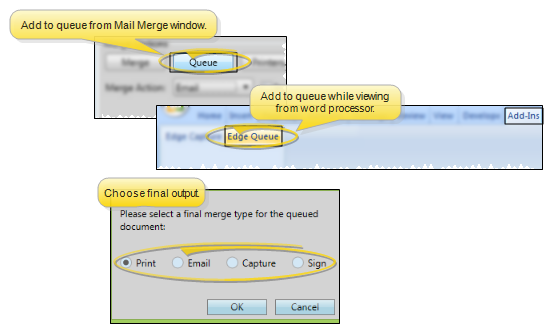
View Merge Action - If you have selected the View merge action, you will be asked to specify the final document output (print, email, or capture) before the document is sent to the queue.
Email Merge Action - If you are emailing the merge document, you can manually attach additional files to the email message when you process the message from your Queue. You cannot do this when you merge and email the document immediately. See "Email Merge Letters" for details.
Sign Merge Action - If you have selected to merge an Edge Signature document, be sure to select the Sign merge action. Then, when you process the document from the Queue, you will choose who should sign the document with the Edge Signature service. If you choose any other merge action, you will not be able to sign electronically. See "Edge Signature" for details.
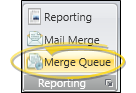
Open the Merge Queue - Home ribbon bar > Reporting section > Merge Queue. (If the icon does not appear on the ribbon bar, click the corner drop down icon (  ) to view all tools available in that section of the ribbon bar. See "Customize Edge Cloud Ribbon Bars" for details.)
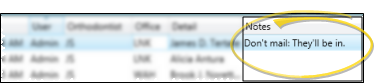
Add Notes - Use the Notes column of the Merge Queue to leave messages regarding the status of pending mail merge documents.
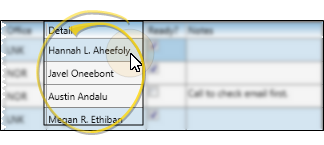
Open Patient Folder - Click a patient name in the Detail column to open that patient folder.
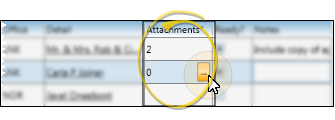
Add / Remove Attachments - (Individual email output only.) If you specified email as a document's final output, you can use the Attachments column to select additional files, such as images or .PDF files, to include with the emailed merge document. These files are in addition to any patient images that are embedded in the mail merge document itself. Also note that this feature is not available when you merge an email document immediately, instead of using the queue.
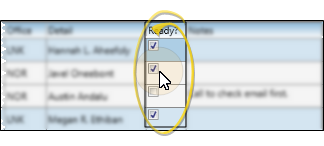
Approve Documents - (Optional.) - Check the Ready field when the document has been approved for completion. This optional feature provides a way for doctors and other authorized persons to review and edit the list of letters selected throughout the day, and check off those that are approved and ready. The office staff then knows they can print and mail (or email) letters that are checked. Not all offices use this feature, so documents can still be processed, even if the Ready field is not checked.
Select Documents to Work With - Click a document name to individually select / deselect that letter. You can use the Shift key to click and select a sequence of letters, or use the Ctrl key to click and select multiple individual letters. You can filter your mail merge queue to include only documents for a specific office, doctor, Edge Cloud user, or "ready" flag. Or, or click Select All and Select None to choose documents. Letters you selected as a subgroup appear as a single document in the list, with no specific name in the Detail column. (You can also use the Search field to find the document(s) you want to work with.)
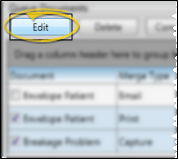
Edit Selected Letters - Click Edit to see the merged results of the selected letters in your word processor. See "View Mail Merge Documents" for details about your viewing options.
Correspondence History Capturing Option - If the Disable capturing to correspondence when printing a Merge Queue document being editedoption of your General User Options is enabled, mail merge documents that you send to the Merge Queue, then edit and print while in your word processor, will not be added to any correspondence history. You can save any changes you make to the output, then return to the Merge Queue to print or email the letter. At that time, the document will be recorded in the appropriate correspondence history. This provides a way for you to review and approve any changes made to mail merge documents before they are permanently added to correspondence histories.
Alternately, if the Disable capturing option is disabled, mail merge documents that you edit and print from the Merge Queue will be immediately added to the correspondence history and removed from the queue list. This eliminates the extra step of returning to the Merge Queue to print / email edited merge documents, but does not provide for review and approval of the changes.
Also note that while you can capture a merge document that you view directly from the Mail Merge feature, you cannot capture a letter that you view & edit from the Merge Queue.
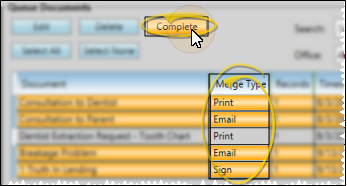
Complete Selected Letters - Click Complete to print, email, or capture the selected document(s), according to the merge action you selected when you first added the document to the Merge Queue. As letters
are completed, they are recorded in the appropriate correspondence
histories and removed from the queue. When you complete a document with the Sign merge type, you will be asked to specify who should electronically sign the document. It is then added to the Edge Signature service, waiting for the required signatures. (See "Edge Signature" for details.)
Printer assignments are available from the Mail Merge selection window, and not from the queue window: To confirm that the correct printers are selected for each document type you will be printing, you must open the Printers option from your Mail Merge window. See "Print Mail Merge Documents" for details.
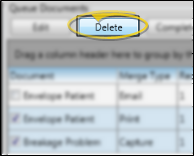
Delete Selected Letters - Click Delete to remove the selected merge letter(s) from your Merge Queue. You must confirm your action before continuing. This feature is generally only needed when a document was incorrectly added to the queue: Documents are removed from the queue automatically after being printed or emailed.
Adjust Columns - You can adjust both the width and location of the columns in the window. All columns return to the defaults when you exit and re-enter.
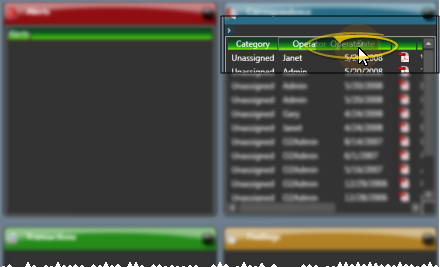
Adjust Column Width - Click the bar between two columns to reallocate the column space. Be aware that it is possible to adjust a column to be so narrow that you no longer see it.
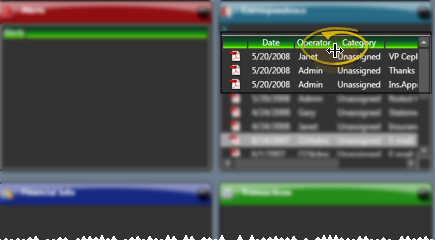
Change Column Order - Click a column heading and drag it to a new location within the window. Other columns adjust accordingly.