Patient Treatment Plan & Sequence
Use the patient Treatment Plan and Treatment Sequencing tools to track the proposed and completed sequence of treatment for your patients, as well as record medical concerns and other significant issues regarding treatment choices. You can sequence a patient's future appointments, and plan customized orthodontic and/or dental procedures for each of those appointments.
 Open Treatment Plan Tab - Open the patient folder and select the
  Treatment Plan tab in the patient folder header.
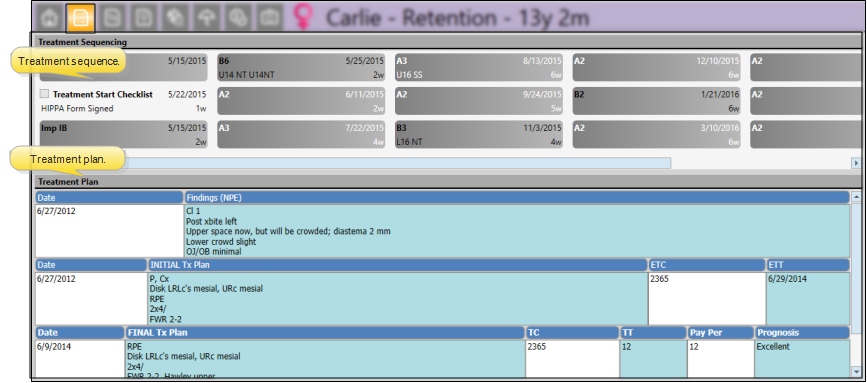
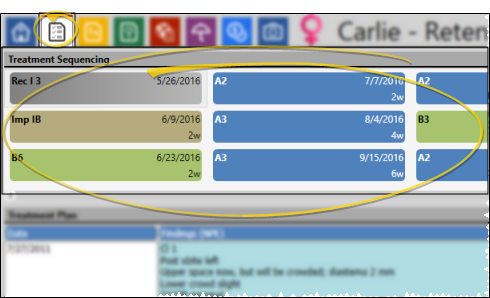
Treatment Sequencing - The patient's Treatment Sequence, or list of proposed and completed appointments, appears at the top of the Treatment Plan page of the patient folder. Use the scroll bar at the bottom of the sequence section of the window to view additional appointments and checklists, if needed. Right-click to edit or process an item, or to change the sequence. You can integrate treatment sequencing with the patient's findings responses, treatment chart records, and needs appointment list, and view the sequence while scheduling patient appointments.See "Treatment Sequence" for details.
Treatment Plans - The patient's treatment plan records appear below the treatment sequence. Treatment plan records are listed underneath the style you selected when creating the record, so
you accumulate a categorized and chronological record of planning activity.
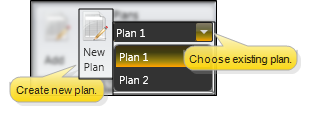
Select Plan to View & Edit - If the patient has multiple treatment plans, you can select which one you want to view and work with.
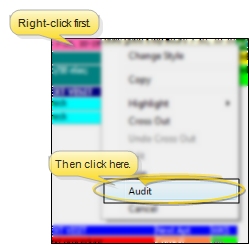
Audit Record - Right-click any record and select Audit to review the operator, date, and time the record was created, as well as when it was last changed.
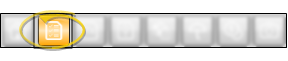
Print Treatment Plan - Click the  button on the File ribbon bar, or Quick Access toolbar to print the currently displayed data. You can optionally include the treatment sequence in the print out.
Add & Edit Treatment Plan Records - Use the treatment plan to record medical concerns, prepare the treatment course, and list other issues related to the treatment planning process for your patients. You can add records to any section of the treatment plan at any time, and create multiple plans per patient. You might use multiple plans, for instance, to separate phases of treatment, or to offer multiple courses of treatment to your patients. See "Add Treatment Plan Records" for details.
Copy Treatment Plan Text - Right-click a treatment plan column and select Copy to copy the text to your clipboard. You can then paste the text into another Edge Cloud field, or a text application (such as a word processor or email message).
Delete Record - Select a record that has been created within the past 24 hours, and click  Delete on the Treatment Chart or Treatment Plan section of the Patient ribbon bar, or right-click the record and select Delete. After 24 hours, the record becomes permanent.
Work with Patient Folders - Edge Cloud includes several tools for working within your patient folders, regardless of which page is currently selected.
Patient Information Panel - The Patient Information Panel contains patient treatment, biographical, and contact information. You can personalize the panel to include additional widgets you use most often. The panel always appears on the left side of the patient's Home page. You can optionally hide / show the panel on all other patient folder pages. See "Patient Information Panel" for details.
Office Color Code - The background of the patient folder header is color-coded according to the office assigned to the patient. See "Set Up Office Locations" for details about assigning the color.
Resize Header - Click the bar between the patient folder header and the information panel to change the space allotted to each section.
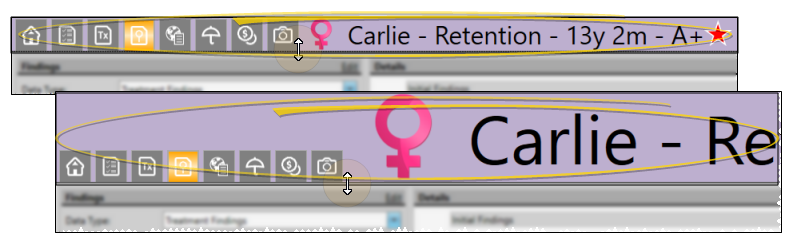
The patient folder header displays the patient nickname, status abbreviation (in the color determined by your Status editor), age, and optionally a gender icon (enabled / disabled in your Visuals user options), as well as the patient tag and visual tag you have assigned to the patient, if any. You use the tabs at the left of the header to move from one patient folder page to another. You can resize the header by dragging the splitter bar between the header and the patient folder window to change the space allotted to each section. In addition, you can hover over the nickname to view a tooltip of the patient's phonetic name. The background of the patient folder header is color-coded according to the office assigned to the patient.
Reposition / Close Tabs - Right-click the page header to close, reposition, rearrange, or resize the window. Tell me more...
Re-Open Patient Folder - Click  Other Actions then select
  Reopen from the Patient section of the Patient ribbon bar to open a second session of the patient folder. If you have multiple screens, you can then drag one of the folder tabs to another screen. This feature is particularly useful for systems with dual monitors that want to keep the patient folder information available while viewing images (or any other page of the patient folder) on another screen.
Refresh - Click  Refresh on the Quick Access toolbar (or press F5 on your keyboard) to refresh the data on your screen.