Manage Office Contacts
Use the Office Contacts editor to set up and maintain the list of people, agencies, and other office resources that are not necessarily involved with your patients' treatment and care.
Office Contacts Security - Your security model must have read-only or full access to the General Administration > Office Contacts Editor security group rights to be able to view and / or change office contact records.
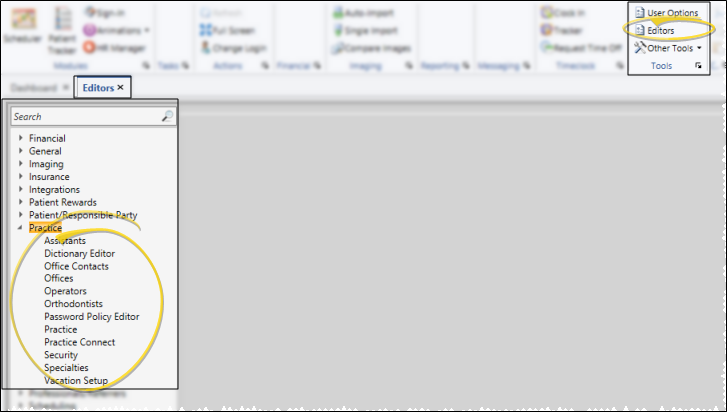
 Open Office Contacts Editor - Home ribbon bar > Tools section > Editors > Practice >Office Contacts. (You can also use the Search field to look for the editor you want to work with.)
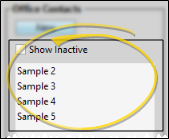
Select Existing Record - Your list of existing records appears at the left. Scroll through the list, and click the record to work with. Then review and edit the details. If not all your records appear in the list, you can enable the Show Inactive option to see them.
Create a New Record - Click New, then enter the details for your new record.
Office Contact Details - Select a record to work with, then add and change the details as needed.

Name, Greeting, Company Name - Enter the name of the contact, the preferred greeting name, and the company name. The greeting field is primarily used for mail merge documents:
Enter the greeting as
you would like to see it in the salutation of a letter.
Address, Phone, Email - Enter the address, phone numbers and email address of the party.
Inactive / Active Toggle - Once you create a record, you cannot delete it. You can, however, flag it Inactive. Records you flag as Inactive are not available for general use, but they remain in your system for reporting and other data collection needs. In addition, you can toggle records back to Active whenever needed.
Custom Fields - Use the User Defined Fields editor to set up the captions, or names, of unique fields available in several types of records, including your Patient and Responsible Party records, your Employer, Assistant, Dentist, Referrer, and Insurance editors, your Office Contacts list, and your patient identification fields. You can use these fields to track any sort of information you deem necessary. In
addition to regular text, you can type or paste a URL (Internet
hyperlink) into the field. Then, simply double-click the link to open that web page. (An active Internet connection is required for this feature to work.) See the "Office Contacts User Defined Fields" in your User Defined Fields editor for details.
Print Quick Label - Click the  button beside the name field or in the ribbon bar to print a Quick Label for this party. See "Office Contacts Quick Labels" for details.
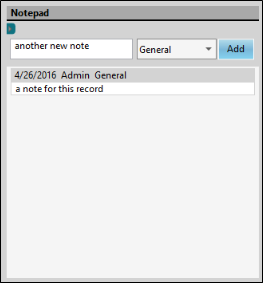
Notepad - Use the notepad to type free-form notes. You can categorize your notes, then use the filter to view only the categories of notes you need to see. In addition, you can use entries from the internal Edge Cloud dictionary, as well as your personal and shared dictionaries, to auto-complete your text.
View Notes - All notepad entries are date stamped automatically, and listed by date, user, and category. Newer entries appear at the top of the notepad. Use the  filter icon to view only certain types of notes.
Filter Notes to Display - Click the Filter icon at the left of the frame to select the categories of items to display. When you are finished, move your cursor off the filter selection box to close it. Edge Cloud remembers filter settings by user and page: So, no matter what workstation you use, or which patient you are working with, your favorite filters go along with you. See "Set Up History Categories" for details about setting up your categories.
Add a Note - Type your note in the text field at the top of the notepad window, and select a category from the drop down list. You can use the Notepad Font section of the ribbon bar, as well as standard word processing keyboard shortcuts (i.e. cut, copy, paste, bold, underline, italics) to enhance the text. As you type, your Edge Cloud dictionaries provide suggestions to auto-complete the text. If your text is not recognized, you may right-click for spelling suggestions, or to add the text to a dictionary for later use. When you are finished, click Add. The date, your Edge Cloud user name, and the assigned category are inserted automatically, and the new note is added to the beginning of the notepad. (See "Set Up History Categories" for details about creating your notepad category list.)
Edit a Note - Right-click a note and choose Edit, then make your changes to the text. As you type, your Edge Cloud dictionaries provide suggestions to auto-complete the text. If your text is not recognized, you may right-click for spelling suggestions, or to add the text to a dictionary for later use.You can also right-click to access a basic text editing menu, or use standard keyboard shortcuts. You cannot change the category assigned to the note.
Delete a Note - Right click a note, and choose Delete to remove it from your Edge Cloud system.
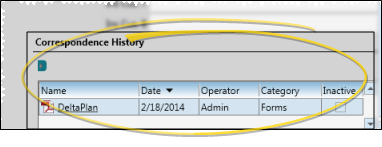
View Correspondence History - View the Correspondence History section of the window to review the documents you have saved for this party.
Use Correspondence History - You can filter the correspondence history items you wish to see, open and view items, and scan and drag new items into the history.
Filter Items to Display - Click the Filter icon at the left of the frame to select the categories of items to display. When you are finished, move your cursor off the filter selection box to close it. Edge Cloud remembers filter settings by user and page: So, no matter what workstation you use, or which patient you are working with, your favorite filters go along with you. See "Set Up History Categories" for details about setting up your categories.
Inactive / Active Toggle - Once you create a record, you cannot delete it. You can, however, flag it Inactive. Records you flag as Inactive are not available for general use, but they remain in your system for reporting and other data collection needs. In addition, you can toggle records back to Active whenever needed.
View a Document / Video - Click the file name to open a document or run a video. You must have an appropriate viewing / editing tool, such as Adobe Acrobat, installed to be able to open files.
Drag Document / Image / Video - You can drag and drop almost any type of digital file into a correspondence history for archive and reference purposes. Files you may want to drag and drop include .PNG graphic files, .PDF document files, .MP3 sound files, and .MP4 video files. See "Drag & Drop Documents into Correspondence History" for details.
Scan Document - Use the Scan tool to send a digital copy of any document from your scanning device to a correspondence history.See "Scan Documents" for details.
Save Changes - Click  Save in your Quick Access toolbar or File ribbon bar (or press Ctrl+S on your keyboard) to save any changes you have made.

Editor History - When you open more than one editor without leaving the Editors window, a history of those editors appears at the top of your screen. You can click a name in the history to return to any previously opened editor, easily going back and forth between editors. This is useful, for example, when you are working with editors that are related to one another, such as the Treatment Chart Style editor and the Treatment Chart List editor.