The Quick Reports feature provides one-click access to viewing and/or printing a report with a specific set of report options.
How to Get Here
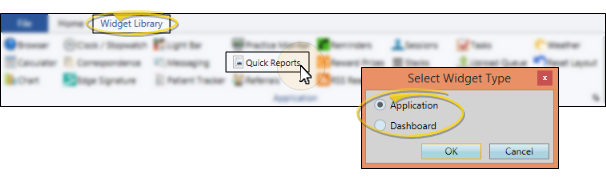
![]() Open Quick Reports - You can open this feature in multiple ways: Use the method that's most convenient for you.
Open Quick Reports - You can open this feature in multiple ways: Use the method that's most convenient for you.
 Reporting > Quick Reports section.
Use This Feature
![]() Create a Quick Report - You can create a Quick Report from any Edge
Create a Quick Report - You can create a Quick Report from any Edge

 Create in the Quick Report ribbon bar to add to your report to the Quick Reports list.
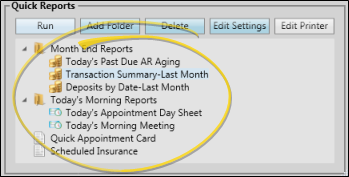
![]() Run a Quick Report - Click to select a name from the Quick Report list in your reporting window or widget, then click Run. Or, double-click the name. The report is generated with the saved options. See "Run Reports" for details. If you change the report options and re-view the results while the report is still on your screen, those options are not saved in your Quick Report: You can, however, use the Edit Settings feature, described below, to change the default report options.
Run a Quick Report - Click to select a name from the Quick Report list in your reporting window or widget, then click Run. Or, double-click the name. The report is generated with the saved options. See "Run Reports" for details. If you change the report options and re-view the results while the report is still on your screen, those options are not saved in your Quick Report: You can, however, use the Edit Settings feature, described below, to change the default report options.
When you run a patient form from the Home or Patient ribbon bar, that form will always use Quick Report settings.
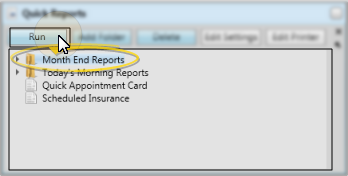
![]() Run a Group of Quick Reports - Click a folder name in your Quick Reports list, then click Run. All the reports in the folder will be generated in sequence with their current quick report settings.
Run a Group of Quick Reports - Click a folder name in your Quick Reports list, then click Run. All the reports in the folder will be generated in sequence with their current quick report settings.
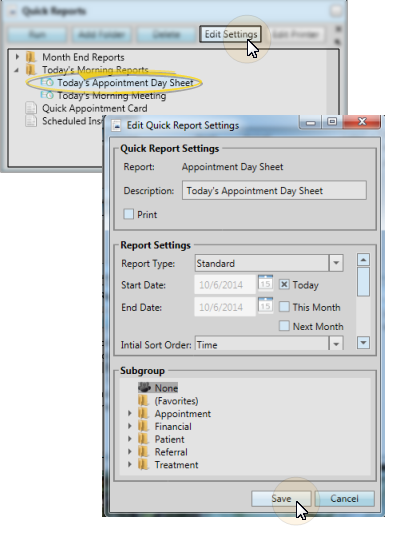
![]() Edit Quick Report settings - Click the report name, then click Edit Settings. You can then change any of the options available for that report, including whether to open the viewing window or simply print the report when you run it. When finished, click Save at the bottom of the editing window to update your Quick Report with the new settings.
Edit Quick Report settings - Click the report name, then click Edit Settings. You can then change any of the options available for that report, including whether to open the viewing window or simply print the report when you run it. When finished, click Save at the bottom of the editing window to update your Quick Report with the new settings.
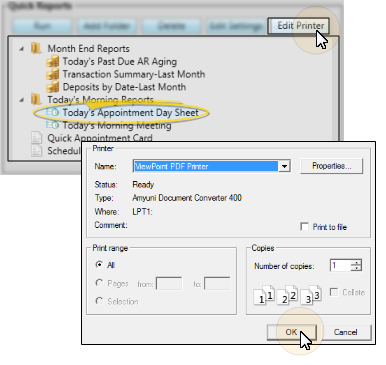
![]() Edit Report Printer - If you have created a Quick Report that skips the viewing window, and simply prints to a specified printer, you can change the printer to use before running the report. Click the report name, then click Edit Printer. You can now select a new default printer for that Quick Report. (If the Quick Report is not set up to print without first opening the viewing window, the Edit Printer option is not available.)
Edit Report Printer - If you have created a Quick Report that skips the viewing window, and simply prints to a specified printer, you can change the printer to use before running the report. Click the report name, then click Edit Printer. You can now select a new default printer for that Quick Report. (If the Quick Report is not set up to print without first opening the viewing window, the Edit Printer option is not available.)
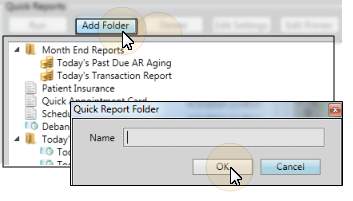
![]() Create & Manage Folders & Files - If you have many Quick Reports, you might find it helpful to organize them into folders. To create a folder, click Add Folder. Type a name for your folder and click Ok. You can now drag and drop Quick Reports into the folder, as well as drag folders and files to re-order them. Note that to generate all the reports in a folder, you can simply click the folder name, then click Runas described above,
Create & Manage Folders & Files - If you have many Quick Reports, you might find it helpful to organize them into folders. To create a folder, click Add Folder. Type a name for your folder and click Ok. You can now drag and drop Quick Reports into the folder, as well as drag folders and files to re-order them. Note that to generate all the reports in a folder, you can simply click the folder name, then click Runas described above,
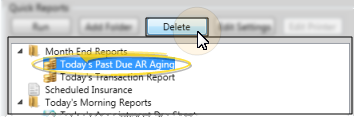
![]() Delete a Quick Report / Folder - Click either the report name or folder to remove, then click Delete. If you delete a Quick Reports folder, all report selections inside that folder are deleted as well.
Delete a Quick Report / Folder - Click either the report name or folder to remove, then click Delete. If you delete a Quick Reports folder, all report selections inside that folder are deleted as well.
More Information
User Settings / Assign Options Tool - These settings are specific to you: Other
![]()
www.ortho2.com │ 1107 Buckeye Ave. │ Ames, IA 50010 │ 800.346.4504 │ Contact Us
Chat with Software Support │ Chat with Network Engineering │ Chat with New Customer Care
Remote Support │ Email Support │ Online Help Ver. 11/11/2019


