Use the Reporting window to select and generate reports. You may choose from any available Edge
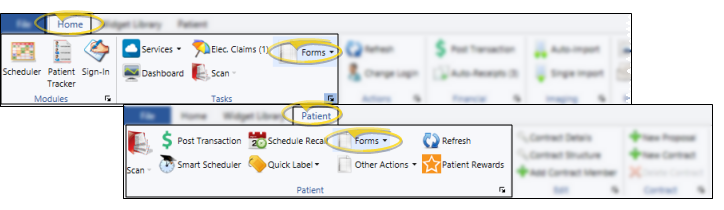
![]() Running Default Forms - You can also use the Forms icon on the Home and Patient ribbon bars to run certain patient forms. However, these options will run your default or quick report formats only: Additional versions of the form will not be available to you.
Running Default Forms - You can also use the Forms icon on the Home and Patient ribbon bars to run certain patient forms. However, these options will run your default or quick report formats only: Additional versions of the form will not be available to you.
Get Started
Assign Email Merge Documents - If you will be emailing forms to your patients and parents, you must use your Reports and Forms editor to assign the mail merge document to use as the text of your email message. See "Set Up Reports and Forms" for details.
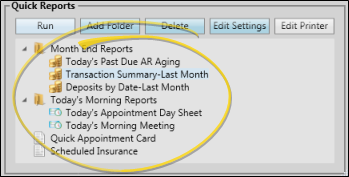
Run Reports and Forms
-
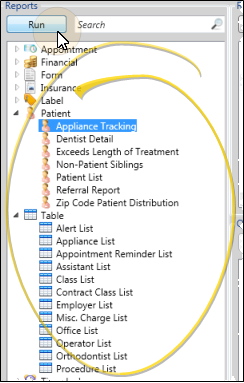
 Open the Reporting Window - Home ribbon bar > Reporting section > Reporting. (You might also be able to open this feature from the Quick Access toolbar at the top of your Edge
 -
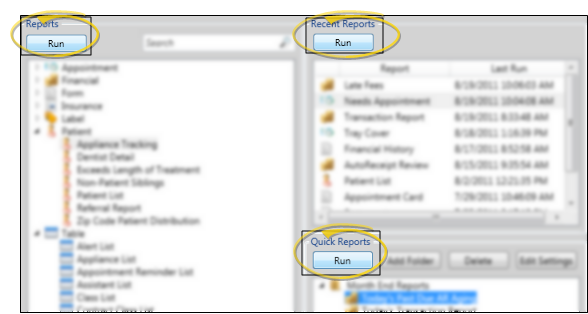
Choose the Report or Form to Generate - Select from all Edge
-
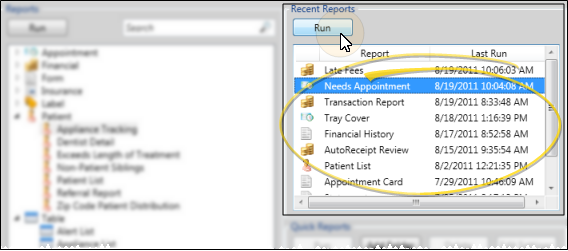
Run the Report or Form - Click the report name you want to work with and click the Run button in that section of the window, or double-click the report name to run it.
-
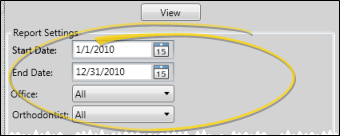
Select Report Options - Select the options to use for choosing records and generating this report. Choose carefully, as your selections will affect which data is included in the report.
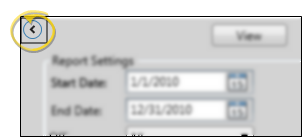
 Show/Hide icon in the upper left corner of the Reporting window.)
 -
View the Report - Click View to generate the report to your screen. (This step is bypassed when you run a Recent Report or a Quick Report.)
-
Choose Other Options - With the report still showing on your screen, you can choose different report options, then click View to re-generate the report with the new options. (If you cannot see your options, you may need to click the Show/Hide icon to show them.)
-
Report Output - Use the toolbar at the top of the report window to zoom the display, view additional pages, print the report, and more. Be aware that not all output choices are available for all reports and forms. See "Use Report Results" for details.


More Information
Assign Correspondence History Categories to Forms - Use the History Category
Automate Reports - Use the Run Report workflow activity to generate a specific report whenever the activity is triggered by a workflow. See "Workflow Activities" for details.
![]()
www.ortho2.com │ 1107 Buckeye Ave. │ Ames, IA 50010 │ 800.346.4504 │ Contact Us
Chat with Software Support │ Chat with Network Engineering │ Chat with New Customer Care
Remote Support │ Email Support │ Online Help Ver. 11/11/2019


