Reports and Forms Editor
Use the Reports and Forms editor to select the default form to use when generating forms such as statements and insurance forms, and to select which mail merge document to use as the message text when you email certain forms to your patients and parents. You can assign one set of default forms for your entire practice, or select different forms for each office in your practice. This is especially useful for practices that need to generate insurance forms and statements for offices in both the United States and Canada.
These settings are system-wide: Any changes you make to these settings are immediately applied to all machines and users in your system.
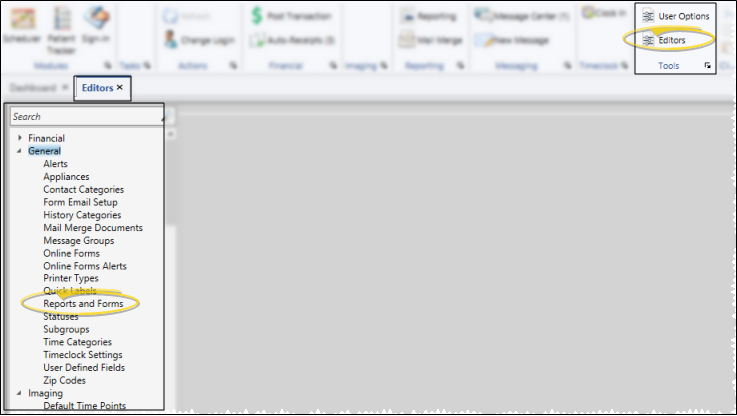
Select Editors from the Tools section of the Home ribbon bar. Then, from the General section, open the Reports and Forms editor. (You can also use the Search field to look for the editor you want to work with.)
Use the Report Email Merge Documents section of the editor to select the merge document to use as the message text when you email certain forms to your patients and parents.
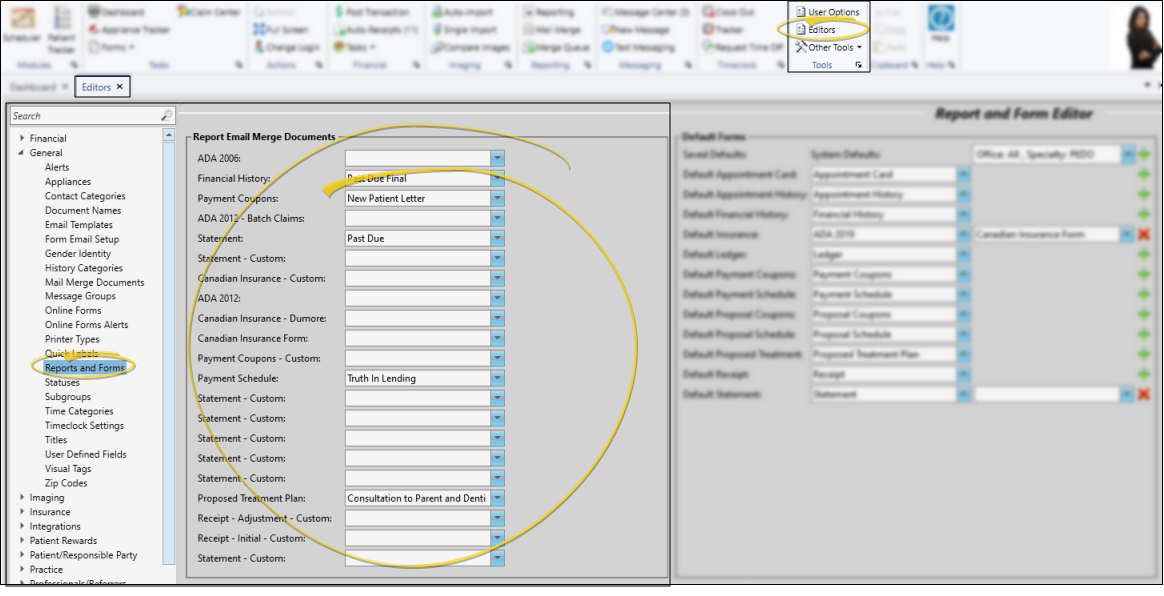
Mail Merge Document Requirements - You can assign mail merge documents with the selection type of "Contract" to financial forms (such as the Financial History, Statement, and Payment Coupons), and mail merge documents with the selection type of "Insurance Detail" to the insurance forms. In addition, the mail merge document you assign to a form must specify the Email Type in the Mail Merge Documents editor in order for this feature to function properly. (See "Mail Merge Document Editor" for details about document selection and email types.)
Results - When you email a form, the name of the assigned mail merge document will be the email subject, the text of the mail merge document will be the email message, and the form will be sent as a PDF attachment. In addition, the mail merge document and the form will be entered as separate items in the patient's correspondence history.
Use the Default Forms section of your Reports and Forms editor to select the default format to use for paper forms. This is the format that will be selected when you run the form from the Forms option of the Home or Patient ribbon bar. If you have purchased customized forms, you may choose your form as the default. If needed, you can set up different default forms for individual offices and specialties in your practice.
Canadian Insurance Options - The additional information fields required for Canadian insurance forms are only available in the patient folder when the Default Insurance field of your Reports and Forms editor is assigned to a Canadian insurance form.
Assign System Defaults
For each form type, choose the form you want to run automatically when you select a form from the Forms menu of the Edge Cloud ribbon bar. If you have purchased a custom form, your form will be included in the drop down list, and you can select it as your default. (When you run a form from the Edge Cloud Reporting menu, all formats are available.)
Set Up Multiple Defaults
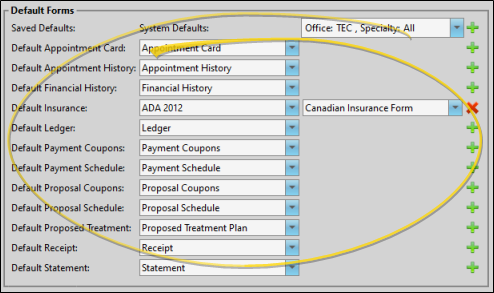
In certain cases, you might need to assign one form as the default for some of your offices or specialties, and another form for other offices / specialties. For example, if you practice in both the United States and Canada, you can set up the Default Insurance form to an "ADA" version for your US offices, and the "Canadian Insurance" form for your Canadian offices. Or, if you have Edge Specialist, you might assign different Default Statement forms for each specialty.
To set up multiple defaults, first click the green " " at the top of the System Defaults list, and choose the office / specialty you want to work with. Then click the green "" beside each form that needs a different default format for this office / specialty, and select that form. You can repeat this process for each office / specialty that needs a different form from your system default. Any office / specialty that is not specifically defined will run the form assigned as your system default.
When you run a form from the Forms section of the ribbon bar, the form that matches the one assigned to the patient's office / specialty will be generated.
Click  Save in your Quick Access toolbar or File ribbon bar (or press Ctrl+S on your keyboard) to save any changes you have made.