Scan Documents
Use the Scan tool along with your digital scanner to make an electronic image of any picture or document, and store that image in a correspondence history.
(Optional.) Choose which scanning device to activate automatically when you initiate a document scan from this machine. (See "Scanner User Options" for details.)
-
Prepare Your Scanner - Place the item to be scanned (or the first page of a multi-page document) in your scanner, and be sure the device is on and ready.
-
 Initiate Scan - Click
  Scan from the appropriate ribbon bar to scan the document using the current settings of the selected scanner.
Patient Correspondence History - Click
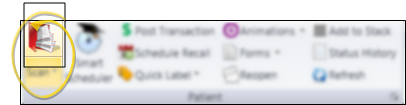
 Scan from the Patient section of the Patient ribbon bar. (An Edge Cloud patient folder must be open for the Patient ribbon bar to be available.)
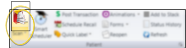
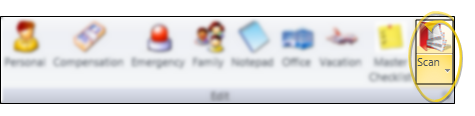
HR Manager Employee Record - Open an HR Manager employee record. Then click
Scan from the Edit section of the Employee Information ribbon bar.
Responsible Party or Professional - Open the responsible party or professional page. Then click
Scan from the Responsible Party or Professional ribbon bar, 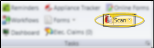
Insurance Company, Insurance Detail, or Office Contacts - Open the insurance company or office contacts record. Then click
Scan beside the Correspondence History section of the window..
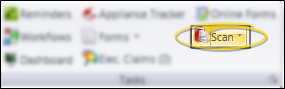
Practice Correspondence Widget - Open your Edge Cloud dashboard. Then click
Scan from the Tasks section of the Home ribbon bar
Scanning Options - You can optionally click the arrow beside the
Scan icon, and choose Scan Manual to manually select your scanner settings. or Scan Text to scan the document in black-and-white, regardless of the document's original colors. -
Select Scanner - Depending on your Scanners User Options settings, you may be prompted for the scanning device to use before the scan will begin.See "Scanner User Options" for details.
-
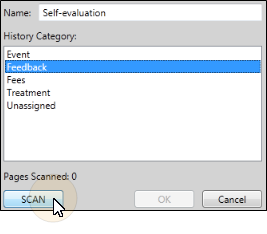
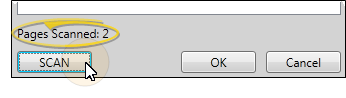
Document Details - Enter the details for the document you want to scan, then click SCAN
Document Name - Type a descriptive name for the document. Or, you can click the drop down arrow to select a description from your Document Name editor. Typed names are used for this scan only: They are not saved in the editor for future use.
Category - Choose a category for this document, from

-
Select Settings & Start Scan (Required only when using the Scan Manual option.) - Select the settings you want to use, and scan the document according to the instructions for your local scanning device.
-
Scan Additional Pages - After your scanning device has digitized the current page, you can insert another page in the scanner, and click SCAN to continue scanning a multiple-page document as needed. The scanning window indicates the number of pages that have been scanned into this document so far.
-
Save and Exit - When you have scanned all pages, click Ok at the bottom of the scanning window to exit. The document is immediately added to the correspondence history.