Home ribbon bar >  Reporting. (You might also be able to open this feature from the Quick Access toolbar at the top of your Edge window.)
Click Reporting from the Reporting section of the Home ribbon bar.
Use the Reporting window to select and generate reports. You may choose from any available Edge report, or select a report you have run recently. With a report still open on your screen, you can change the report options to obtain different results, and save or print the report.
Home ribbon bar > Reporting. (You might also be able to open this feature from the Quick Access toolbar at the top of your Edge window.)
Click Reporting from the Reporting section of the Home ribbon bar.
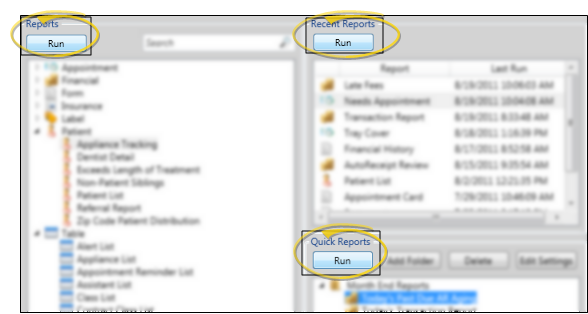
Choose the report to generate- Select from all Edge reports, your Recent Reports list, or choose a Quick Report. (You can also search for the report you want to work with.)
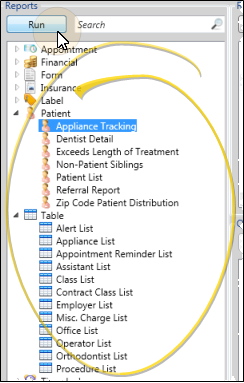
All Edge reports are listed on the left-hand side of the window, grouped into categories. Click the arrow beside a category name to expand / collapse that category. You can hover over a report name to see a tooltip that describes the purpose of that report.
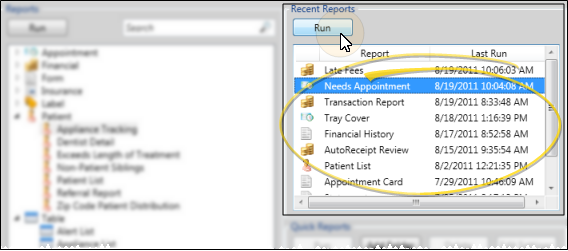
Recent reports are listed on the upper right-hand side of the window, with the most recently run report listed first.
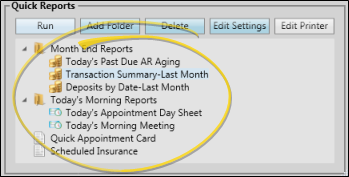
Quick reports are listed on the lower right-hand side of the window, under your Recent Reports list. The Quick Reports feature provides one-click access to viewing and/or printing a report with a specific set of report options. Your Quick Reports may be organized in folders. You may need to expand a folder to see the report you want. See "Use Quick Reports" for details.
Run the report - Click the report name you want to work with and click the Run button in that section of the window, or double-click the report name to run it.
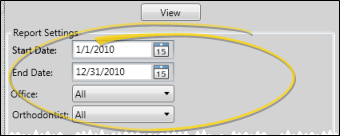
Select report options - Select the options to use for the report, such as the dates to include, records to include, and more, depending on the type of report you have selected. The last settings used to generate a general Edge report or report from your Recent Reports list are the defaults. Quick Reports are automatically generated to your screen with their saved options, bypassing this step. See "Reports" for details about the options available for each report.
View the report - Click View to generate the report to your screen. (This step is bypassed when you run a Recent Report or a Quick Report.)

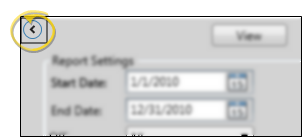
Show / hide report options - Click  in the upper-left corner of the window to hide / show the report options. When the options are hidden, the report expands to fill the entire window. When you run a Quick Report, the report options are hidden initially.
Choose other options - With the report still showing on your screen, choose different report options. Then click View to re-generate the report with the new options. (If you cannot see your options, you may need to click to show them, as described above.)
Zoom, print, export, capture, or e-mail your report - Use the toolbar at the top of the report window to zoom the display, view additional pages, print the report, and more. See "Navigate, Print, & Export Report Results" for details.

Assign Correspondence History categories to forms - Use the History Category editor to set up the categories for sorting and filtering the documents recorded in the correspondence histories and notepads of your patients, responsible parties, professionals, employees, and your practice. See "Set Up History Categories" for details.
Run Report workflow activity - Use the Run Report workflow activity to generate a specific report whenever the activity is triggered by a workflow. See "Set Up Workflows" for details.
Reposition / Close Tabs - Right-click the page header to close, reposition, rearrange, or resize the window. Tell me more...
 │
│
Ortho2.com │1107 Buckeye Avenue │ Ames, Iowa 50010 │ Sales: (800) 678-4644 │ Support: (800) 346-4504 │ Contact Us
Remote Support │Email Support │New Customer Care │ Online Help Ver. 8/3/2015


