Use the Workflows editor to create and edit your workflows, the series of actions that you want to initiate whenever an event occurs in Edge.
Home ribbon bar > Editors > Workflows > Workflows. (You can also search for the editor you want to work with.)
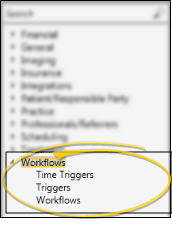
Work with existing workflows - Click to select the workflow you want to edit. You can now edit the workflow name, toggle the Inactive flag, and work with the activities assigned to the workflow, described below.
If the workflow you want to edit is not in the list, enable the 
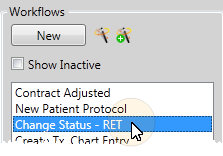
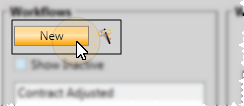
Show Inactive option to be sure both active and inactive workflow records are listed.
Create a workflow with the Workflow Wizard - Click the
Workflow Wizard icon, then choose an activity you would like to initiate with this workflow. After defining the activity properties, you return to the Workflow editor where you can further define it.
Click Workflow Wizard:
Choose an activity.
Define the properties. The properties available depend upon the type of activity you selected. Note that certain activities have properties that are not available from the wizard, and must be set up directly from the Workflow editor. See "Set Up Workflow Activity Properties" for details.
Save your workflow.
Manually create a workflow - Click New, then enter the workflow details, described below.
Workflow details - A workflow can be as simple as a single-step activity, or it can contain a complex system of conditions and activities, depending on your practice needs.
Name - Be sure your workflow name is descriptive enough so you know its purpose as you assign it to triggers (See "Workflow Trigger Editor" for details). Note that when you use the Workflow Wizard, the name defaults to the activity you chose to include in the workflow.
Inactive / active toggle - Once you create a workflow, you cannot delete it. You can, however, flag it Inactive. Inactive workflows that are already assigned to triggers will remain in effect. However, you will not be able to assign an inactive workflow to a new trigger.
Add an activity using the wizard - Click the 
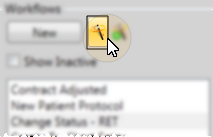
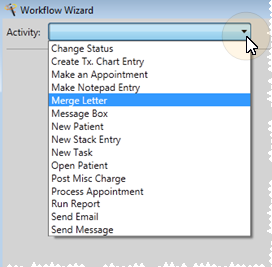
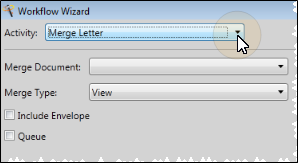
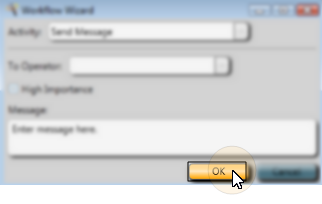
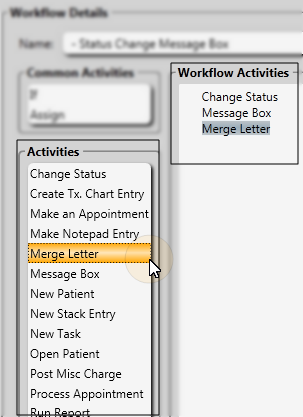
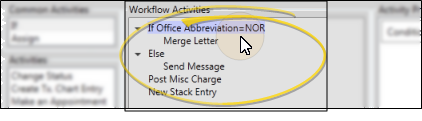
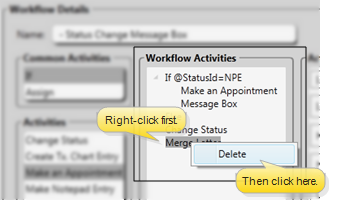
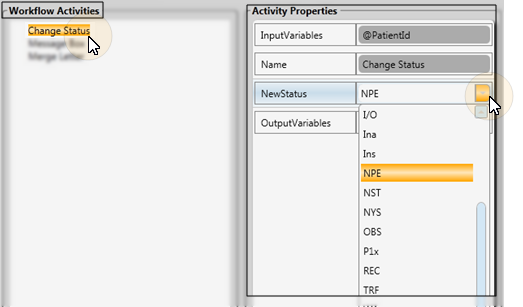
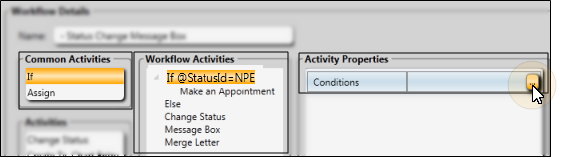
Add Activity wizard, then choose the activity you would like to add to the selected workflow. After you define the activity properties, you return to your Workflow editor window where you can further define your workflow.
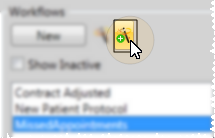
Click Add Activity:
Choose an activity.
Define the properties. The properties available depend upon the type of activity you selected. Note that certain activities have properties that are not available from the wizard, and must be set up directly from the Workflow editor. See "Set Up Workflow Activity Properties" for details.
Save your workflow.
Manually add an activity - Drag your choice from the Activities list onto the Workflow Activities section of the window. You can then define the activity properties at the right side of the window, described below.
Re-order activities - You can drag your Workflow Activities within the list to re-order them as needed. This is especially important in more complex workflows.
Delete an activity - Right-click an item in the Workflow Activities window, and select Delete (or, click to select the activity and press the Delete key on your keyboard). Note that you cannot delete workflows themselves, but you can flag them as Inactive.
Activity Properties - Use the Activity Properties, listed at the right side of the Workflow editor window, to specify how you want an activity to function when it is initiated by a workflow trigger. The properties available depend on the type of activity you are working with. While you can change many of the properties as needed, certain properties that are required for the activity to function are set up by your Edge system, and cannot be changed by you. See "Set Up Workflow Activity Properties" for details about the settings you have available for each activity.
Conditional elements - Use the If conditional element to test patient data. You can then trigger different activities based on whether or not the patient meets the criteria. See "Set Up Workflow Conditional Elements" for details.
Variable assignments - Use the Assign conditional element to define the contents of a variable for use within a specific workflow activity. See "Assign Workflow Variable Contents" for details.
Save Changes Click
Save in your Quick Access toolbar or File ribbon bar (or press Ctrl+S on your keyboard) to save any changes you have made.
Assign triggers - Use the Trigger editor to tell Edge which workflow to initiate whenever a certain action or event occurs. See "Workflow Trigger Editor" for details.
Status workflows - Use the Statuses editor to assign a workflow to be triggered whenever you update a patient's status. See "Set Up Status List" for details.
Appliance workflows - Use the Appliances editor to assign a workflow to be triggered whenever you flag an appliance as Sent or Received in your Appliance Tracker. See "Set Up Appliance & Destination Lists" for details.
Procedure - specific workflows - Use the Procedure editor to assign a workflow to be triggered whenever you process an appointment for a specific procedure. See "Set Up Procedure List" for details.
Ortho2.com │1107 Buckeye Avenue │ Ames, Iowa 50010 │ Sales: (800) 678-4644 │ Support: (800) 346-4504 │ Contact Us
Remote Support │Email Support │New Customer Care │ Online Help Ver. 8/3/2015