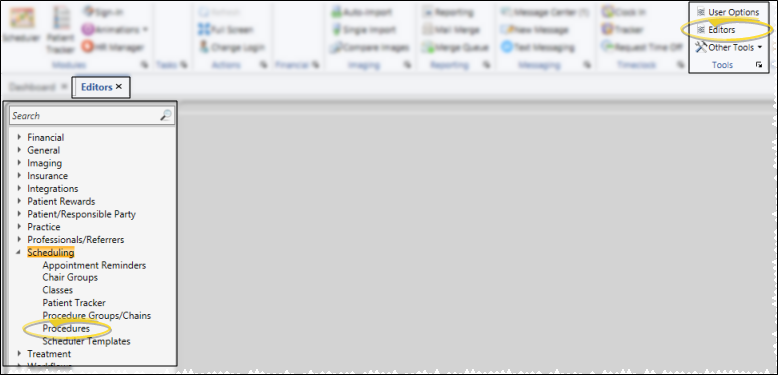
 Editors > Scheduling > Procedures. (You can also search for the editor you want to work with.)
Use the Procedure
Home Ribbon Bar - Tools Section > Editors > Scheduling > Procedures. (You can also search for the editor you want to work with.)
Click Editors from the Tools section of the Home ribbon bar.

Select Scheduling in the list at the left, and choose the Procedures option.
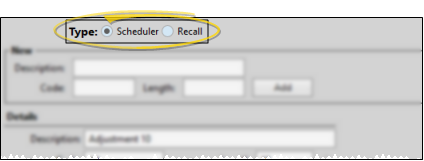
Type of procedure to work with -
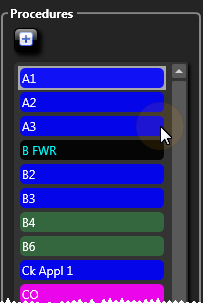
Choose Record to Work With - Your list of existing records appears at the left. Click the record to work with. The details for that record appear at the right.
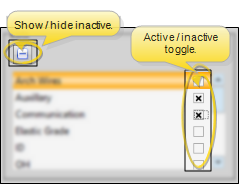
Display Active / Inactive Records - You can choose whether to include inactive records in your list.  icon at the top of the window
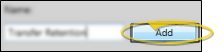
Create New Procedure - Be sure the appropriate procedure type is selected at the top of the window (described above). Then, type a procedure code (not necessarily the full description) and click Add. You can then edit your new procedure to complete the details. (Note that once created, you cannot change whether the procedure is for Scheduler or Recall appointments.)
Procedure Details- Define how the selected procedure should be scheduled.
Scheduler procedure details:
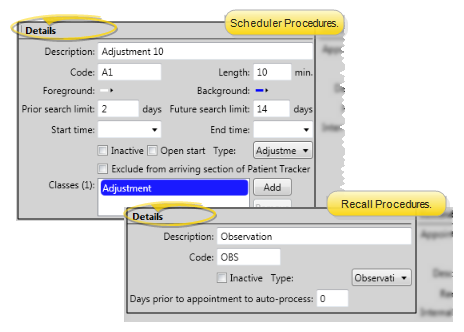
Recall procedure details:
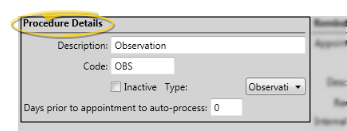
Description - Type the full in-office description for the appointment. This description appears in the scheduler appointment hover and in several areas of the patient folder.
Code - Review and edit the procedure code, if needed.
Length - (Scheduler procedures only. Not available for Recall procedures.) Enter the number of minutes to schedule for this procedure. You will notice the doctor time fields, described below, are prepared for you according to the length you enter.
Foreground / background colors -
Prior / future search limits - (Scheduler procedures only. Not available for Recall procedures.) Enter the number of days before and after the Smart Scheduler search date to include when searching for openings for this procedure.
Start / end times -
Inactive / active toggle - Once you create a record, you cannot delete it. You can, however, flag it  Inactive. Inactive records cannot be selected for your patients. You can, however, change them back to Active if needed.
Open start -
Exclude from arriving section of Patient Tracker - (
Classes
Days prior to appointment to auto-process - If you enter a number in this field, when you schedule a regular appointment for a patient that has a recall appointment within the number of days you specified, the recall appointment will default to being processed as "Kept".
Reminder and Appointment Card Details - Select the reminders to associate with the selected procedure, and define how you want the procedure to appear on your patients' appointment cards.
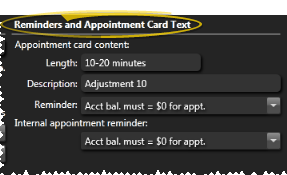
Length-
Description - Type a description for the procedure in layman's terms so the patient understands what will be happening.
Reminder (appointment card) - Type a reminder, or select one from your list to print on the appointment card.This will be the default reminder for this procedure, but you can change it as you schedule an appointment if needed. (See "Set Up Appointment Reminders List" for details about creating the lists for both Scheduler and Recall appointments.)
Internal appointment reminder - Type a reminder, or select one from your list to print on your appointment day sheet and other internal reference sources. This will be the default reminder for this procedure, but you can change it as you schedule an appointment if needed. (See "Set Up Appointment Reminders List" for details about creating your reminder lists.)
Doctor Time Details -
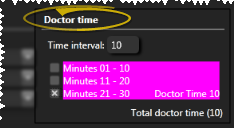
Time interval- Enter the number of minutes you consider a "unit" of time in your appointment schedule.
Enable doctor time - Enable each "unit" of time during this procedure that requires the doctor's presence.
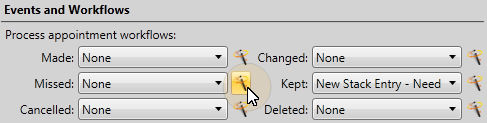
Assign an Existing Workflow - Click the drop down arrow to select an existing workflow that you want to initiate whenever the trigger event occurs. To remove a workflow assignment, choose None from the top of the list. (See "Set Up Workflows" for details about creating and maintaining workflows.)

Create a New Workflow - Click the  Workflow Wizard icon, then choose the activity you would like to initiate with this event. After you define the activity properties, a new workflow is created, and assigned to this trigger.
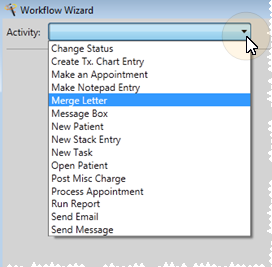
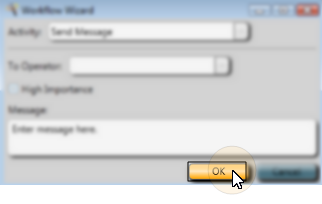
Click Workflow Wizard.
Choose an activity.
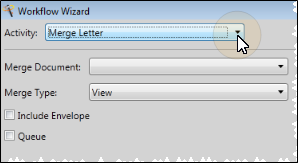
Define the properties. The properties available depend upon the type of activity you selected. Note that certain activities have properties that are not available from the wizard, and must be set up directly from the Workflow editor. See "Set Up Workflow Activity Properties" for details.
Save your workflow.
Note that workflows you assign here are specific to this procedure: You can use the workflow Trigger editor to assign workflows to appointment triggers that are not procedure-specific. (See "Workflow Trigger Editor" for details.)
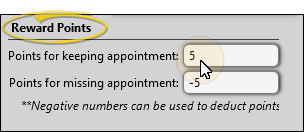
Assign Reward Points - Use the Reward Points section of your Procedures
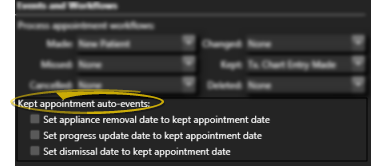
Update Milestone Dates
Save Changes![]() Click
Click  Save in your Quick Access toolbar or File ribbon bar (or press Ctrl+S on your keyboard) to save any changes you have made.
Print a Procedure List Report - Run a Procedure List report to review the list of regular appointment
Assign Workflow Triggers - In addition to assigning workflows to specific procedures, you can use the Trigger editor to assign workflows to any procedure that is processed in a specific manner.
 │
│
Ortho2.com │1107 Buckeye Avenue │ Ames, Iowa 50010 │ Sales: (800) 678-4644 │ Support: (800) 346-4504 │ Contact Us
Remote Support │Email Support │New Customer Care │ Online Help Ver. 8/3/2015


