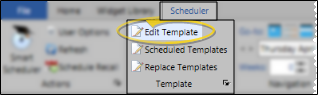
Edit template from the Scheduler ribbon bar. (Or, press Ctrl-T on your keyboard.) (See "View & Navigate Your Schedule" for details about selecting the date to work with.)
Use
Global Template - Your template tools are initiated automatically when you create or edit global templates from the Templates editor. See "Set Up Scheduler Templates" for details.
In general, changes you make to global templates will affect new dates that you assign to the template. Dates in your scheduler that are already using a template are not affected by these changes.
Individual Template![]() - Open your scheduler to the date you want to work with. Then click Edit template from the Scheduler ribbon bar. (Or, press Ctrl-T on your keyboard.) (See "View & Navigate Your Schedule" for details about selecting the date to work with.)
- Open your scheduler to the date you want to work with. Then click Edit template from the Scheduler ribbon bar. (Or, press Ctrl-T on your keyboard.) (See "View & Navigate Your Schedule" for details about selecting the date to work with.)
Changes you make to the template of an individual date in your scheduler do not affect any other date, or your global templates.
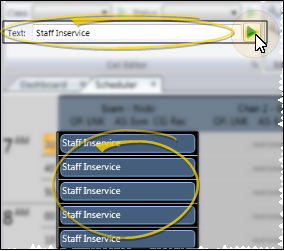
Cell Text ![]() - Select the cells to work with, then enter the text you want to see in the cell
- Select the cells to work with, then enter the text you want to see in the cell
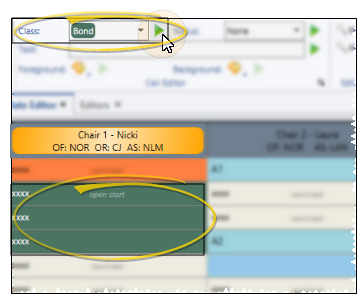
Classification ![]() - Select the cells to work with, then choose the class you want to assign
- Select the cells to work with, then choose the class you want to assign
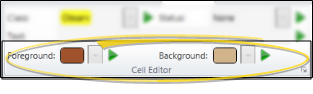
Cell Colors![]() - Select the cells to work with, then choose the colors you want to assign
- Select the cells to work with, then choose the colors you want to assign
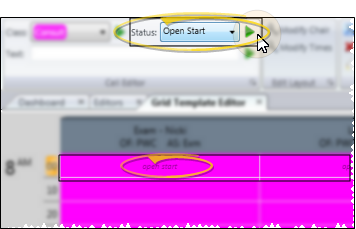
Cell Status![]() - Select the cells to work with, then choose the status you want to assign
- Select the cells to work with, then choose the status you want to assign
Chairs / Columns - Specify the number of chairs, or columns, to have in the template. You can optionally assign a doctor, office, assistant
Use the Reclassify Chairs feature to update the chair assignments (Office, Doctor, Assistant and/or Chair Group) of applied scheduling templates to match the values of a global scheduling template you have just edited. This reclassification occurs without disturbing any currently scheduled appointments. You might use this feature, for example, if you have edited a template to assign chairs to a new orthodontist in your practice, or to reassign chairs among your assistants. See "Reclassify Grid Chairs" for details.
Template Time Coverage - Define the interval (the number of minutes) allotted for each scheduling cell. Most offices schedule by 5-, 10-, or 15-minute intervals. Also, enter your working hours for this template. When finished, click
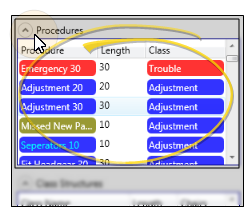
Use Procedures List![]() - Drag and drop a procedure from the Procedures list on the right side of the window to your template to quickly apply the procedure class equal to the length of the procedure. You can alternately manually select cells, as well as use the Class Structures and Saved Structures lists to apply procedure classes to your template.
- Drag and drop a procedure from the Procedures list on the right side of the window to your template to quickly apply the procedure class equal to the length of the procedure. You can alternately manually select cells, as well as use the Class Structures and Saved Structures lists to apply procedure classes to your template.
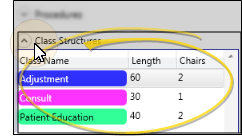
Use Class Structures![]() - Drag and drop a Class Structure from the list at the right of the window to your template to apply a procedure class for a pre-defined length of time and chair span. If you drag to an area of the template that cannot accommodate the structure, your action is ignored. (See "Set Up Scheduling Classes" for details about creating pre-defined Class Structures.) You can alternately manually select cells, as well as use the Procedures and Saved Structures lists to apply procedure classes to your template.
- Drag and drop a Class Structure from the list at the right of the window to your template to apply a procedure class for a pre-defined length of time and chair span. If you drag to an area of the template that cannot accommodate the structure, your action is ignored. (See "Set Up Scheduling Classes" for details about creating pre-defined Class Structures.) You can alternately manually select cells, as well as use the Procedures and Saved Structures lists to apply procedure classes to your template.
Use Saved Structures - You can create sets of grid cells that are assigned to specific classes, procedures, and statuses, then save those cells as template structures. The template structures can then be dragged onto other areas of your template, or even dragged onto other templates to quickly assign cell properties. Tell me more...
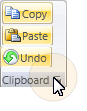
Copy, Paste, Undo Cell Properties![]() - After applying one or more properties to grid cells, you can select the cells to work with, then use the
- After applying one or more properties to grid cells, you can select the cells to work with, then use the  Copy( Ctrl+C) and
  Paste (Ctrl+V) those properties to other cells in the same template, or a different template.
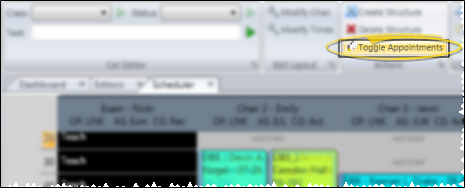
Toggle Appointment Display![]() - (Available only when editing the template for a specific date.) Click
- (Available only when editing the template for a specific date.) Click  Toggle Appointments in the Actions section of the Scheduler ribbon bar to hide / view appointments already scheduled for that date. (Note that any scheduled appointments that no longer fit on your modified template will be moved to a Scheduler Bar automatically.)
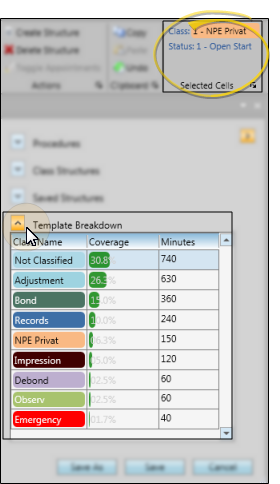
Template Review![]() - The assigned class and status of the cell(s) you are working with appear in the Selected Cells section of the template tools ribbon bar. In addition, you can review the template stats, including the class name, percentage of the template that is covered by the class, that the total number of minutes assigned to each class, in the Template Breakdown on the right side of the window.
- The assigned class and status of the cell(s) you are working with appear in the Selected Cells section of the template tools ribbon bar. In addition, you can review the template stats, including the class name, percentage of the template that is covered by the class, that the total number of minutes assigned to each class, in the Template Breakdown on the right side of the window.
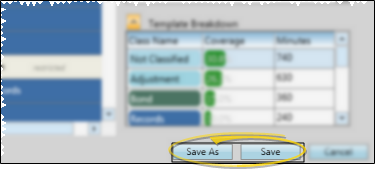
Save Changes![]() - Click Save at the bottom of the window to save changes you make to your template. Or, if you ware working with global templates, you can click Save As to create a new template from the changes, leaving the original template unchanged.
- Click Save at the bottom of the window to save changes you make to your template. Or, if you ware working with global templates, you can click Save As to create a new template from the changes, leaving the original template unchanged.
Existing Appointments - If previously scheduled appointments do not fit onto your modified template, they will be moved to your Scheduler Bar automatically to await re-scheduling. See "Manage Scheduler Bar Clipboards & Lists" for details.
 │
│
Ortho2.com │1107 Buckeye Avenue │ Ames, Iowa 50010 │ Sales: (800) 678-4644 │ Support: (800) 346-4504 │ Contact Us
Remote Support │Email Support │New Customer Care │ Online Help Ver. 8/3/2015