Use the Smart Scheduler to search for, identify, and schedule patient appointments.
Watch video tutorial. (Windows Media Player, an active Internet connection, and a valid Ortho2 customer login are required to run video tutorials, webinars, and training programs.)
Set up Smart Scheduler - Use the Smart Scheduler options to set up many choices that define how your Smart Scheduler works for you.See "Set Up Smart Scheduler Options" for details.
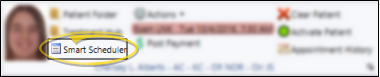
Patient ribbon bar -  Open patient folder >
  Smart Scheduler.

Home ribbon bar - Home ribbon bar >  Scheduler > Smart Scheduler.
Click the Scheduler button from the Tasks section of the Home ribbon bar.
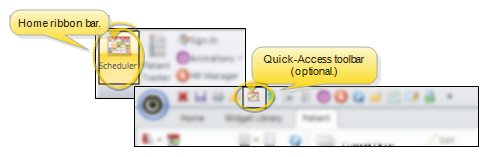
Then click Smart Scheduler from the Actions section of the Scheduler ribbon bar.
Active Patient ribbon - Or, activate a patient in your Scheduler and click  Schedule (or press Ctrl-E on your keyboard). This is an efficient way of processing and rescheduling patient appointments throughout your day. See "View & Navigate Your Schedule" for details.
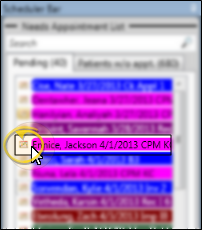
Needs Appointment List - Click the Schedule button beside a patient name in your Needs Appointment list to open the Smart Scheduler for that patient.
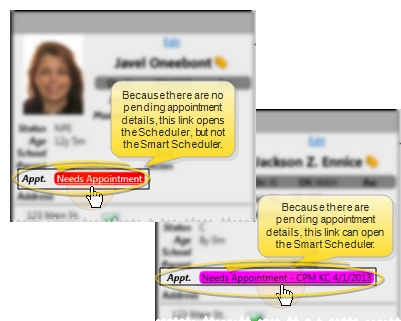
Patient Information Panel - In addition, you can set up your system so that clicking a Needs Appointment link on the Patient Information Panel of a patient folder opens the Smart Scheduler for the patient, defaulted to the suggested next procedure. (See "Set Up General Scheduler Options" for details about this scheduling option.) Note that this feature works only for patients on the Pending section of the Needs Appointment List, and not patients on the Patients Without Appointments section.
Choose patient - If a patient is not currently active in the Scheduler, you use Fast Find to locate the patient to work with. If you attempt to appoint the same patient twice in a row, you are notified of the event and must confirm your action to continue scheduling the appointment. This feature helps prevent accidental duplicate scheduling.
Respond to milestone reminders -
 Alert - If the patient has an alert stop flag for this feature, the alerts box will appear when you initiate this feature for the patient. Review the alert information, then click the box to continue. (See "Patient Alerts" for details.)
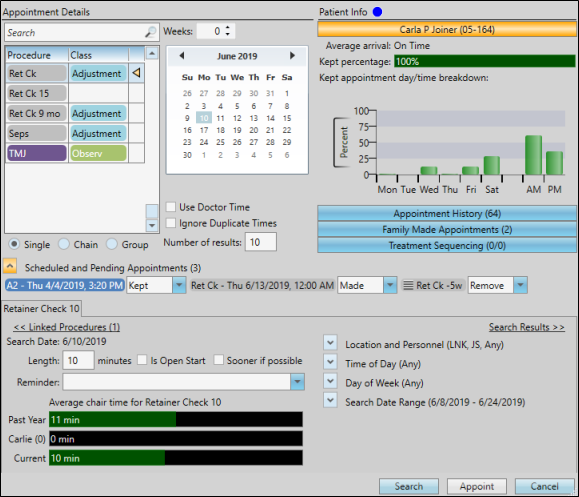
Select appointment details - Select the appointment procedure, target search date, and other details you want the Smart Scheduler to look for.
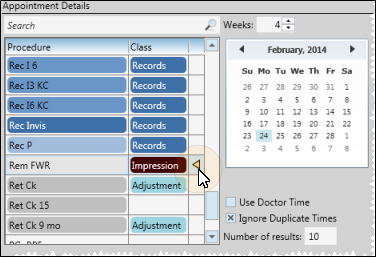
Individual procedure![]() If the patient has a treatment sequence, the next sequence appointment procedure is the default. (See "View Treatment Plan & Sequence" for details.)
If the patient has a treatment sequence, the next sequence appointment procedure is the default. (See "View Treatment Plan & Sequence" for details.)
Review patient and family information - Review this patient's
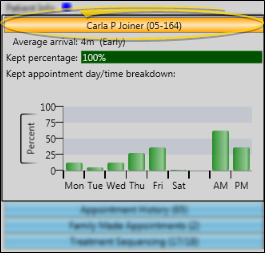
Patient compliance - Review how well this patient complies with appointments at your office. (You must use the Patient Tracker and appointment processing for this data to be accurate.)
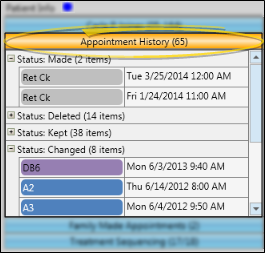
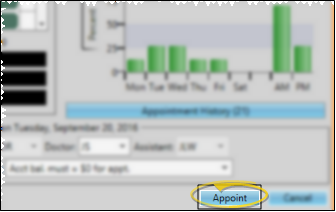
Appointment history - Review currently scheduled appointments, as well as the history of appointments this patient has kept, missed, and changed.
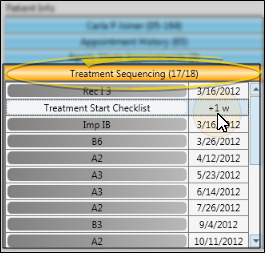
Treatment Sequence progress - You can review a patient's treatment sequence while scheduling an appointment. This feature helps you stay on the proposed course of treatment with every appointment. See "Add & Edit Treatment Sequence" for details.
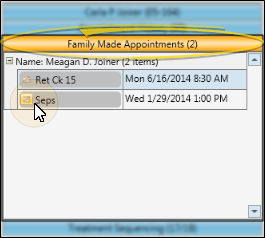
Schedule near family appointment - The Smart Scheduler can locate available appointment time slots that are near other family member appointments. This feature is useful for parents that want to schedule appointments for multiple family members on the same day. Open the Family Made Appointments list on the Patient Info section of your Smart Scheduler window, then click the box beside the appointment you want to schedule near. See "Schedule Appointment Near Family" for details.
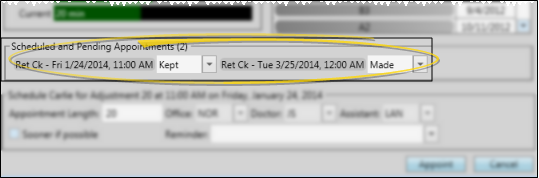
Process scheduled/pending appointments - As you schedule a new appointment for a patient, you can process previously scheduled appointments directly from the appointment confirmation window.
Fine-tune search details - Narrow or expand your search for available appointment openings by adjusting the procedure length, specifying a specific location, doctor, or assistant, and limiting the search to specific days, times, and dates.
Click the arrows beside each section to expand and collapse each set of options as needed.
Proposed appointment details - The bottom portion of the window includes the details about the procedure you are scheduling. If you have already initiated a search, the number of resulting matches (up to your maximum number of results) appears beside the procedure name. In addition, if you have selected a possible opening, the date and time appear on the tab. The appointment will not actually be scheduled until you click Appoint.
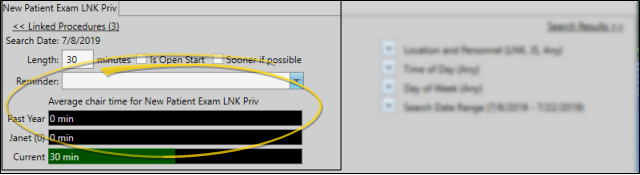
Length - Enter the number of minutes to schedule for this appointment. The default length for the selected procedure is found in your Procedure Editor. The Scheduler compares the length with the actual number of minutes this procedure generally takes at your office, so you can adjust the length as needed for this patient. (You must use appointment tracking for this data to be accurate.).
Open Start - Enable this option if you want the Smart Scheduler to look only at openings that begin with cells flagged as Open Start. This feature is useful, for example, if you like to start appointments at the hour, quarter hour and half hour only. If you disable this option, the Smart Scheduler will look for appointments that begin at any time. (You set the default for this procedure in your Procedure Editor, and flag cells as Open Start with your Template Tools.
Sooner if possible - As you schedule a patient appointment, you can enable the Sooner If Possible flag to place the patient on your Sooner if Possible list, making it easier for you to fill appointment slots that become open due to cancellations.See "Manage Scheduler Bar Clipboards & Lists" for details.
Reminder - Select a reminder to appear with the appointment, and optionally to print on the appointment card. (Use the Appointment Reminders Editor to maintain your list of reminder messages.)
Location and Personnel - Limit your search to a specific office, orthodontist and/or assistant, or search for all available openings. Each option defaults to the location or person assigned to the patient folder. If you attempt to schedule to an office, doctor or assistant that is not assigned to the patient, you must confirm your action before the appointment will be scheduled.
Time of day - Select a specific time of day to search, or, leave these fields blank to search any available time during your scheduling day. Use the Procedure Editor to set up the default times of day for specific procedures.
Day of week - Flag one or more days of the week to search: Or, leave all days of the week unmarked to search any available scheduling days.
Search date range - Select the beginning and ending dates to search. This option defaults to searching two days before and two weeks after the target date you selected on the calendar at the top of the Smart Scheduler window. You can use the Schedule Near Family Appointment feature to automatically select dates near another appointment.
Initiate search & review results - Click Search to look for appointment openings that match your appointment and search details. The bottom of your Smart Scheduler window toggles to show you the search results.
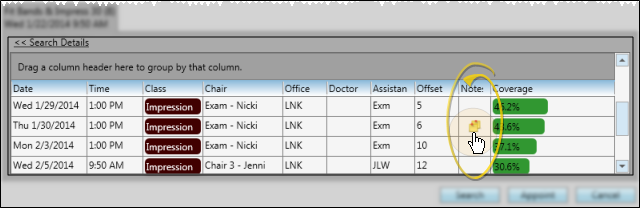
Appointment details - The Search Results panel includes the details about each appointment opening, including the date, time, chair, doctor, and assistant. If you narrowed your Search Details to include only specific locations, times or people, the results will include only openings that match those details.
Offset - The Offset column indicates the number of days that this appointment falls before or after your target appointment date.
Note - Hover over the  Note icon in the in the Smart Scheduler results panel to read the Scheduler notes associated with that date. See "Scheduler Notes" for details.
Coverage - The coverage column indicates how heavily the date is already scheduled.
Sort order - Click a column heading to sort the results by that column: Click the same heading again to reverse the sort order.
Grouping - You can group the search results by any column by dragging that column heading to the space above the results list. For example, you might group by chair (as shown in our example), then search the results of a specific chair. You can drag multiple column headings to the grouping area to create a hierarchy of groups as needed. Drag the group heading back to the results list to remove the grouping.
Return to details - If you do not find an appropriate appointment opening, click the <<Search Details link to return to the Search Details panel. You can then change the appointment details or include a wider date range before you click Search to start looking again.
Appoint the patient - When you are satisfied with the appointment details, click Appoint.
Navigate to Appointment Date After Scheduling - (Optional.) Use your Smart Scheduler user options to choose whether to open the Scheduler to the appointment date after you appoint a patient with the Smart Scheduler. See "Set Up Smart Scheduler Options" for details.
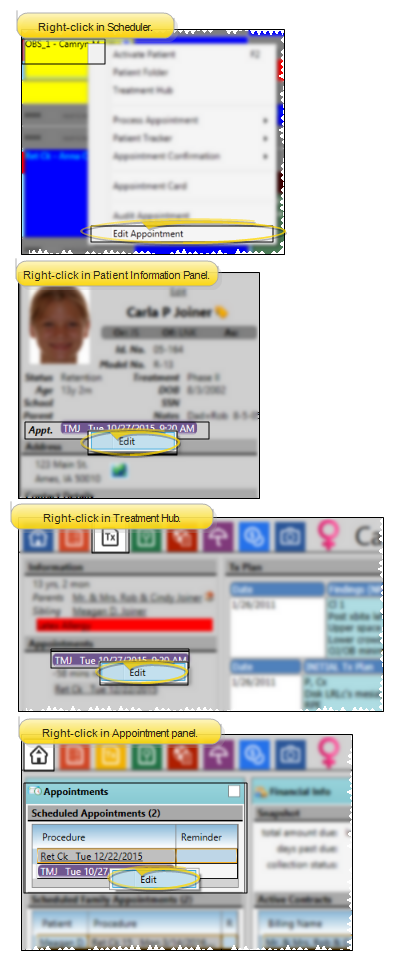
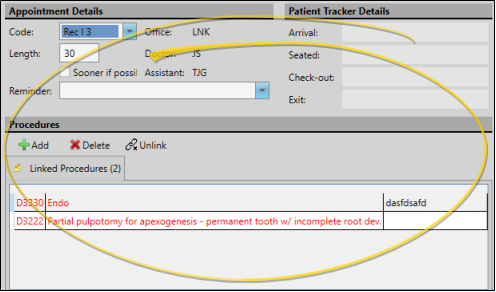
Edit Appointment Details![]() - Right-click an appointment in your schedule, from the patient information panel, or from the expanded Appointment panel of the patient folder Home page, and select Edit Appointment to change the appointment details, including the procedure, appointment length, reminder, and Patient Tracker times. You can also enable / disable the
- Right-click an appointment in your schedule, from the patient information panel, or from the expanded Appointment panel of the patient folder Home page, and select Edit Appointment to change the appointment details, including the procedure, appointment length, reminder, and Patient Tracker times. You can also enable / disable the  Sooner if Possible option to add / remove the patient from your Sooner if Possible scheduler board.
Use "Make an Appointment" Workflow Activity - Use the Make an Appointment workflow activity to open the Smart Scheduler for the patient whenever the activity is triggered by a workflow. See "Set Up Workflows" for details.
 │
│
Ortho2.com │1107 Buckeye Avenue │ Ames, Iowa 50010 │ Sales: (800) 678-4644 │ Support: (800) 346-4504 │ Contact Us
Remote Support │Email Support │New Customer Care │ Online Help Ver. 8/3/2015