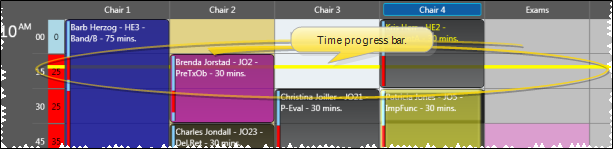
The time progress bar places itself across your schedule at the current time, so you can see how far ahead or behind you are with your scheduled appointments. This feature is controlled by several settings.
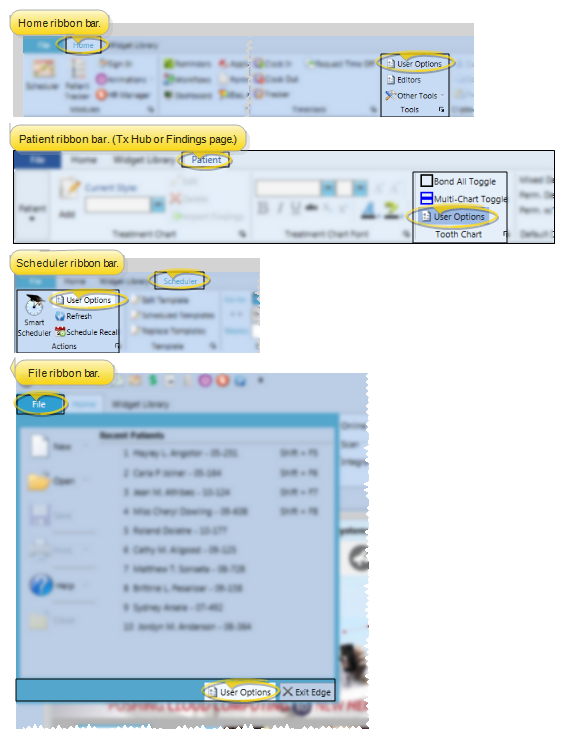
File, Home, or Scheduler Ribbon Bar -  User Options > Scheduler > Time Progress Bar.
Select User Options from a ribbon bar.
Choose the Scheduler options.

Select the Time Progress Bar tab.
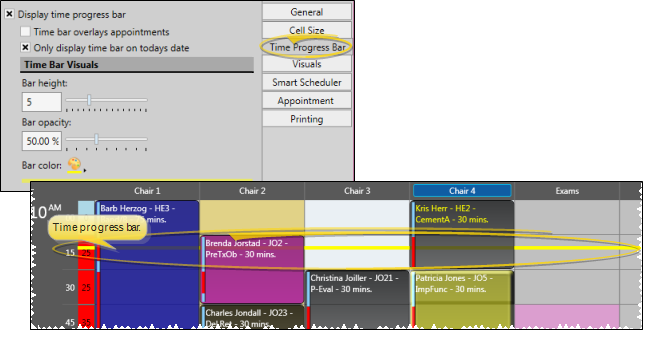
Display time progress bar - Enable / disable the bar entirely with this setting.
Time Progress Bar Overlays Appointments - Enable this setting to place the bar on top of patient appointments. Disable the feature to "dim" the bar as it goes through cells that contain scheduled appointments. In the example at the top of this topic, this setting is disabled.
Only display Time Progress Bar on today's date - Enable this setting to display the bar only on today's schedule. Otherwise, the bar will appear at the current time, no matter what date you are viewing.
Bar Height - Set the height of the bar: The bigger the number, the thicker the bar.
Bar opacity - Set how "see-through" the bar is. A value of "1" means the bar is solid and nothing can be seen "behind" it. A value of "0" means the bar is transparent and you will not be able to see the bar at all.
Bar color - Set the color of the bar. Choose a bright color if you want to emphasize the bar. Choose a lighter color if you want the bar to be a more subtle reminder of how the day is going.
Save - Click Ok to save your changes and exit the setup options.
User Settings / Assign Options Tool - The settings you choose here are specific to you; Other operators that log into Edge with a different username and password may have different settings. However, you can use the Assign Options tool to copy your settings to other operators (and vice-versa) if needed. (See "Assign Your Settings to Other Users" for details.)
 │
│
Ortho2.com │1107 Buckeye Avenue │ Ames, Iowa 50010 │ Sales: (800) 678-4644 │ Support: (800) 346-4504 │ Contact Us
Remote Support │Email Support │New Customer Care │ Online Help Ver. 8/3/2015


