 Editors > General > Statuses. (You can also search for the editor you want to work with.)
Use the Status
Home Ribbon Bar - Editors > General > Statuses. (You can also search for the editor you want to work with.)
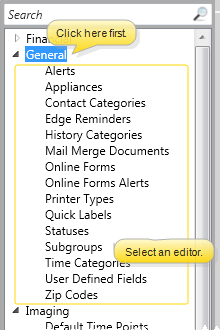
Click Editors from the Tools section of the Home ribbon bar.

Select General in the list at the left, and choose the Statuses option.
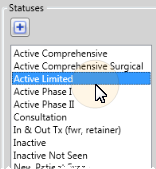
Choose Record to Work With - Your list of existing records appears at the left. Click the record to work with. The details for that record appear at the right.
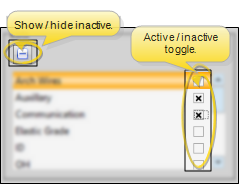
Display active / inactive records -  icon at the top of the window
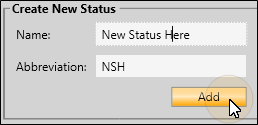
Create new record - Type a name and abbreviation in the Create New Status portion of the window and click Add. You can then edit your new status to complete the details.
Edit status - Select a status to work with. If you just created a new status, it is selected automatically. If you cannot find the status you are looking for, icon to toggle the display
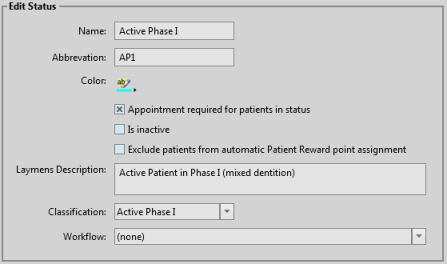
Name - You can change the name of your status in this field.
Abbreviation - The status abbreviation appears on the
Color - Select a color, or use the eyedropper tool to choose a screen color, to identify this status in the header of the patient folder.
Appointment required - Enable the Appointment Required status option if every patient in the status should have an appointment scheduled with your office. When you process an appointment for a patient in a status that requires an appointment, you are given rescheduling opportunities, including placing the patient on your needs appointment list. In addition, you may optionally include a Needs Appointment Message on the patient statement.
Inactive / active toggle - Once you create a record, you cannot delete it. You can, however, flag it  Inactive. Inactive records cannot be selected for your patients. You can, however, include inactive records in your list of records, and change them back to Active if needed.
Exclude Patients From Automatic Patient Rewards - Enable the Exclude Patients From Automatic Patient Rewards option in your Status editor to prevent applying automatically triggered patient reward points to patients assigned to the status. Patients retain any points they have already accumulated, and can redeem those points for prizes. You can also apply points to any patient, regardless of status, either manually or as part of a subgroup, at any time.See "Set Up Patient Reward Triggers" for details.
Layman's description - Enter a layman's description of this status, perhaps in sentence format, primarily for use as a mail merge variable.
Classification - Select the classification to apply to this status. The classifications are compiled and used by your certain report and graphs. If you do not want this description included in any statistics, select Other.
Workflow - Use the Workflow field of the Status editor to assign a workflow to trigger whenever you change a patient status to a specific description. To erase the workflow assignment, select (None). Note that inactive workflows do not appear in this list, unless this status already has the workflow selected. (See "Set Up Workflows" for details about creating workflows.)
Save Changes![]() Click
Click  Save in your Quick Access toolbar or File ribbon bar (or press Ctrl+S on your keyboard) to save any changes you have made.
Print report - Run a Status List report to review the patient status descriptions you have created. The report includes the status description, abbreviation, laymans' description
Default status - You can select a status to be the default for new patient folders. Of course, you can change the default for individual patients as needed, and select a different status to be the default at any time. See "Create a New Patient Folder " for details.
Automated Status Changes - You can change a patient's status manually at any time, or trigger a status change
Status changes recorded - When you change a patient's status, the change is recorded in the patient’s Status History form. See "View Status History" for details.
 │
│
Ortho2.com │1107 Buckeye Avenue │ Ames, Iowa 50010 │ Sales: (800) 678-4644 │ Support: (800) 346-4504 │ Contact Us
Remote Support │Email Support │New Customer Care │ Online Help Ver. 8/3/2015


