Use the Workflow Manager to view and process workflow activities.
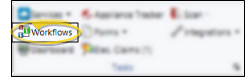
Home ribbon bar > Workflows.
If the ribbon bar is not displayed at the top of your Edge window, click the Home ribbon bar heading, then make your selection, or use the Show/Hide button at the far right of your screen. See "Show / Hide Ribbon Bar" for details.
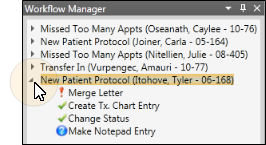
The Workflow Manager window also opens automatically whenever a workflow is running, and closes when all workflows have been completed.
Move & position Workflow Manager window - You can drag and resize the Workflow Manager window as needed. To "pin" it to your screen, drag it until your screen shows you the highlighted area where you want to place the window, and click the pin icon. You can now "show / hide" the window as needed. To move the window again, first unpin it. You can then click the heading and drag it again.
Review workflows in progress - Your Workflow Manager lists workflows currently in progress. The list includes the workflow name, patient name and id number, and all the activities in the workflow. When all activities have been completed for a workflow, it is removed from the Workflow Manager window.
Collapse / expand list - Click the arrow beside a workflow, or simply double-click, to expand or collapse the list of activities for that workflow.
Waiting &
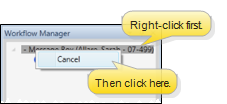
completed activities - A workflow remains in the Workflow Manager until all activities for that workflow have been completed. A
checkmark indicates activities that have been completed; a
question mark indicates the next activity in the workflow that needs your input.
Incomplete activity properties - An activity flagged with an
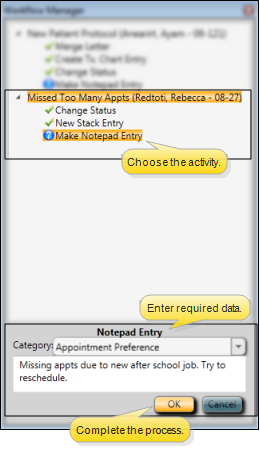
exclamation point indicates that required properties settings are missing. For example, the Merge Letter activity requires that you specify which document should merge when the workflow is triggered for a patient. See "Set Up Workflow Activity Properties" for details about each activity's required properties.
Activity Processing - Workflow activities have different processing requirements, depending on the type of activity, and your activity property settings. (See "Set Up Workflow Activity Properties" for details.) In addition, activities must be completed in the order they appear in the workflow. See "Set Up Workflows" for details about changing the order of activities, if needed.
Automated activities - Some workflow activities happen entirely automatically, without any input from you. For example, a Change Status activity whose properties include the status description to change to will occur automatically whenever the workflow is triggered. If a workflow contains only automated activities, it may appear in the Workflow Manager for only a brief period of time, since workflows are removed from the Workflow Manager as soon as all activities are complete.
Edge function activities - Some workflow activities initiate Edge functions, then wait for your input within that function. For example, the Create Tx. Chart Entry activity opens the patient's Treatment Hub, creates a new record, and waits for you to save that record before processing the activity as complete.
Workflow Manager activities - Some workflow activities prompt you for input from the Workflow Manager window. To work with this type of activity, click the activity in the Workflow Manager list, then complete the fields displayed at the bottom of the window. For example, when you select the Make Notepad Entry activity, the bottom of the Workflow Manager will prompt you for the notepad category and text. When finished entering your data, click Ok to process the activity as completed.
Cancel workflow - If a workflow has not yet been processed, you can right-click and select Cancel to remove it from the list and prevent it from running. Note that you can only cancel entire workflows: You cannot cancel individual activities within a workflow.
Ortho2.com │1107 Buckeye Avenue │ Ames, Iowa 50010 │ Sales: (800) 678-4644 │ Support: (800) 346-4504 │ Contact Us
Remote Support │Email Support │New Customer Care │ Online Help Ver. 8/3/2015