Patient Online Forms Data
The Online Forms page of the patient folder contains the results of online forms submitted by the patient. Use this page to review, compare, and update patient folder information based on online form data. You can also generate online form merge documents for the patient from this window.
Open a patient folder and select the  Online Forms tab in the patient folder header.
Patients often accumulate multiple online forms as they update their health histories throughout treatment. You can view the results of each form whenever needed, search for data in the selected form, and view responses according to the category assigned to them.
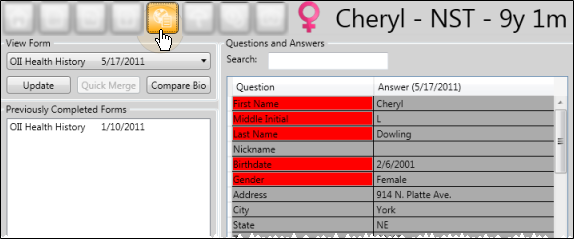
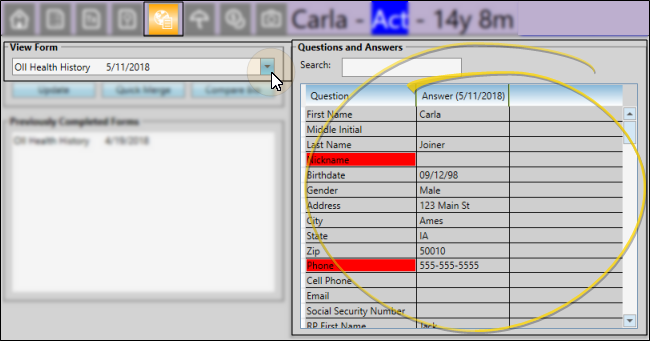
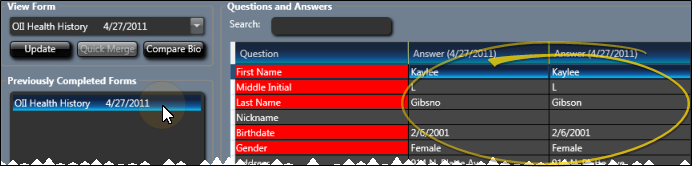
 Select Form to View- Use the View Form drop down to select the online form you want to work with. The results for that form appear at the right of the window. Questions you have chosen to highlight in your Online Forms editor appear in red.
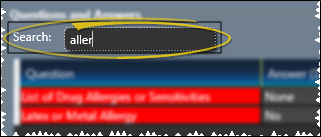
Search Questions and Responses - Use the Search field at the top of the results section to look for any question or response in the selected form.
When a patient has completed two or more online forms of the same type, you can compare the results of those forms.
Use the View Form drop down to select the online form you want to work with. Then select the second form you want to compare from the Previously Completed Forms section of the window to see the differences between the forms. If you use multiple types of online forms, only forms that are the same type as your selected form appear in the Previously Completed Forms list.
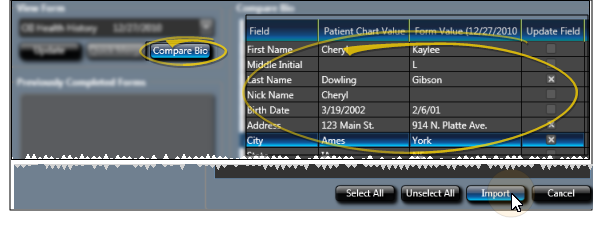
When you link an online form to a patient, the Edge Cloud patient folder is not automatically updated. You can, however, use the Compare Bio option on the Online Forms page of the patient folder to view data differences between an online form and the patient folder, and choose to update the patient folder as appropriate.
Use the View Form drop down to select the online form you want to work with. Then, click Compare Bio to show any discrepancies between the selected form and the biographical information currently in the patient folder. Individually select fields you want to update, or click Select All or Select None as needed. When you click Import at the bottom of the window, the corresponding patient folder fields will be updated to match the data in the online form.
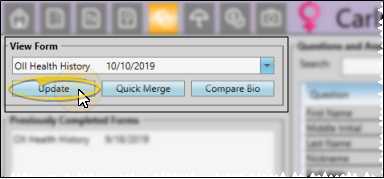
After a patient has completed at least one online form, you can launch the most recent form from the Online Formspage of the patient folder to make updates to the responses.
Click Update to open the most recent online form, and ask the patient to make any changes. After the information is updated, and all required responses have been completed, click Submit at the bottom of the form. The updated form will be listed in the patient folder, along with the date. You might then want to use the Compare Bio button, described above, to update the patient folder as well. (See "Fill Out and Submit Online Forms" for details about completing online forms.)
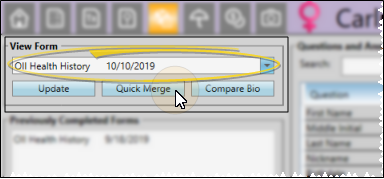
Most often, you will use the Letter Queue function of the Online Forms window to generate the merge document that is linked to an online form. However, you can optionally generate the documents from the patient folder, even if you accidentally deleted the document from the Letter Queue.
Use the View Form drop down to select the online form you want to work with. To continue, click Quick Merge. The mail merge document will be generated in View mode (See "View Mail Merge Documents" for details.) Once you capture or print the merged document, it is added to the correspondence history. If the document was in your online forms Letter Queue, it is removed from that list.
Unlink Form Data - If you link an online form to the wrong patient, you can unlink it by selecting the form in the Processed Forms section of the Online Forms window, and clicking Unlink. The form is moved back to the Unprocessed Forms list, where you can choose to link it to the correct patient folder. See "Unlink a Form" for details.
Work with Patient Folders - Edge Cloud includes several tools for working within your patient folders, regardless of which page is currently selected.
Patient Information Panel - The Patient Information Panel contains patient treatment, biographical, and contact information. You can personalize the panel to include additional widgets you use most often. The panel always appears on the left side of the patient's Home page. You can optionally hide / show the panel on all other patient folder pages. See "Patient Information Panel" for details.
Office Color Code - The background of the patient folder header is color-coded according to the office assigned to the patient. See "Set Up Office Locations" for details about assigning the color.
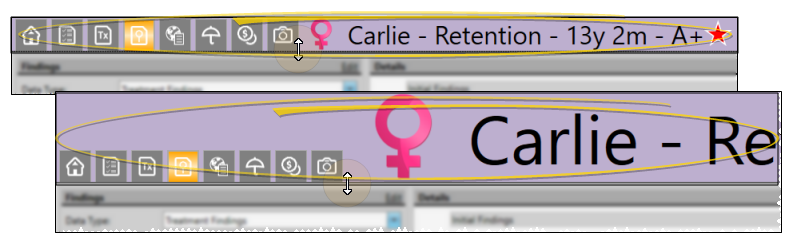
Resize Header - Click the bar between the patient folder header and the information panel to change the space allotted to each section.
The patient folder header displays the patient nickname, status abbreviation (in the color determined by your Status editor), age, and optionally a gender icon (enabled / disabled in your Visuals user options), as well as the patient tag and visual tag you have assigned to the patient, if any. You use the tabs at the left of the header to move from one patient folder page to another. You can resize the header by dragging the splitter bar between the header and the patient folder window to change the space allotted to each section. In addition, you can hover over the nickname to view a tooltip of the patient's phonetic name. The background of the patient folder header is color-coded according to the office assigned to the patient.
Reposition / Close Tabs - Right-click the page header to close, reposition, rearrange, or resize the window. Tell me more...
Re-Open Patient Folder - Click  Other Actions then select
  Reopen from the Patient section of the Patient ribbon bar to open a second session of the patient folder. If you have multiple screens, you can then drag one of the folder tabs to another screen. This feature is particularly useful for systems with dual monitors that want to keep the patient folder information available while viewing images (or any other page of the patient folder) on another screen.
Refresh - Click  Refresh on the Quick Access toolbar (or press F5 on your keyboard) to refresh the data on your screen.