Visual Tags
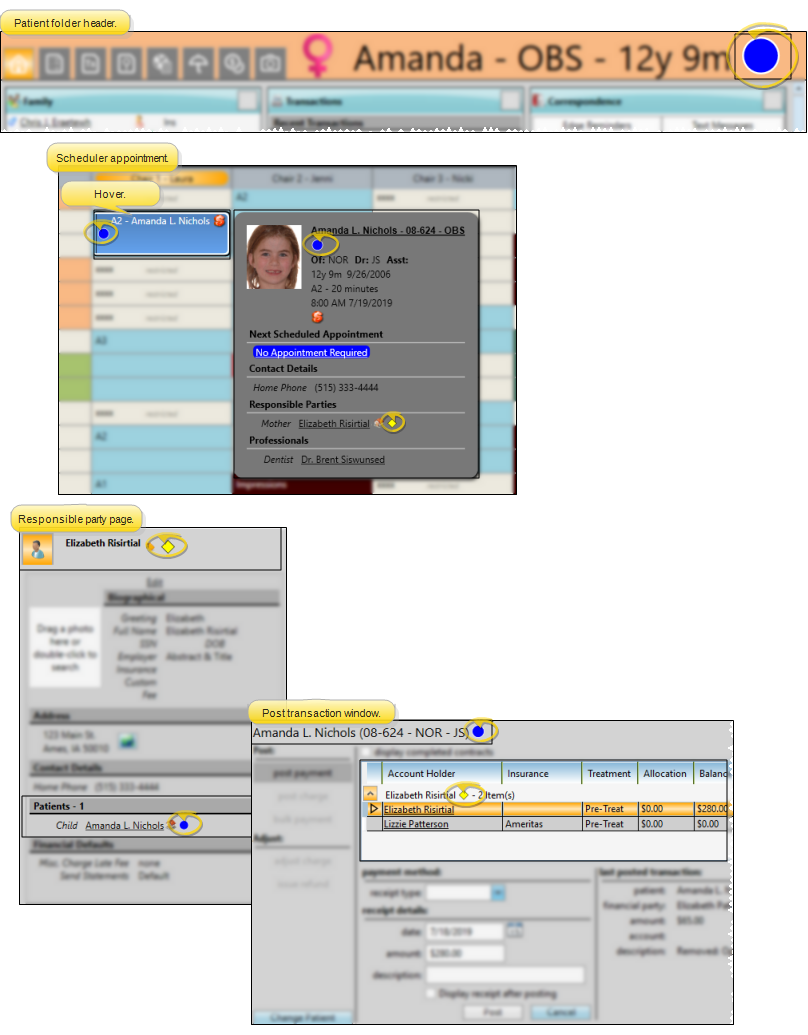
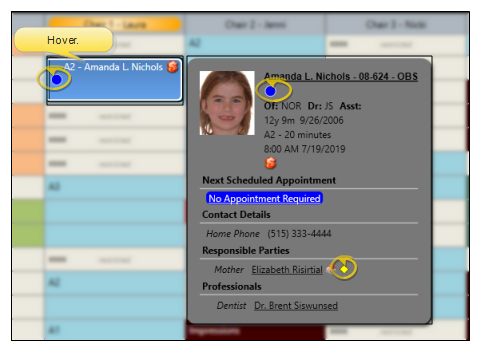
Use visual tags to classify and subgroup patients and responsible parties with unique identifiers consisting of shape / color combinations. You use the Visual Tags editor to create the identifiers, and can apply the tags to individual patients and responsible parties, or to subgroups. Visual tags are displayed in the patient folder header, responsible party record, post transaction window, Smart Scheduler, appointment hover, and optionally on your Patient Tracker and Scheduler appointments.
-
Open the Visual Tags Editor - Select Editors from the Tools section of the Home ribbon bar. Then, from the General section, open the Visual Tags editor. (You can also use the Search field to look for the editor you want to work with.)
-
Add or Edit a Visual Tag - Click Add at the top of the Visual Tags list to create a new tag, or select an existing tag to work with. If not all your records appear in the list, enable the Display Inactive option.
-
Edit Tag Details - Once you have a tag selected, you can edit the name, style, and color. If the style you select is "Character", type the keyboard character you want to use in the Character box. Once you create a record, you cannot delete it. You can, however, flag it Inactive. Records you flag as Inactive are not available for general use, but they remain in your system for reporting and other data collection needs. In addition, you can toggle records back to Active whenever needed.
-
Save Changes - Click  Save in your Quick Access toolbar or File ribbon bar (or press Ctrl+S on your keyboard) to save any changes you have made.
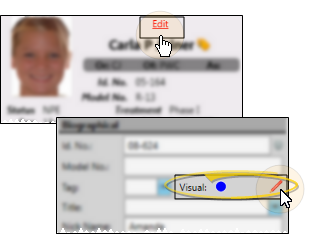
Apply from Patient Folder or Responsible Party Page - You can apply visual tags as you create new patient folders and responsible parties. Or, click the Edit link at the top of the Patient Information Panel, or Responsible Party page to add / remove visual tags from existing records.
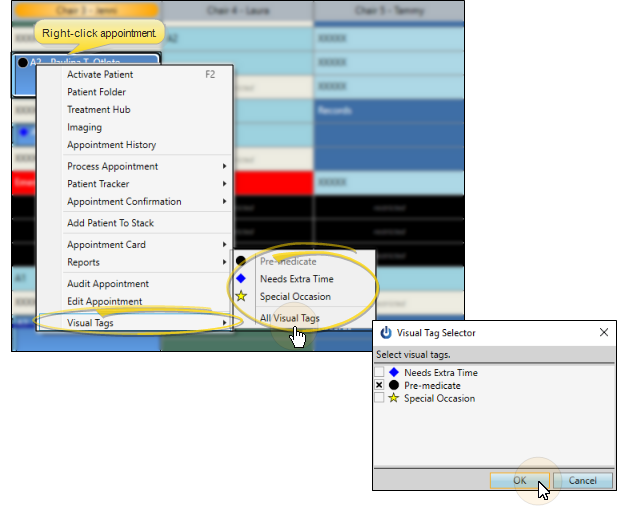
Apply from Scheduler - You can add / remove visual tags by right-clicking the patient's appointment in the Scheduler and selecting Visual Tags. A list of your 10 most frequently used active visual tags appear; any tags already applied to the patient appear dim. You can simply click a visual tag to apply it to the patient. Or, select the View All Tags option to open the entire list of visual tags. You can then add / remove any visual tag from the patient folder.
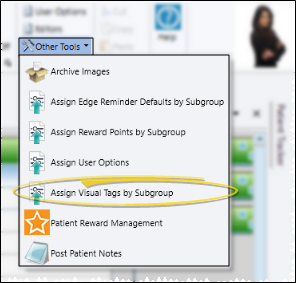
Apply to a Subgroup - You can apply and remove visual tags for any subgroup of patients or responsible parties with the Assign Visual Tags by Subgroup tool. See " Apply a Visual Tag to a Subgroup" for details.
Show / Hide Visual Tags on Patient Tracker - Use your Patient Tracker editor to add / remove the visual tags field from your Patient Tracker views. See "Patient Tracker Editor" for details
Show / Hide Visual Tags on Appointments - Use the Appointment tab of your Scheduler user options to enable / disable visual tags from appearing on your Scheduler appointments. The tags will continue to appear in the appointment hover. See "Appointment Options" for details.
Visual Tag Display - Visual tags are displayed in the patient folder header, responsible party record, post transaction window, Smart Scheduler, appointment hover, and optionally on your Patient Tracker and Scheduler appointments.
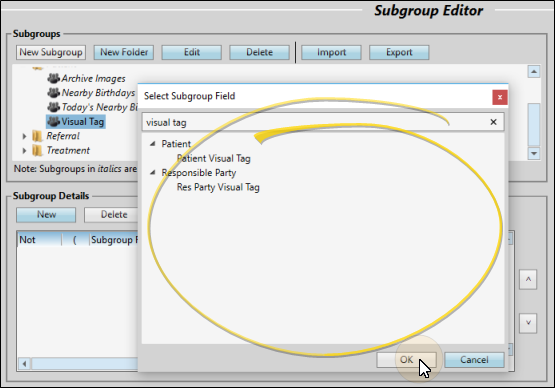
You can use the Patient or Responsible Party Visual Tags subgroup field to subgroup your patients and responsible parties by the visual tags applied to their records. See "Subgroup Editor" for details about creating subgroups.