Apply a Visual Tag to a Subgroup
You can apply and remove visual tags for any subgroup of patients or responsible parties with the Assign Visual Tags by Subgroup tool. Visual tags are displayed in the patient folder header, responsible party record, post transaction window, Smart Scheduler, appointment hover, and optionally on your Patient Tracker and Scheduler appointments.
-
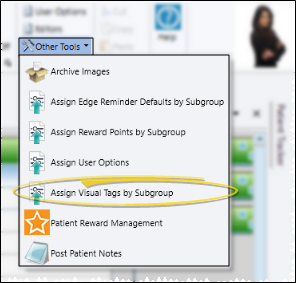
 Open Assign Visual Tags Subgroup Window - From the Tools section of the Home ribbon bar, open the Other Tools menu and select Assign Visual Tags by Subgroup.
-
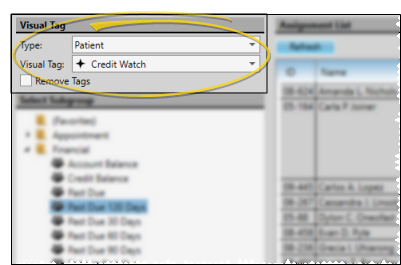
Choose Visual Tag to Apply or Remove - Select the contact type to work with (patient or responsible party), then select the visual tag you want to apply. Or, enable the Remove Tags option to remove the selected visual tag from the selected parties. (See "Visual Tags" for details about creating your list of visual tags.)
You apply or remove visual tags for one contact type and one tag at a time. If you want to apply or remove multiple types of visual tags, you will need to run this tool multiple times.
-
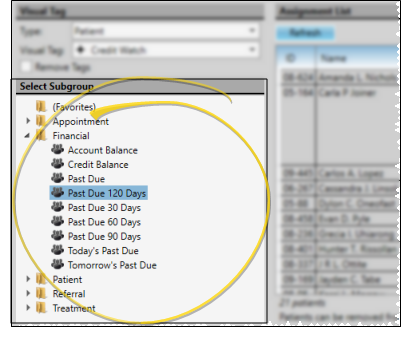
Choose Subgroup - Choose the subgroup to use for applying or removing the visual tag. (See "Subgroup Editor" for details about creating subgroups.)
-
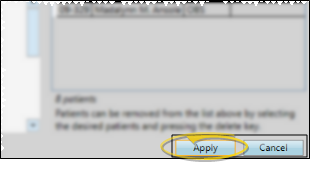
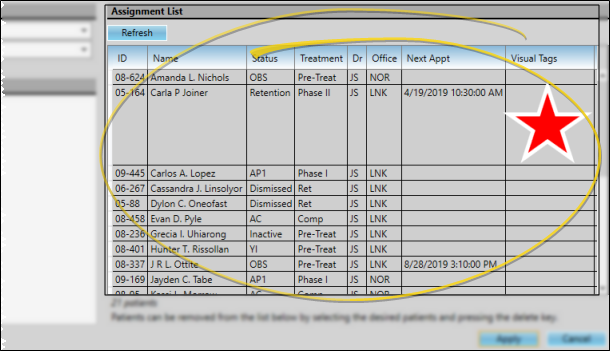
Review / Edit List - View the list of records that fits your subgroup at the right of the window. If needed, click Refresh to generate the list. To remove a record from the list, click the name, then press the Delete key on your keyboard. If you press Refresh again, the selected subgroup will be re-generated, and the deleted names will return to the list.
-
Apply / Remove Tags - When you are satisfied with the list of records that will be affected, click Apply. The selected visual tag will be applied or removed from each listed record immediately. Any additional visual tags already applied to the patient or responsible party are unaffected.