Treatment Sequence Template Editor
Use the Treatment Sequence Editor to create and manage standard treatment protocols. The templates, can include the appointments and checklists that are generally required for completing different types of treatment. After selecting a treatment sequence template for a patient, you may edit the sequence at any time to meet that patient's unique treatment needs.
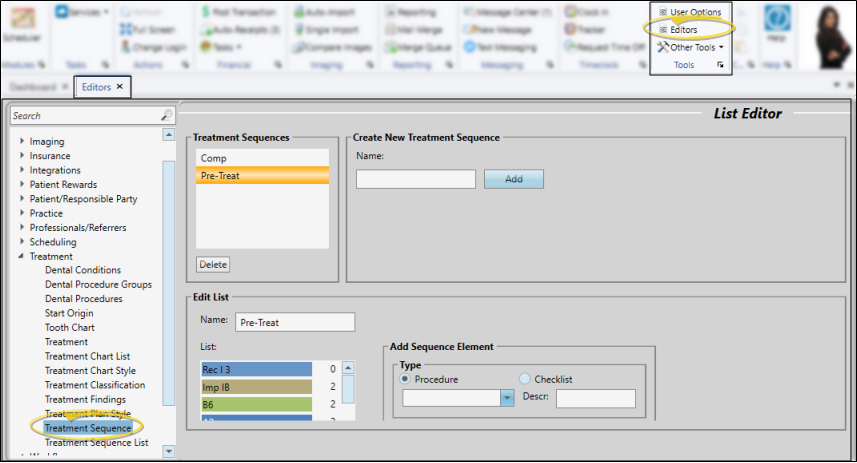
Select Editors from the Tools section of the Home ribbon bar. Then, from the Treatment section, open the Treatment Sequence editor. (You can also use the Search field to look for the editor you want to work with.)
 Create a New Record
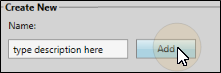
Type a description in the Create New portion of the window. Then click Add. You can then edit your record to complete the details.
Select Existing Record
Your list of existing templates appears at the left. Click the template to work with, then review and edit the details at the bottom of the window.
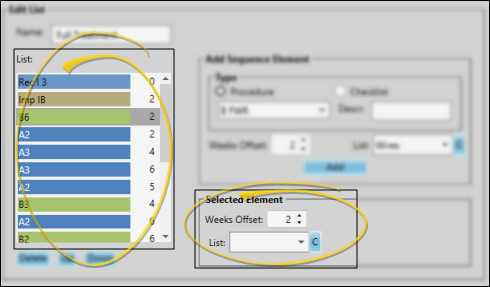
Type a name to describe this treatment sequence template. Often, the name indicates the treatment phase or basic options. You can create as many templates as you need to plot out all treatments available to your patients at your practice.

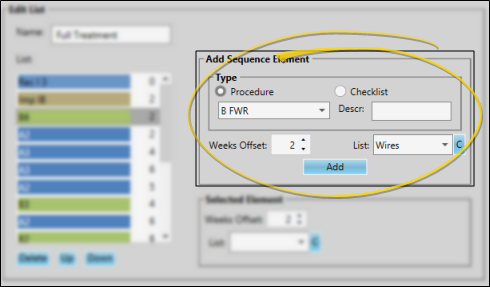
Choose Type - Choose Procedure to insert an appointment procedure into the sequence, and choose the appropriate procedure code. Choose Checklist to insert a non-appointment item into the sequence, and type a description, such as "Scan Insurance Card". You might use checklist items, for example, to be sure the patient receives all relevant educational materials, and to record that all insurance and financial forms have been returned to your office.
Enter Weeks Offset - Enter the number of weeks after the previous sequence item that this item should be completed, An offset of 0 will create an item for the same week as the previous item.
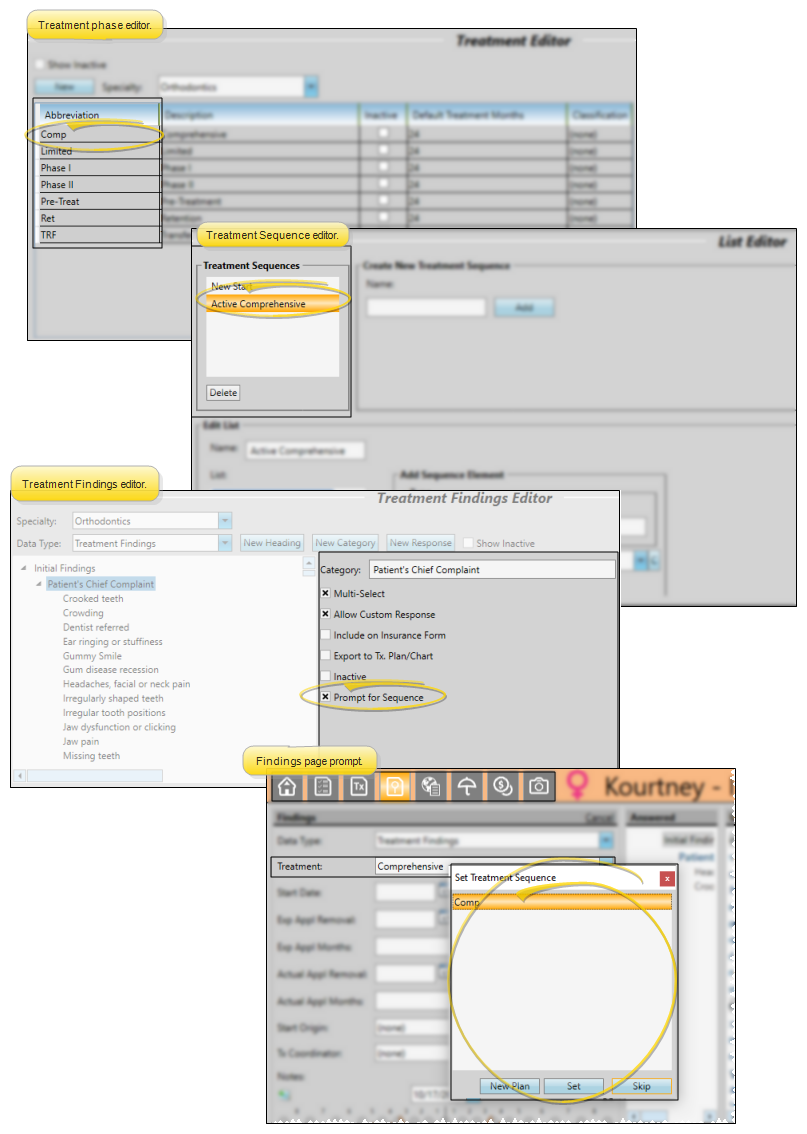
Assign List - (Optional.) If you assign a Treatment Sequence List to this item, you will be able to choose a response from the list to enter into the Note field when you apply the item to a patient's treatment sequence. If no list is assigned, you will be able to type a note into the field. (See "Treatment Sequence Lists" for details about setting up your lists.)
Add - After entering all the item details, click Add. The item is added to the end of your sequence, but you can move it up and down the list as needed. You can add as many procedures and checklist items as needed to create your standard protocol for this treatment sequence.
Once you create a Sequence item, you cannot change the type or description. You can, however, delete items created in error, and re-enter them correctly as needed.
Once you create a Sequence item, you cannot change the type or description. You can, however, delete items created in error, and re-enter them correctly as needed.
Edit Sequence Item Options - Choose a sequence item from the List section of the window. You can then use the Selected Element fields at the right to change the number of weeks to schedule after the previous item, and to assign a Treatment Sequence List, which allows you to quickly insert standard notes into treatment sequence items. You can also click C to Clear, or remove, any list assignment so that you can type a unique response in the note field when this item is added to a patient's treatment sequence. and arrange the items in the order they should happen during a patient's treatment.
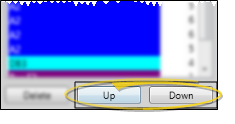
Re-Order Items - Choose a sequence item from the List section of the window, then use the up / down buttons to arrange the items in the order they should appear in the patient's folder.
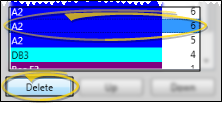
Delete Items -Choose a sequence item from the List section of the window, then click the Delete button at the bottom of the list. This does not remove the item from any existing patient treatment sequences that were created from this template.
Click the name in the Treatment Sequences list, then click Delete. This does not affect any existing patient treatment sequences that were created from this template.

Click  Save in your Quick Access toolbar or File ribbon bar (or press Ctrl+S on your keyboard) to save any changes you have made.