Date - Choose the date to use. You can type a date in the Date field, or click the v button to select a date from a calendar. You can also enable the Today option to use today's date. If Today is enabled, you cannot type a date or open the calendar: Disable the Today option first if you want to choose a specific date. The date or you select will appear just under the report title; if you select a date that is not "today", this date will be different from the run date that appears in the report header.
Weeks to Display - Select the number of weeks to include on the report (up to 10), starting from the date you chose above.
Use Open Start Match - Enable this option to count only appointment openings that begin with an Open Start cell.
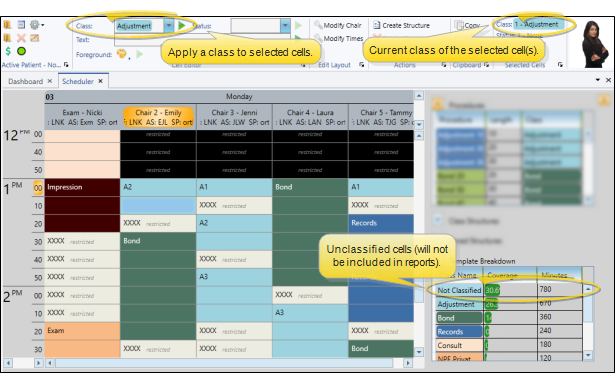
Procedures and Classes - All of your scheduling classes are listed, along with their assigned procedures. You can select individual procedures to include in the report, or simply select a class heading to include all the procedures in that class. Or, use the Select All / Clear All buttons to choose / clear all classes and procedures. In addition, you can expand / collapse classes individually, or use the Collapse All / Expand All button to list only class headings, or all procedures in all classes.
Office - Choose the offices to include on the report, or use Select All / Clear All to include / clear all office locations.
Group By Office - Enable this option to sort the appointment openings by office, and print the results for each office on separate pages. If this option is disabled, all the appointment openings will be lumped together.
Orthodontist / Doctor - Choose to include only the records for a specific orthodontist / doctor, or include the records for all orthodontists in your practice.

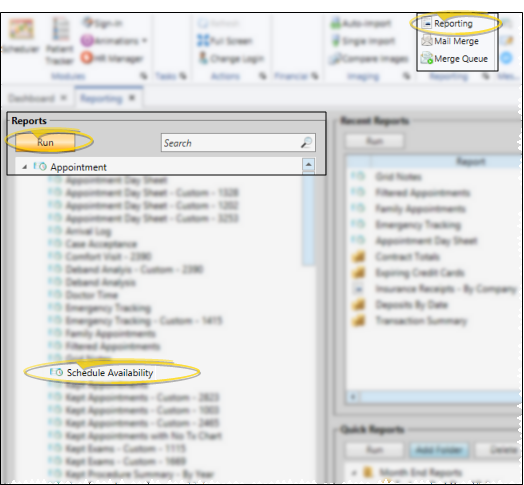
 Show/Hide icon in the upper left corner of the Reporting window.)