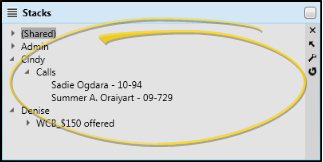
Stacks Widget
Use your Stacks widget to flag patients for further action. When you find yourself needing to complete additional work for a patient at a later time, simply add the patient to an appropriate stack folder, or add the task to someone else's stack. When you have finished the task, you can remove the patient from the stack. Stacks do not leave an audit trail.
Use the Stacks options in your General security group to allow / limit access to your own stack and other users' stacks.
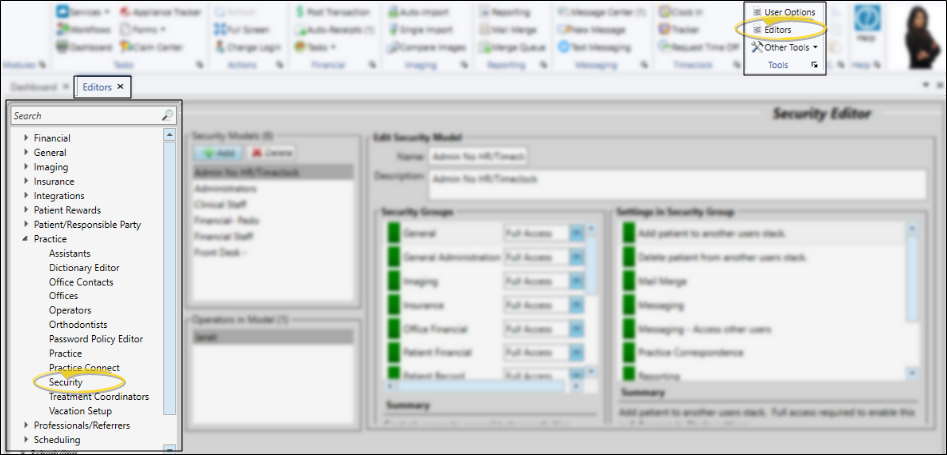
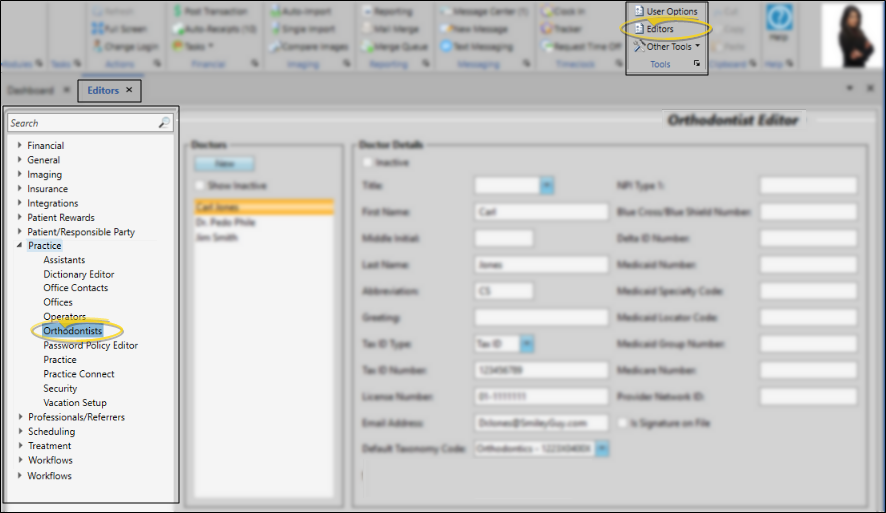
Select Editors from the Tools section of the Home ribbon bar. Then, from the Practice section, open the Security editor. (You can also use the Search field to look for the editor you want to work with.).
Select a security model to work with, then select the "General" security group. You use the three stacks settings to define which stacks, if any, users can see and work with.

Stacks Setting - This setting defines the general access a user has to the Stacks widget. More...
"No Access" prevents users from seeing or using the Stacks widget. "Read Only" allows users to see all stacks, and make changes to their own and shared stacks. "Full Access" allows users to see and make any changes to any stack.
Add Patient to Another User's Stack - This setting allows you to optionally expand the "Read Only" general Stacks security setting to adding patients to someone else's stack. More...
Read-Only Security Models Only - This setting applies only when the general Stacks security setting is "Read Only". When the general setting is "No Access", you cannot add any patient to any stack, regardless of this setting. When the general setting is "Full Access", you can always add any patient to any stack, regardless of this setting.
The "No Access" and "Read Only" settings prevent users from adding patients to someone else's stack, but allow adding to their own and shared stacks. "Full Access" allows users to add patients to another user's stack as well as their own and shared stacks.
Delete Patient From Another User's Stack - This setting allows you to optionally expand the "Read Only" general Stacks security setting to removing patients to someone else's stack. More...
Read-Only Security Models Only - This setting applies only when the general Stacks security setting is "Read Only". When the general setting is "No Access", you cannot remove any patient from any stack, regardless of this setting. When the general setting is "Full Access", you can always remove any patient to any stack, regardless of this setting.
The "No Access" and "Read Only" settings prevent users from removing patients from someone else's stack, but allow removing from their own and shared stacks. "Full Access" allows users to remove patients from another user's stack as well as their own and shared stacks.
Click  Save in your Quick Access toolbar or File ribbon bar (or press Ctrl+S on your keyboard) to save any changes you have made.

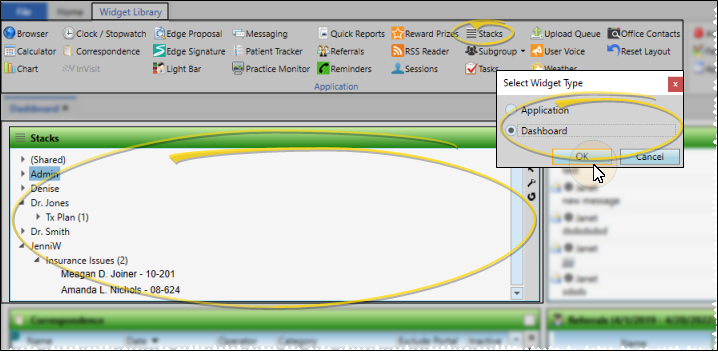
From the Application section of the Widget Library ribbon bar, choose the Stacks widget, and select to open it as either a Dashboard or Application widget.
Stacks Security - Your security rights may limit the stacks you can see and work with. See "Get Started", above, for details.
Click the  Settings icon on the widget tool panel to set up which stacks to include in the widget, and how to sort the items within each stack.
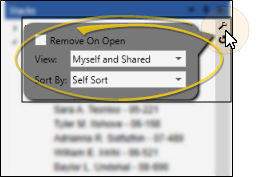
When this option is enabled, a patient is removed from the stack when you open the patient folder from the stacks widget. When the option is disabled, patients remain in the stack until you remove them manually.
Choose whose stacks to include in your widget display: Myself and Shared shows you only stacks you are responsible for; All Operators lists each Edge Cloud user, whether or not that user has any current stacks items; All Operators With Stacks lists all operators that have at least one stack folder.
Choose how to sort the items within each stack: Self Sort allows you to drag and drop patient names in to different positions within the stack. Or, the stacks can be sorted automatically by Date Entered, Full Name, Last Name, or Primary Code.
When you are happy with your widget settings, click anywhere on your screen, or press Enter on your keyboard to exit the window. The settings are saved and applied to the widget immediately. All your settings are saved even if you exit and reopen the widget.
Right-click an operator or stack to add, remove, edit, or clear a stack folder.
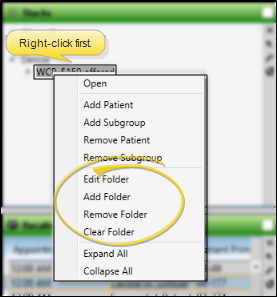
To create a stack for an Edge Cloud operator, right-click the operator name, select Add Folder and enter a category name. (If the operator you want to work with is not listed, be sure your widget is set to view All Operators, as described above.) Once the stack has been created, any Edge Cloud operator can view it, as long as their widget is set to view All Operators or All Operators with Stacks.
Right-click a stack and select Edit Folder to change the name of the stack. You might name stack folders something like Care Call, Insurance Verification, Past Due, and Import Images, indicating the type of task required.
Right-click a stack name and select Clear Folder to remove all the patients from the stack. The folder itself is not deleted.
Right-click a stack name and select Remove Folder to remove it entirely. If there are patients currently in the stack, you must confirm your action to continue. There is no history kept of patients who were in the stack, nor of the stack itself after it is deleted.
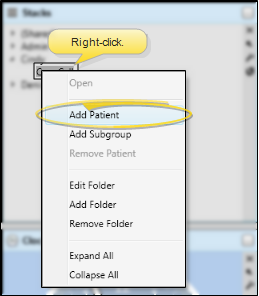
You can add an individual patient to a stack from the Stacks widget, the Patient ribbon bar, or the Scheduler.
Add from the Stacks Widget - Right-click a stack and select Add Patient. Use Fast Find to locate the appropriate patient folder. If you attempt to add a patient that is already in the selected stack, your action is ignored. You can repeat the process to add the patient to multiple stacks.
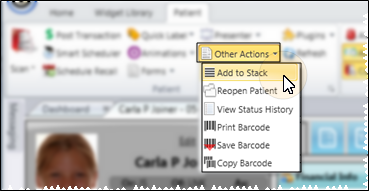
Add from the Patient Ribbon Bar - While working with a patient folder, you can select Other Actions then Add to Stack from the Patient ribbon bar. You then choose the stack to work with, and click Add to complete the process.
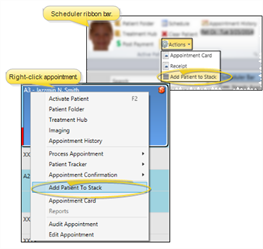
Scheduler - Right-click a patient appointment and select Add to Stack, or activate the patient and select Actions then Add Patient to Stack from the Scheduler ribbon bar. You then choose the stack to work with, and click Add to complete the process.
Automate Adding Patients to Stacks - Use the New Stack Entry workflow activity to add an individual patient or a subgroup of patients to a specific stack. See "Workflow Activities" for details.
![]() Add a Subgroup of Patients to a Stack
Add a Subgroup of Patients to a Stack
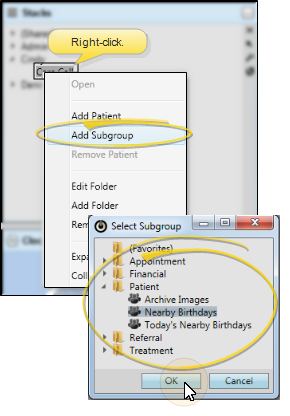
Right-click a stack folder and select Add Subgroup. Choose the subgroup to search for. Each patient that matches the subgroup criteria is added to the stack. You can repeat the process to add the patients to multiple stacks. See "Subgroup Editor" for details about creating subgroups.
![]() Move a Patient to a Different Stack
Move a Patient to a Different Stack
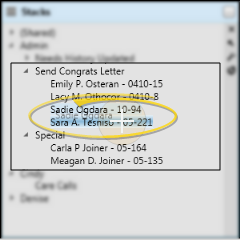
Use drag and drop to move a patient from one stack to another stack. If your Sort widget setting is set to Self Sort, you may drop the patient in any location you want. Otherwise, the patient is incorporated into the stack according to the selected sort order.
Hover over a patient name in a stack to see a tool tip that includes the patient status, treatment phase, next appointment, responsible party contact details, and other information.

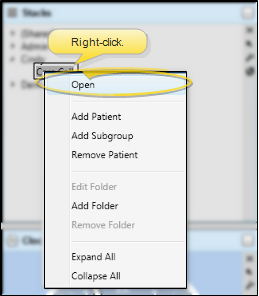
Double-click a patient name in a stack, or right-click the name and select Open to open the patient folder. If the Remove on open widget setting is enabled, the patient will be removed from the stack automatically as soon as you open the patient folder. Otherwise, you will need to remove the patient from the stack manually.
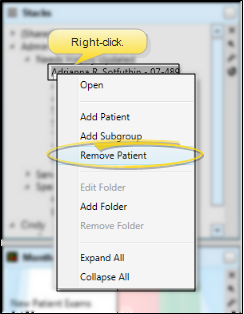
Right-click a patient name in a stack and select Remove Patient to manually remove the patient from the list.
Remove On Open Setting - If the Remove On Open widget setting is enabled, the patient will be removed from the stack automatically as soon as you open the patient folder from a stac.
Remove from Stacks Workflow - Use the Remove Stack Entry workflow activity to remove an individual patient or a subgroup of patients from a specific stack. See "Workflow Activities" for details.
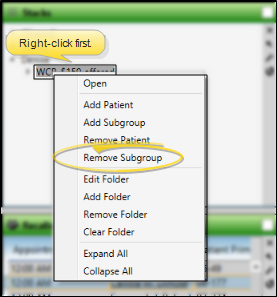
Right-click a stack folder and select Remove a Subgroup. Choose the subgroup to search for. Each patient that matches the subgroup criteria is removed from the stack.
Remove On Open Setting - If the Remove On Open widget setting is enabled, the patient will be removed from the stack automatically as soon as you open the patient folder from a stac.
Remove from Stacks Workflow - Use the Remove Stack Entry workflow activity to remove an individual patient or a subgroup of patients from a specific stack. See "Workflow Activities" for details.
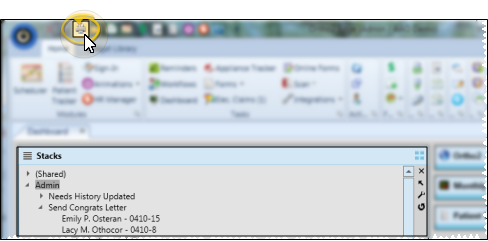
Open Stacks as a Dashboard widget, and expand the panel. Click  Print from your File ribbon bar or Quick Access toolbar (or press Ctrl+P on your keyboard) to print a copy of the current screen contents.
Depending on your device and panel format, you can expand and minimize widget panels, move the widget location on your screen, float them in their own windows, refresh and print data, and close the widget when you no longer need it. See Application widgets or Your Dashboard for details about using these features.