 Editors > Financial > Payment Accounts. (You can also search for the editor you want to work with.)
Use the Payment Accounts editor to define the types of payments you accept from responsible parties. If you integrate Edge with an electronic payment processing system (such as X-Web, Vanco, or Element), you must create at least one payment account to use with that integration.
Home Ribbon Bar - Editors > Financial > Payment Accounts. (You can also search for the editor you want to work with.)
Click Editors from the Tools section of the Home ribbon bar.

Select Financial in the list at the left and elect the Payment Accounts option.

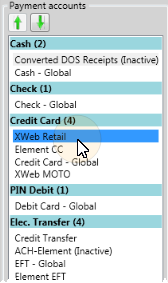
Choose Record to Work With - Your list of existing records appears at the left. Click the record to work with. The details for that record appear at the right. Note that payment accounts that have been flagged as inactive are noted in parenthesis.
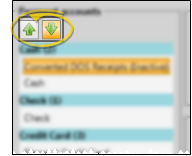
Re-Order Accounts - Use the arrows at the top of the payment accounts list to reorder accounts within each section. You might use this, for example, to move all inactive accounts to the bottom of the list. Note that the accounts appear in this order when you manually post transactions.
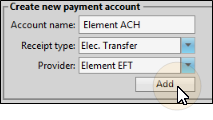
Create a New Payment Account - Type a name in the Account name field, and select the receipt type (cash, check, etc.). If you select Credit Card or Electronic Transfer, you also specify the provider to use when you post these transactions. Then click Add. You can now select the account details, described below.
Account Details - Identify how you will use this payment account within your Edge system.
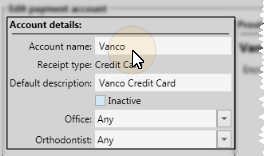
Account name - Enter a name that describes how to use this payment account. If you separate transactions by orthodontist and/or office, be sure to identify the doctor / location for this account. Also, if you have separate merchant ID's for retail, moto, and/or ecommerce transactions, be sure the account name specifies which type of transaction you should post with this account.
Default description - Enter the default description to use when posting transactions with this payment account.
Inactive / Active toggle - Once created, you cannot delete a payment account. You can, however, flag payment accounts that you do not use as  Inactive.
Office / Orthodontist designation - If you separate transactions by office and/or orthodontist, specify the doctor / location for this account. Otherwise, enter Any in these fields. Note that if you have separate merchant ID's for offices and/or doctors, you will need to create a separate payment account for each.
Provider Details - (Credit card and electronic transfer accounts only.) When you create a credit card or electronic transfer account, and select to use an integrated payment processing provider, complete the Provider Details section of the window. The information required depends upon the payment type and processing system you are working with. Note that if you have obtained separate client ID numbers for each orthodontist or office, you must create a payment account for each, with the appropriate ID numbers in the provider details fields. Refer to the appropriate details for your integration provider:
Element - As a top 40 US processor and leader in simple and secure payment technology, Element offers Tokenization and Point-to-Point Encryption (P2PE) technology simplifying security and PCI compliance for your practice. And, Element’s commitment to honest, upfront pricing with no hidden fees is shown in our True PricingSM Promise—We’ll meet or BEAT your current processing rates and give you a free, side-by-side rate comparison! Even if you are locked into a contract or just want to stay with your current provider, Element has a solution for you. Our Gateway works with any processor out there today.
OpenEdge - OpenEdge Edge's credit card feature lets you swipe or manually enter credit card payment information directly into patients' ledgers individually or with AutoReceipts. All transactions are authorized quickly over a secure connection, using free credit card processing software by OpenEdge. With Edge’s credit card feature, you can provide your responsible party with one receipt that includes the credit card payment information, enhancing your professional image, and simplifying transactions for everybody.
OrthoBanc - With this integration, you access OrthoBanc's state-of-the-art system which provides patient credit risk assessment in just seconds. After you create payment plans, they are submitted from Edge to OrthoBanc. OrthoBanc collects payments, manages credit card expiration dates and NSF/failed payment follow-up, and deposits are downloaded from OrthoBanc and posted directly in patient ledgers. No additional Edge module is required.
Vanco Payment Solutions - The Edge integration with Vanco allows you to easily process credit card and electronic funds transfer AutoReceipts through Vanco Payment Solution's e.service® payment solutions right from Edge. Vanco Payment Solutions is a PCI (Payment Card Industry) Level 1 Compliant Service Provider. Then, payment information is posted directly into patient ledgers
Save Changes![]() Click
Click  Save in your Quick Access toolbar or File ribbon bar (or press Ctrl+S on your keyboard) to save any changes you have made.
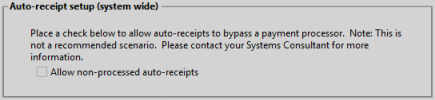
Auto-Receipt Setup Option - The Auto-Receipt setup option at the bottom of the payment accounts editor provides a way to run Auto-Receipts that are not actually processed by an integrated payment provider. This feature is generally only used for testing and other specialized purposes. Please contact Ortho 2 before enabling this option.
OrthoBanc Integration - If you use the Edge / OrthoBanc integration, you will want to create a payment account specifically for those deposits. See "About the OrthoBanc Integration" for details.
 │
│
Ortho2.com │1107 Buckeye Avenue │ Ames, Iowa 50010 │ Sales: (800) 678-4644 │ Support: (800) 346-4504 │ Contact Us
Remote Support │Email Support │New Customer Care │ Online Help Ver. 8/3/2015


