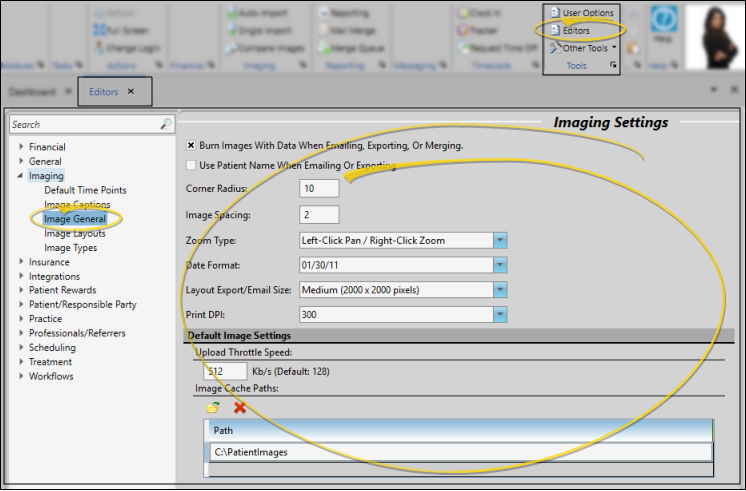
Use the Image General editor to select whether to "burn" identification labels onto your images, and to specify certain imaging format and size options.
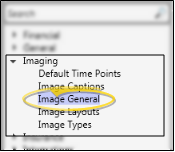
How to Get Here
Home ribbon bar > Editors > Imaging > Image General. (You can also search for the editor you want to work with.)
Click Editors from the Tools section of the Home ribbon bar.
Expand the Imaging section, if needed, and choose the Image General option.
Setup
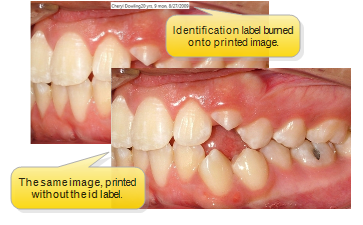
Burn images with data - Enable this option to include a patient identification label with images you export. The label does not appear on your screen when you view imaging layouts, but is included when you export, e-mail or print them. (See "Set Up Image Captions" for details about selecting the type of information to include on the label.)
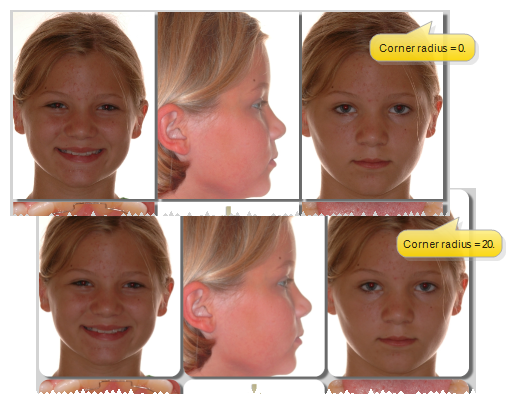
Corner radius - Enter the degree of curve to use at the edges of your images. The larger the number, the more pronounced the curve. To display image edges as square, enter the value "0" (zero). Note that this option does not apply to your card flow layouts.
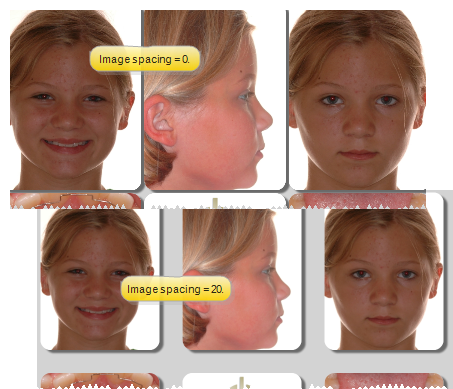
Image spacing - Enter the distance to use between images. The larger the number, the farther apart the images will display. To display images as close together as possible, enter the value "0" (zero). Note that this option does not apply to your card flow layouts.
Zoom type - Select how you want to control image zooming with your mouse buttons.
Date format - Choose the format you want dates to appear in your image layouts, and on identification labels you burn onto images.
Layout export / email size - Choose the image size to use when you export or e-mail a layout.
Print DPI - Choose the print quality to use when sending images to a printer.
Save Changes Click Save in your Quick Access toolbar or File ribbon bar (or press Ctrl+S on your keyboard) to save any changes you have made.
 Editors > Imaging > Image General. (You can also search for the editor you want to work with.)
 Save in your


