Use the Messages tab of your Reminders editor to create and edit the messages you send via email, text message. and telephone.
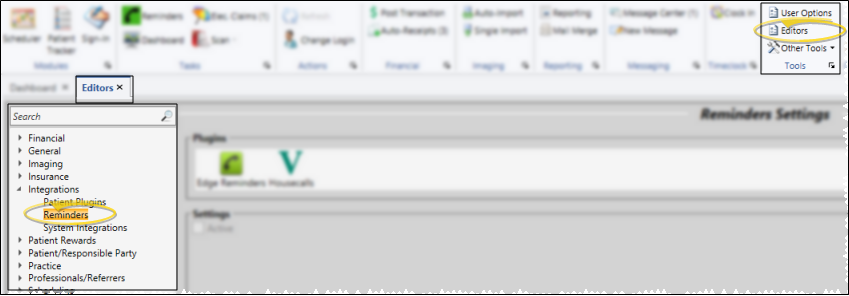
How to Get Here
Home Ribbon Bar - Editors > Integrations > Reminders. (You can also search for the editor you want to work with.) After selecting the editor to open, enter your Edge user name and password. Only operators assigned to a security model that allows full access to the Edge Reminder Editor settings of the General Administration group can open this editor. See "Set Up Security Access" for details.
Click Editors from the Home ribbon bar.
Select Integrations in the list at the left and choose the Reminders option.
Setup
Select Edge Reminders - Choose the Edge Reminders plug in, and be sure the Active option is enabled.
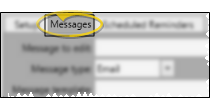
Open Messages Options - Click to open the Messages tab.
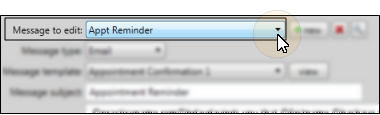
Edit Existing Message - If you want to edit a message that has already been created, select it from the dropdown list.
Change Message Properties - The message properties determine whether the message is linked to upcoming appointments, or responsible parties. You select the message properties when you create a new message, but you can change the properties of an existing message if needed. If you need to change the message properties, click the Settings button beside the message name. Select Appointment Message if you want everyone with an appointment on a specific date to receive the message, or select Responsible Party Message if you want to be able to send the message to a subgroup of patient folders, such as messages regarding birthday greetings or missed appointments. Click Ok to accept your changes.
Edit Message Details - After selecting the message to work with, you can change the message type, email template, and text, as described below.
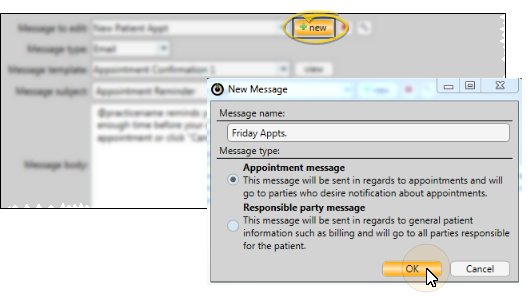
Create a New Message - If you want to create a new message, click New,
Message Name & Type - Type a description of your message that makes it easy to determine who it is intended for. Select Appointment Message if you want everyone with an appointment on a specific date to receive the message, or select Responsible Party Message if you want to be able to send the message to a subgroup of patient folders, such as messages regarding birthday greetings or missed appointments. Click Ok to accept your changes.
Message Details - After entering a message name and type, you can enter the message type, email template, and text, as described below.
Message Details - After choosing an existing message to work with or creating a new message, you can enter the output type, email template, and message text and variables.
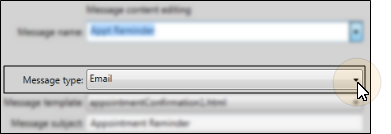
Message Output Type - Choose whether this message will be sent via email, text, or answering machine (voice).
Text Output Notice - Keep your text messages be as short as possible: Some patients may have cell phones that allow a maximum of 150 characters per message.
Voice Output Notice - Note that voice messages contain special codes that must not be changed in any way, or the message will not function as intended. Please contact a representative at the phone number listed at the bottom of this topic if you need additional assistance.
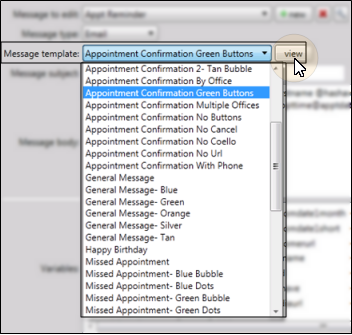
Message Template - (Email messages only.) Select from a list of ready-to-send message templates. Unless otherwise specified in the template name, your email reminders will include buttons for confirming or canceling the appointment, as well as links for opening your web site or a map to your office. If you do not want the email to include these interactive options, be sure to select a template name that says the items are excluded.
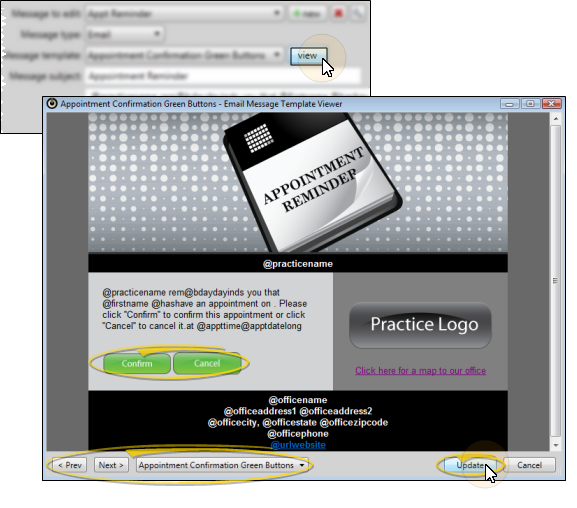
Message Template Preview - (Email messages only.) To preview message templates, click View. With the template window open, you can click Previous / Next to cycle through all templates, or use the dropdown at the bottom of the window to preview a specific template. When you are happy with the template you have selected, click Update. Note that you can also click the interactive buttons on the template to view that button's linked command.
Click View:
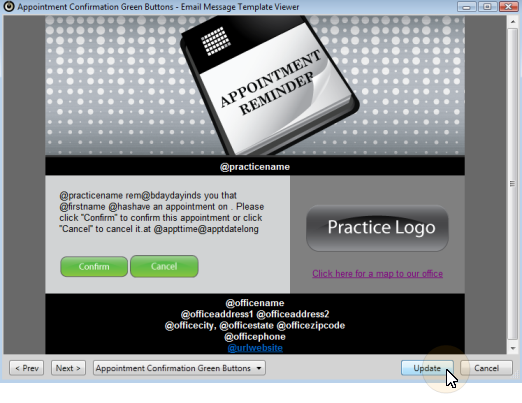
Preview the message:
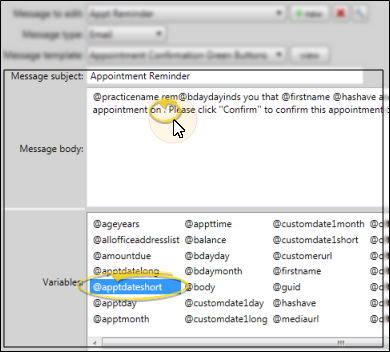
Message Subject & Body - (Text Message Notice: Keep your text messages as short as possible: Some patients may have cell phones that allow a maximum of 150 characters per message.) Type or edit the message in the Message Body box. Email messages also have a Message Subject text box. Variables, such as the patient name, appointment date, and appointment time, act as a single character to prevent misspelling. To add or remove a variable from the message body, simply drag and drop the variable from the list at the bottom of the window.
Certain email templates (described above) include buttons for confirming or canceling the appointment, as well as links to your web site and a map to your office. To add or remove the Confirm and Cancel buttons, or the web site or map links from your message, you must select a different template.
Inactivate message - Select the message to work with, and click Delete. Although the message is not deleted from your system, it will no longer be available for new reminders.
Save your changes - Click Save in your Quick Access toolbar, or press Ctrl+S on your keyboard to save the changes you have made.
 Editors > Integrations > Reminders. (You can also search for the editor you want to work with.) After selecting the editor to open, enter your Edge user name and password. Only operators assigned to a security model that allows full access to the Edge Reminder Editor settings of the General Administration group can open this editor. See "Set Up Security Access" for details.
 Active option is enabled.
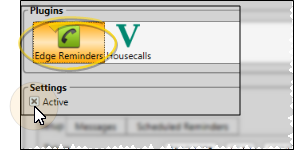
 Settings button beside the message name. Select Appointment Message if you want everyone with an appointment on a specific date to receive the message, or select Responsible Party Message if you want to be able to send the message to a subgroup of patient folders, such as messages regarding birthday greetings or missed appointments. Click Ok to accept your changes.
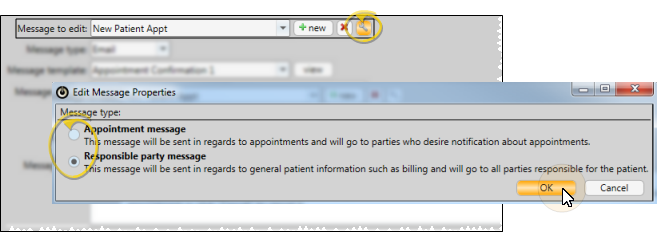
 Delete. Although the message is not deleted from your system, it will no longer be available for new reminders.
 Save
Save 


