Use the tooth chart to record and review the state and health of your patient's teeth. Tooth chart data is saved by date and treatment phase so you can review progressive tooth conditions as necessary. You can view the tooth chart from a patient folder, and include it in mail merge documents.
Choose Viewing Mode - You can enable the Stack tooth chart and images Tooth Chart user option to stack your tooth chart and image layout on your Treatment Hub, or disable this option to show the tooth chart and image layout side-by-side. See "Set Up Tooth Chart Options" for details.
You can open this feature in multiple ways: Use the method that's most convenient for you.
Patient Folder![]()
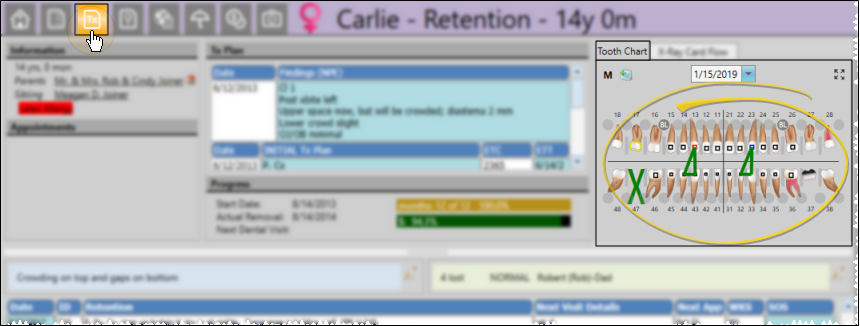
 Treatment Hub page.
Patient Folder![]()
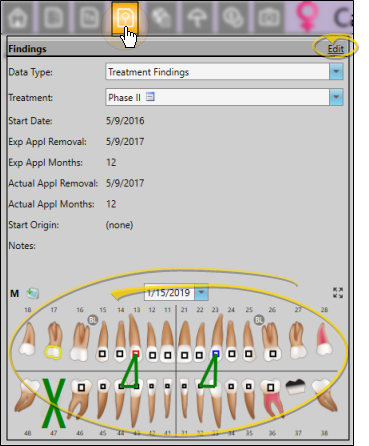
 Treatment Findings page.
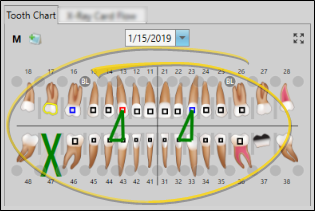
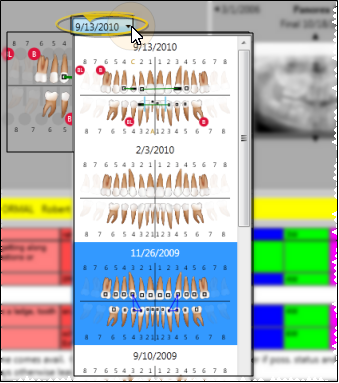
Select Record to View![]() Choose the date you wish to review. Tooth chart data is saved by date and treatment phase. The appearance of a patient's tooth chart depends upon the appliances and conditions you have selected for each tooth.
Choose the date you wish to review. Tooth chart data is saved by date and treatment phase. The appearance of a patient's tooth chart depends upon the appliances and conditions you have selected for each tooth.
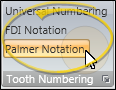
Numbering Method![]() While viewing the tooth chart from the Treatment Hub or the Findings page of the patient folder, you can use the Tooth Numbering section of the Patient ribbon bar to temporarily change the tooth numbering system to display. When you exit and reload a patient's folder, your default tooth numbering system will be used. (See "Set Up Tooth Chart Options" for details about selecting the default numbering method.)
While viewing the tooth chart from the Treatment Hub or the Findings page of the patient folder, you can use the Tooth Numbering section of the Patient ribbon bar to temporarily change the tooth numbering system to display. When you exit and reload a patient's folder, your default tooth numbering system will be used. (See "Set Up Tooth Chart Options" for details about selecting the default numbering method.)
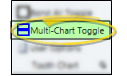
Multi-Chart Mode![]() Click the
Click the  Multi-Chart Toggle icon from the Tooth Chart section of the the Patient ribbon bar to switch a tooth chart to display either a single chart with all teeth combined, or a split chart showing adult and child teeth separately. Be sure you select the appropriate multi-chart mode before making changes to the tooth chart: Toggling the multi-chart mode for a saved tooth chart may result in data loss.
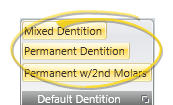
Dentition Stage![]() You can select the dentition stage of individual teeth as needed, or apply a pre-determined dentition template to all teeth at once.
You can select the dentition stage of individual teeth as needed, or apply a pre-determined dentition template to all teeth at once.
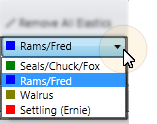
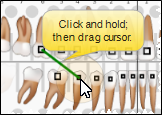
Elastics![]() Click a tooth, then drag to add elastics between teeth in the tooth chart. You can also select the elastics type to use, and remove elastics as needed.
Click a tooth, then drag to add elastics between teeth in the tooth chart. You can also select the elastics type to use, and remove elastics as needed.
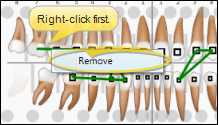
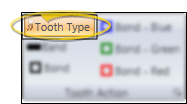
Bands, Bonds, TADS & Tooth Conditions![]() Right-click the tooth to work with, then enable / disable the checkmark beside the appliance or tooth condition you want to apply or remove. Certain tooth conditions can also be applied by using the
Right-click the tooth to work with, then enable / disable the checkmark beside the appliance or tooth condition you want to apply or remove. Certain tooth conditions can also be applied by using the
Spacers![]()
Tooth Notes - Right-click the tooth to work with and select the Note option. Then type the text of the note and click Ok. You can then hover over the  Note icon that appears above the tooth to see a tooltip of the note contents.
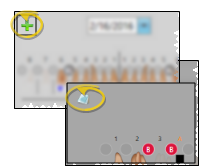
Tooth Chart Notes![]() - Click the
- Click the  Notes icon in the upper left corner of the tooth chart to add and review notes about this chart. You can include the Treatment > Tooth Chart Note variable in mail merge documents to print the latest note in the merge output.
Multiple Conditions - Right-click the tooth to see all the conditions that have been applied to that tooth.
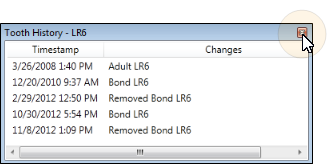
Tooth History![]() Right-click a tooth, then select Tooth History (at the very bottom of the list) to pop up a window that lists the conditions applied to that tooth in the patient's tooth chart, along with the date and time the changes were made. Click the red X at the upper-right corner of the window to close the history. Tooth identification depends upon the currently selected numbering method.
Right-click a tooth, then select Tooth History (at the very bottom of the list) to pop up a window that lists the conditions applied to that tooth in the patient's tooth chart, along with the date and time the changes were made. Click the red X at the upper-right corner of the window to close the history. Tooth identification depends upon the currently selected numbering method.
Save - As soon as you change a tooth chart for a previous date, you automatically create a new tooth chart for today's date. You can then continue making changes to today's tooth chart as needed: All changes are saved as soon as you exit and re-enter the patient folder. Previous tooth chart records cannot be changed.
Tooth Chart / Treatment Chart Integration (Optional.) - The tooth chart / treatment chart integration provides a way for you to add narrative text to a patient's treatment chart as you edit a patient tooth chart. Simply add a new record to a patient's treatment chart, and place your cursor in a text or list and text column. Then enter data into the tooth chart. The
tooth chart data will be translated into a narrative description in the
active column of your treatment chart record.See "Add, Edit, & Sign Treatment Chart Records" for details.
Mail Merge Options - Include a Tooth Chart variable in a mail merge document to include a graphical representation of your extraction requests in letters you send to a patient's dentist or other professional. You can choose from among several tooth chart variables, specifying which numbering system to use, and whether to include just extraction requests or all tooth chart notations in the output. You can also include a Treatment > Tooth Chart Note variable to print the contents of the latest tooth chart note in the document. See "Mail Merge Variables" for details.
 │
│
Ortho2.com │1107 Buckeye Avenue │ Ames, Iowa 50010 │ Sales: (800) 678-4644 │ Support: (800) 346-4504 │ Contact Us
Remote Support │Email Support │New Customer Care │ Online Help Ver. 8/3/2015


 Deciduous;
  Permanent