Patient Alerts
Use patient alerts to notify you of important issues. You can view alerts in several places in the patient folder, optionally include alerts on certain reports (including Appointment Day Sheet reports), and flag alerts to pop onto your screen when certain triggers occur. In addition, alerts flagged as medical concerns appear on the summary of the patient's Treatment
Create Standard Alerts - Use the Alerts
Print Alert List - Run the Alert List report to obtain a list of the alert descriptions you have created to use in patient folders. Ad-hoc alerts you typed into patient folders, and descriptions you deleted from the Alerts editor are not included. The report indicates whether the description is flagged as a medical alert. See "Alert List" for details.
![]() Set Up Default Alert Stops for Custom Alerts - Use the
Set Up Default Alert Stops for Custom Alerts - Use the
These defaults are used by custom alerts you add to a patient folder: Standard alerts use the defaults selected in your Alert Editor.
You can open this feature in multiple ways: Use the method that's most convenient for you.
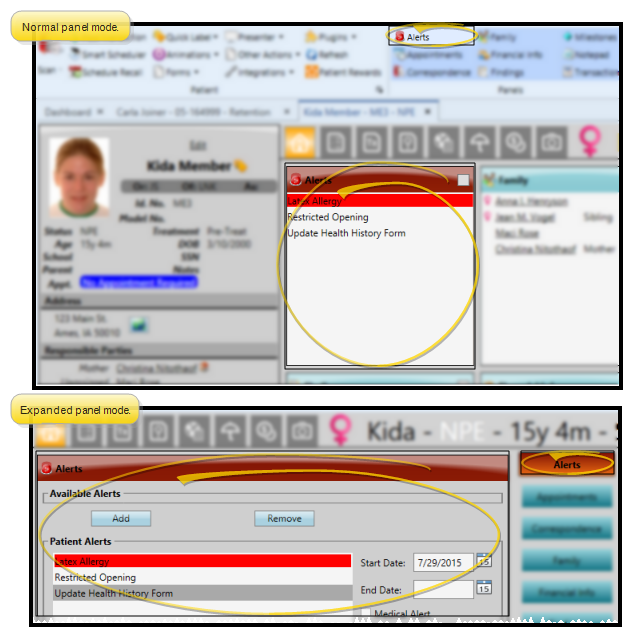
Patient Folder - Open the patient folder Home page, and enable the  Alerts panel. (See "Patient Home Page" for details about opening the patient's Home page and selecting the panel(s) to view. The process is slightly different, depending on whether Normal panel mode or Single Expanded panel mode is enabled in your Visual User Options.) Expand the panel to access the patient's alert editor.
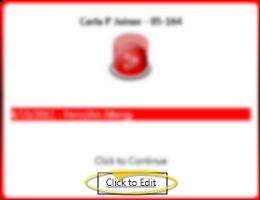
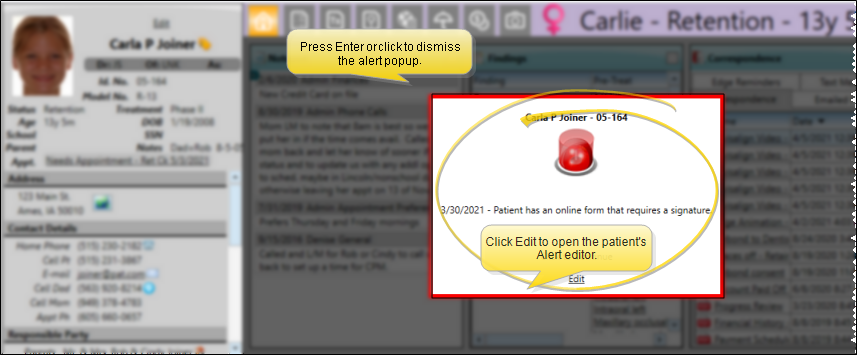
Alert Stop Pop-Up - When an Alert Stop pop-up window appears on your screen, click the Edit Alert link to open the patient's Alert Editor.
Treatment

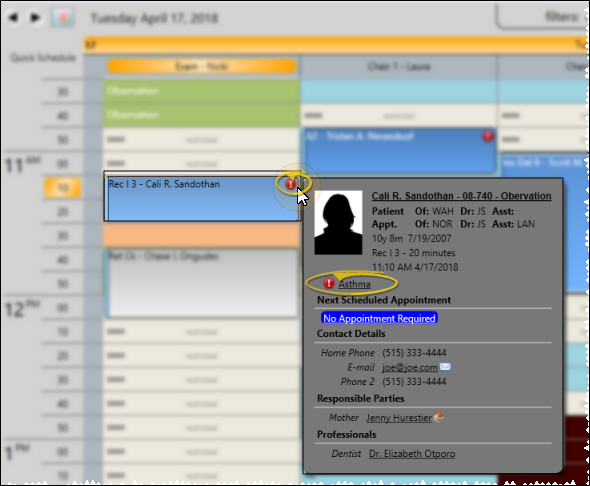
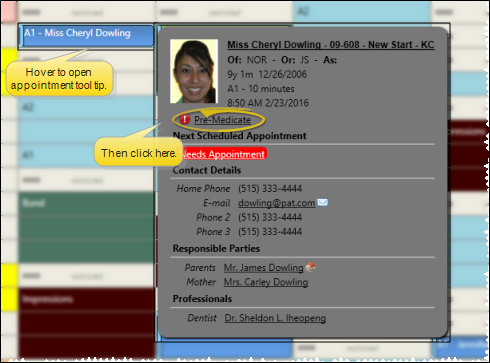
Scheduler - (Available only if the patient has at least one alert flagged as Medical.) Hover over appointment > Click the alert description.
![]() Apply a Standard Alert to a Patient
Apply a Standard Alert to a Patient
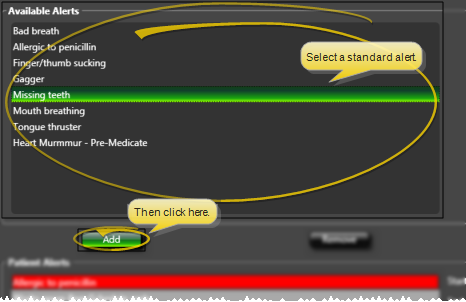
After opening the patient's Alert Editor, select a description in the Available Alerts box and click Add, or double-click the description. You can then customize the alert details. (See "Alert Editor" for details about your list of alert descriptions.)
![]() Create a Custom Alert for a Patient
Create a Custom Alert for a Patient
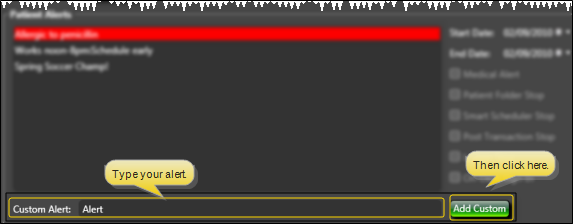
First, open the patient's Alert Editor. Type your alert in the text box at the bottom of the patient's Alert Editor to create a unique alert for this patient. Click Add Custom. You can then customize the alert details.
![]() Edit, Audit, and Remove Alerts
Edit, Audit, and Remove Alerts
After you add a standard or custom alert to a patient, folder, you can customize the alert stops, dates, and description, audit the alert, and remove old alerts.
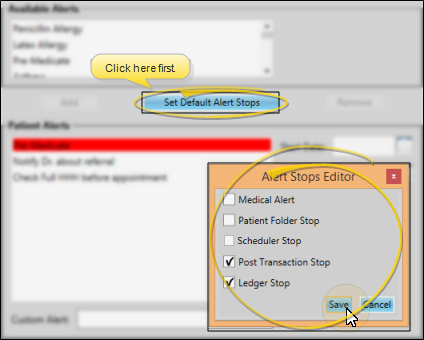
![]() Choose Alert Stops - Select the alert to work with, then enable the features / events you want to flag as alert stops. You can enable multiple stops for an alert, if appropriate. The defaults for standard alerts are in your Alerts Editor. The defaults for custom alerts are defined by clicking the Set Default Stops button on the window.
Choose Alert Stops - Select the alert to work with, then enable the features / events you want to flag as alert stops. You can enable multiple stops for an alert, if appropriate. The defaults for standard alerts are in your Alerts Editor. The defaults for custom alerts are defined by clicking the Set Default Stops button on the window.
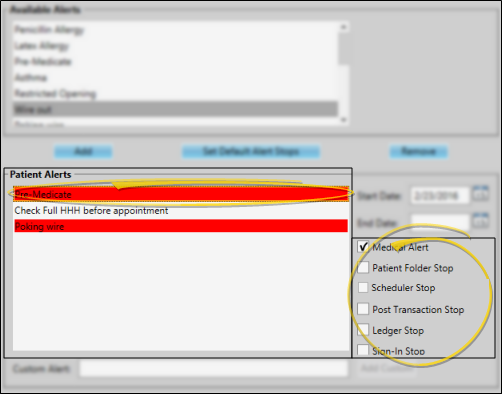
Medical Alert - Enable this option to show this alert in red in the patient folder Alert panel, the Patient Information Panel alerts widget, and the Treatment  Medical Alert icon on Scheduler appointments. When this option is enabled, you can hover over the icon to open the patient information pop-up window, where you can read the alert message. In addition, you can choose to include medical alerts in several reports.
Patient Folder Stop - Enable this option to show this alert in an Alert Stop pop-up window whenever you first open a patient folder.
Scheduler Stop - Enable this option to show this alert in an Alert Stop pop-up window whenever you begin to schedule an appointment for the patient, or drag and drop an appointment for the patient from a Scheduler Bar onto your schedule.
Post Transaction Stop - Enable this option to show this alert in an Alert Stop pop-up window whenever you open the Post Transaction window for the patient.
Ledger Stop - Enable this option to show this alert in an Alert Stop pop-up window whenever you open the patient's Finance page.
Sign-In Stop - Enable this option to show this alert in an Alert Stop pop-up window whenever the patient signs into your office. The alert is triggered only from the sign-in screen, and not if you sign the patient in by right-clicking the appointment in your schedule.
Prevent Patient Sign-In Option - If you have enabled the Sign-In alert trigger, you can optionally enable this option to prevent the patient from completing the sign-in process. The patient will see a message that requests that they check in at the front desk instead. You might use this option, for example, in cases where paperwork needs to be signed or the account is seriously past due.
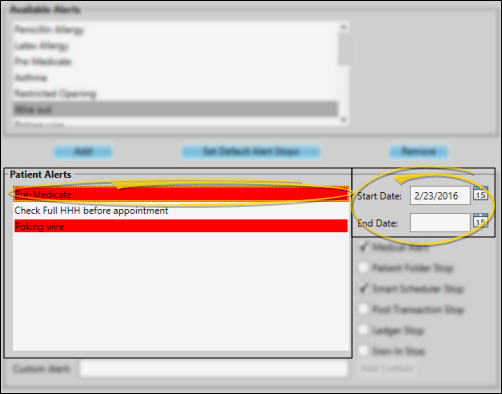
![]() Start / End Dates - Select the alert to work with, then enter the Start Date and optionally the End Date to determine when the alert triggers will be active. The enabled alert triggers will only function during the specified date range. Alerts with no end date will continue to be triggered indefinitely.
Start / End Dates - Select the alert to work with, then enter the Start Date and optionally the End Date to determine when the alert triggers will be active. The enabled alert triggers will only function during the specified date range. Alerts with no end date will continue to be triggered indefinitely.
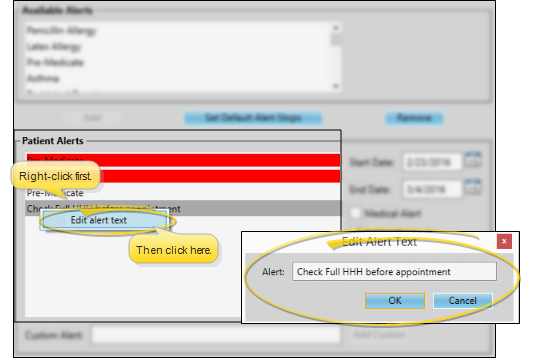
![]() Description - Right-click an alert, and select Edit Alert Text to change the description. Click Ok when you are finished.
Description - Right-click an alert, and select Edit Alert Text to change the description. Click Ok when you are finished.
Audit an Alert - Right-click an alert in the patient's Alert Editor and select Audit to review who created the alert, and when it was created.
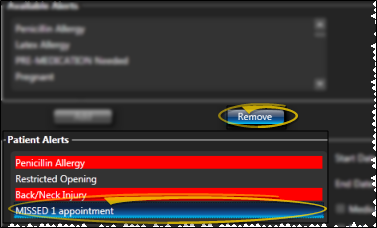
![]() Remove an Alert - Select the alert to work with, then click Remove. Or, double-click the description, then confirm that you want to remove it
Remove an Alert - Select the alert to work with, then click Remove. Or, double-click the description, then confirm that you want to remove it
Save Your Changes - Click Save to save the changes you have made and close the editing window.
You can view a patient's alerts from the Home page of the patient folder, and the Alerts widget of the Patient Information Panel, and view medical alerts from the Treatment
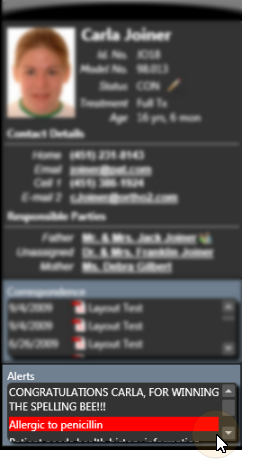
Patient Information Panel - Enable the Alerts patient folder widget to see all active alerts for the patient. Those flagged as medical concerns are red.
Patient Folder - Home page > Alerts panel. (See "Patient Home Page" for details about opening the patient's Home page and selecting the panel(s) to view. The process is slightly different, depending on whether Normal panel mode or Single Expanded panel mode is enabled in your Visual User Options.) All active alerts appear in the Alerts panel of the patient's Home page. Those flagged as medical concerns are red.
Treatment
Alert Stop Pop-Up Window -Alerts will display in the Alert Stop pop-up window whenever you open the triggered page for the patient, and today's date is within the alert date range. When you have finished viewing the alerts, click anywhere within the pop-up, or press the Enter key on your keyboard to close the window.
If you have a patient folder page in a floating window, under certain circumstances the Enter key will not dismiss the alert popup window. In that case, you must click the popup window to dismiss it.
Scheduler Appointments - You can choose to show a Medical Alert icon on Scheduler appointments. When this option is enabled, you can hover over the icon to open the patient information pop-up window, where you can read the alert message. (See "Appointment Options" for details about enabling / disabling this option.