Treatment Plan Records
Use the treatment plan to record medical concerns, prepare the treatment course, and list other issues related to the treatment planning process for your patients. You can add records to any section of the treatment plan at any time, and create multiple plans per patient. You might use multiple plans, for instance, to separate phases of treatment, or to offer multiple courses of treatment to your patients.
Records Become Permanent After 24 Hours - Once a treatment chart or plan record is 24 hours old, or after a chart record has been signed, even if that happens before 24 hours have passed, it cannot be edited or deleted. You may exit a new record you have not yet completed by pressing the Esc key on your keyboard, clicking Cancel at the bottom of the window, or exiting the patient folder before you tab out of the final column of the record. After 24 hours, or after signing a chart record, you can no longer edit the text, although you can still change the way the text looks.
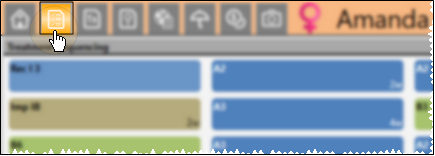
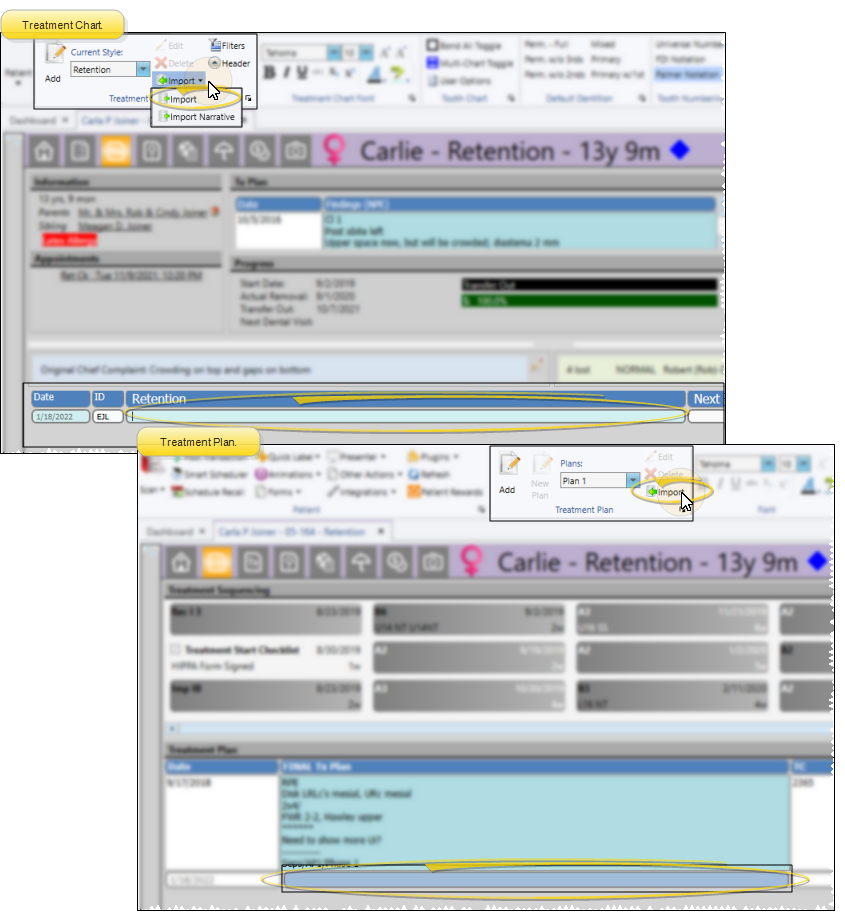
Open the patient folder and select the  Treatment Plan tab in the patient folder header. The treatment sequence appears at the top of the window, and the treatment plan appears in the bottom portion of the window.
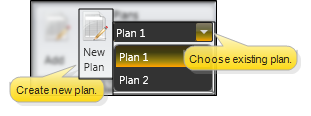
If the patient has multiple treatment plans, select the plan you want to add to, or create a new plan as needed.
Records Become Permanent After 24 Hours - Once a treatment chart or plan record is 24 hours old, or after a chart record has been signed, even if that happens before 24 hours have passed, it cannot be edited or deleted. You may exit a new record you have not yet completed by pressing the Esc key on your keyboard, clicking Cancel at the bottom of the window, or exiting the patient folder before you tab out of the final column of the record. After 24 hours, or after signing a chart record, you can no longer edit the text, although you can still change the way the text looks.
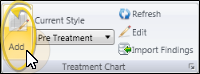
Click the style heading you want to work with, then click Add from the Treatment Plan section of the Patient ribbon bar.(Or right-click the section you want to work with and select Add, or press Ctrl+A on your keyboard). A new record is added to the bottom of the selected style, ready for your input.
Treatment chart and plan records can include a lot of different types of data, depending on the style you chose to create it. After entering information into a column, you can press the Tab key on your keyboard to advance to the next column, or click in the column you want to work with next.
You can type text, or cut, copy, and paste You can cut, copy and paste to add and edit text and/or images to many areas of your system using standard keyboard shortcuts ( Ctrl+X , Ctrl+C , Ctrl+V , respectively). Or, you can often right-click the field or image you are working with and select the action from a menu. In many cases, Ctrl+A selects all available text or images, ready for you to cut or copy, Ctrl+Z performs an Undo of the last action, and Ctrl+Y performs a redo of the last action. text into columns that are set to either Text Only or List and Text in your Treatment Chart / Plan Style editor. In addition, while your cursor is in a Text Only or List and Text column, you can make changes to your tooth chart that will be translated into a narrative in the treatment chart column, and use the Import Findings and Import Narrative tools to add findings, appointment narratives, and treatment sequence details to the column.
Auto-Complete From Dictionary![]() - Begin typing your text in a notepad, treatment chart, or treatment plan record, then press Ctrl+Space to allow the internal Edge Cloud dictionary, as well as your personal and shared dictionaries, to suggest matching text. You can then select an entry from the list to insert into your record. (See "Edge Cloud Dictionary Editor" for details about maintaining your Edge Cloud dictionaries.)
- Begin typing your text in a notepad, treatment chart, or treatment plan record, then press Ctrl+Space to allow the internal Edge Cloud dictionary, as well as your personal and shared dictionaries, to suggest matching text. You can then select an entry from the list to insert into your record. (See "Edge Cloud Dictionary Editor" for details about maintaining your Edge Cloud dictionaries.)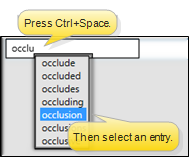
You can select responses from an assigned list for columns that are set to either List Only or List and Text in your Treatment Chart / Plan Style editor.
If you are entering data into a List Only column, you can select only one responses, and you cannot edit that response. If you are entering data into a List and Text column, you can select multiple responses from the list by pressing the space bar between responses, edit the responses, and type or copy/paste additional text as needed. In addition you can import tooth chart, findings, and appointment / treatment sequence narratives into List and Text columns, just like in Text Only columns, described above.
List responses can be set up to trigger patient rewards and workflows when entered into a treatment chart record. Also, lists may be set up to allow text search and to auto-complete.
Text Search Option![]() - When the Text Search option
is enabled for a list, you can begin typing a list response, and your cursor will jump to the response that begins with your typed text. (The matching will occur only after you have stopped typing.) If this option is disabled, your list responses will be numbered, and you can type a number to jump to the response you want.
- When the Text Search option
is enabled for a list, you can begin typing a list response, and your cursor will jump to the response that begins with your typed text. (The matching will occur only after you have stopped typing.) If this option is disabled, your list responses will be numbered, and you can type a number to jump to the response you want.
Auto Complete Option![]() - When the Auto Complete option is enabled for a list, you can press the Tab key on your keyboard to add the entirety of the currently selected response to the treatment chart / plan record. If this option is disabled, you must click the response to add the entire response text to the record.
- When the Auto Complete option is enabled for a list, you can press the Tab key on your keyboard to add the entirety of the currently selected response to the treatment chart / plan record. If this option is disabled, you must click the response to add the entire response text to the record.
You can select a response from your
Text Search / Auto Complete![]() - The Text Search and Auto Complete options are automatically enabled for Procedure List columns. This means that you can begin typing a procedure name, and your cursor will jump to the response that begins with your typed text. You can then press the Tab key to enter that response into the column.
- The Text Search and Auto Complete options are automatically enabled for Procedure List columns. This means that you can begin typing a procedure name, and your cursor will jump to the response that begins with your typed text. You can then press the Tab key to enter that response into the column.
First, create a treatment chart or treatment plan record with a style that contains a column that accepts Text Only or List and Text input. With your cursor in that column, click  Import from the Treatment Chart or Treatment Plan ribbon bar. Or, select Import from the Import dropdown options of the Treatment Chart ribbon, or press F2 on your keyboard. You then choose which findings to import. See "Add Findings to Treatment Plan / Chart" for details.
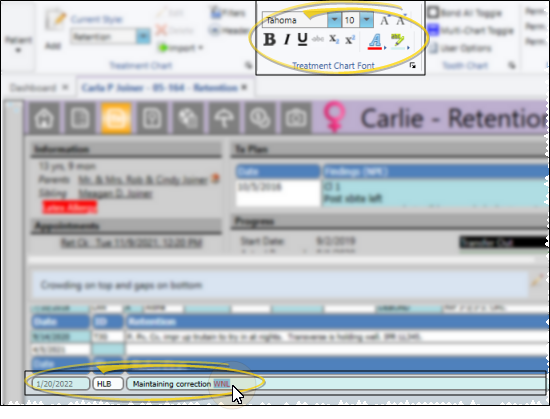
Click and drag to select the text you want to work with, then use the Treatment Chart Font section of the ribbon bar to apply a new font, color or emphasis to the text. If the Rich Text option is enabled for this style column, only the selected text will be affected. Otherwise, the entire column will be affected by your formatting choices. See "Treatment Chart & Plan Style Editor" for details about enabling / disabling this style option.
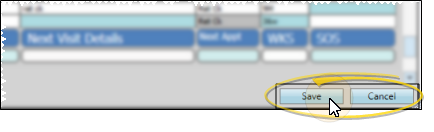
Click Save in your Quick Access toolbar, or at the bottom of the window, or press your Tab key after the final column of the record to save it.
Records Become Permanent After 24 Hours - Once a treatment chart or plan record is 24 hours old, or after a chart record has been signed, even if that happens before 24 hours have passed, it cannot be edited or deleted. You may exit a new record you have not yet completed by pressing the Esc key on your keyboard, clicking Cancel at the bottom of the window, or exiting the patient folder before you tab out of the final column of the record. After 24 hours, or after signing a chart record, you can no longer edit the text, although you can still change the way the text looks.
![]() Edit and Audit Treatment Plan Records
Edit and Audit Treatment Plan Records
Records Become Permanent After 24 Hours - Once a treatment chart or plan record is 24 hours old, or after a chart record has been signed, even if that happens before 24 hours have passed, it cannot be edited or deleted. You may exit a new record you have not yet completed by pressing the Esc key on your keyboard, clicking Cancel at the bottom of the window, or exiting the patient folder before you tab out of the final column of the record. After 24 hours, or after signing a chart record, you can no longer edit the text, although you can still change the way the text looks.
You can delete only records created within the past 24 hours, and only unsigned chart records. Right-click the record you want to change, then select Delete. Or, click  Delete in the Treatment Chart / Plan section of the ribbon bar.
You can edit only records created within the past 24 hours that have not been signed. Right-click the record you want to change, then select Edit. Or, click Edit in the Treatment Chart / Plan section of the Patient ribbon bar. When you finish making changes, press the Tab key on your keyboard to save them. Or, click Save in your File ribbon bar or Quick Access toolbar to save the changes.
Click and drag to select the text to work with, then you can cut, copy, and paste You can cut, copy and paste to add and edit text and/or images to many areas of your system using standard keyboard shortcuts ( Ctrl+X , Ctrl+C , Ctrl+V , respectively). Or, you can often right-click the field or image you are working with and select the action from a menu. In many cases, Ctrl+A selects all available text or images, ready for you to cut or copy, Ctrl+Z performs an Undo of the last action, and Ctrl+Y performs a redo of the last action. that text as needed.
Right-click any record and select Audit to review the operator, date, and time the record was created, as well as when it was last changed.
