Patient Imaging Page
Add Images to Patient Folders - If the patient has not images yet, use the  Auto Import,
  Single Import and
  Scan tools to add images to the patient folder.
You can open this feature in multiple ways: Use the method that's most convenient for you.
Patient Folder - Open a patient folder and select the  Imaging tab in the patient folder header.
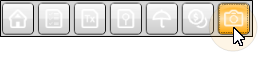
Patient Information Panel - Click the patient image box at the top of the patient information panel to open that patient's Imaging page.
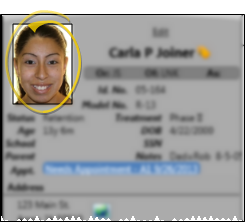
Findings Panel - While viewing the Findings panel on a patient's Home page, click an image name to open the patient's Imaging page, with that image maximized. (See "Maximize Images" for details about viewing maximized images.) See "Patient Findings Panel" for details.
Scheduler - Right-click an appointment and select Imaging to open the patient's Imaging page.

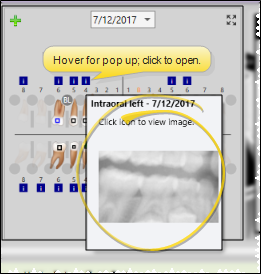
Tooth Chart - While viewing the patient's tooth chart, you can hover over the  Information icon to pop up a thumbnail of the image that is linked to that tooth, or click the icon to open the patient's Imaging page, with that image maximized. See "Link Images to Tooth Chart" for details.
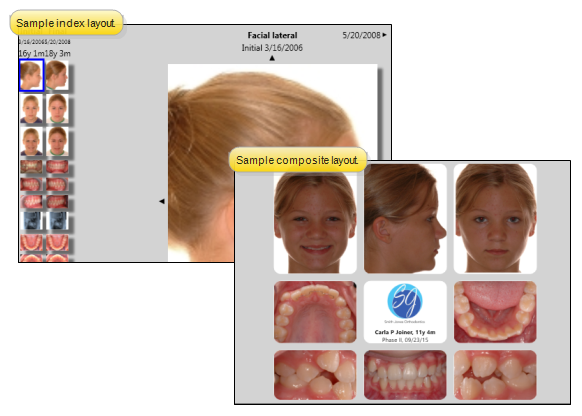
Layout / Timepoint - When you first open a patient's Imaging page, your default layout appears for the most recent timepoint.

Dynamic Layout Timepoints - You can optionally limit Dynamic layouts to including only the first and last time points when you choose to view All Time Points. This option is useful for presenting "before" and "after" images. See "Image Layouts Editor" for details about selecting this option.
Images Appear Distorted - If a dynamic layout has both Stretch to Fit and Equal Row Heights enabled, the proportions of some images may distorted. See "Image Layouts Editor" for details.
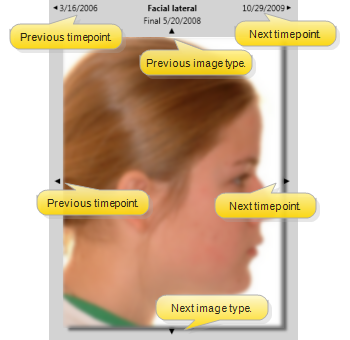
Navigate Index or Card Flip Layout - The card flip layout type presents one image in the center of the screen clearly labeled with the image type, timepoint, and date. Click the arrows at the top and bottom of the image to scroll through additional images in this timepoint. Click the arrows on either side to view the "previous" and "next" timepoint.
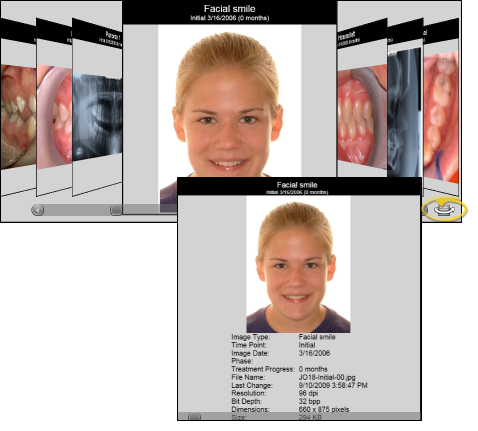
Navigate Card Flow Layout - The card flow layout type is an attractive presentation tool. One image is positioned in the center of the screen clearly labeled with the image type, timepoint and date. Click  Over to see a smaller version of the image along with the image details, and the age of the patient at the time the image was taken. You can also click an image that comes "before" or "after" the current image to bring that image to the foreground, or use the scroll bar at the bottom of the window to move forward and backward through the series of images.
Maximize - Double-click, or right-click and select Maximize to display this image as large as possible on your screen.See "Maximize Images" for details.
Use the tools in the Imaging section of the Imaging ribbon bar to morph images and time points, initiate integrations, compare, copy, email and export images, and initiate the importing process.
 Edit - Click Edit from the Imaging section of the Imaging ribbon bar to use editing tools, actions, adjustments, and options.
 Animations - Click Animations from the Imaging section of the Imaging ribbon bar to open Edge Animations with this patient's images loaded. See "Edge Animations" for details.
 Timepoint Morph - Use Timepoint Morph tools to create an animated presentation of the changes that have occurred over the course of the patient's treatment, using any image type, and any number of timepoints you have added to the patient's Edge Imaging page. You can view the animations immediately, save them as independent video files, or export them to Edge Animations. See "Time Point Morph" for details.
 Image Morph - Use Image Morph tools to cosmetically manipulate images. This feature is especially useful for cleaning up patient photos, sharpening the details of x-ray images, and showing patients the potential results of orthodontic treatment. See "Image Morphing" for details.
 SmartCeph - (Ceph tools are part of Premier Imaging, an optional module, available from Ortho2.) Click to select the patient's lateral ceph, then click SmartCeph to open your SmartCeph tools. The SmartCeph icon is available only when you have selected to view the patient's lateral ceph: Otherwise, the button appears dim on the ribbon bar. When you save a traced ceph or analysis report in SmartCeph, a copy is saved in the appropriate timepoint of the patient's Edge Imaging page. You can view these images from the Index layout, or from any layout that includes SmartCeph image types. See "Introduction to SmartCeph" for details.
 Compare Image - Choose Compare from the Imaging section of the Imaging ribbon bar, or right-click the image and select Compare, to open the Compare Images window with this image as the default first image to use. See "Compare Images" for details.
 Integrations - Click Integrations from the Imaging section of the Imaging ribbon bar, then select the Edge Imaging integration to open, such as Submit ABO Case.
 Copy to Clipboard - Choose Copy from the Imaging section of the Imaging ribbon bar, or right-click the image and select Copy to copy this image to your clipboard. See "Copy Image / Layout to Clipboard" for details.
Copy to Another Patient - Choose Copy then Copy To from the Imaging section of the Imaging ribbon bar, or right-click the image and select Copy To to copy this image to another patient folder. See "Copy Image / Timepoint to Another Patient" for details.
 Email Image - Choose Email from the Imaging section of the Imaging ribbon bar, or right-click the image and select Email to send this image as an email attachment. See "Email Images & Layouts" for details.
 Export - Choose Export from the Imaging section of the Imaging ribbon bar, or right-click the image and select Export to save this image as a .JPG file. You can also export images from the Imaging section of the Imaging ribbon bar. See "Export Image / Layout to JPG" for details.
 Refresh - Click Refresh from the Imaging section of the Imaging ribbon bar to refresh your screen with the latest imaging changes for this patient.
 Select All - Click Select All from the Imaging section of the Imaging ribbon bar to select all images in the displayed layout for copying, emailing, or exporting.
 Full Screen - Use the Full Screen option to fill your entire monitor with the active window, without status bars, ribbon bars, or other distractions. This feature is often useful for presenting progress images to patients and parents. See "Full Screen Mode" for details.
 Presenter - Use the Presenter to duplicate whatever is currently being shown on your
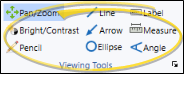
You can use viewing and drawing tools while viewing a static (not card flow) image layout, or while an image is maximized. Some of the annotations you can make, such as free-hand pencil drawings, can optionally be saved with the image, while some changes, such as the image position or brightness, are temporary. To use these tools, enable the tool you want to use from the Viewing Tools section of the ribbon bar, then click and drag your cursor as described below. Before applying any annotations, please consider these important points:
Before applying any annotation tool, you can adjust the size and color with the tools in the Annotation Options section of the ribbon bar.
After annotations are applied, you can show / hide them with the Show Annotations tool in the Annotation Options section of the ribbon.
Saved annotations will appear with the image in all layouts except card flow layouts, and when the image is maximized.
Saved annotations are for display purposes only: They are not printed, copied, or exported with the image.
Saved annotations cannot be changed, but can be removed with the Undo and Undo All tools in the Annotation Options section of the ribbon. (To permanently remove an annotation, be sure to save the image again.)
 Pan / Zoom - Enable this tool, then left-click and drag an image to move it within its window, or right-click and drag your mouse to make the image appear larger or smaller. You can also use the tracking wheel on your pointing device (i.e. your mouse) to "zoom" an image. These changes to the image are temporary: When the image is refreshed, it is automatically restored to its original settings. You can, however, make permanent changes to the image with the image editing tools.
 Bright / Contrast - Enable this tool, then left-click an image and drag to the right to increase the brightness, or drag to the left to decrease the brightness. You can also right-click and drag right to increase the contrast, and drag left to decrease the contrast. These changes to the image are temporary: When the image is refreshed, it is automatically restored to its original settings. You can, however, make permanent changes to the image with the image editing tools.
 Pencil Drawing - Enable this tool, then click and drag to draw free-hand on an image. You can optionally save this annotation with the image.
 Line Drawing - Enable this tool, then click and drag to draw a straight line. You can optionally save this annotation with the image.
 Arrow - Enable this tool, then click and drag to draw an arrow on an image. The point of the arrow is at the tip of your cursor.
Ellipse - Enable this tool, then click and drag to draw a circular shape on an image. You can optionally save this annotation with the image.
 Label - Enable this tool, then click on an image where you would like to add descriptive text, and type your message in the box that appears. Or, click an existing label to move it on the image. Due to font sizing, labels are often best viewed when the image is maximized. You can optionally save this annotation with the image.
 Measurement - Enable this tool, then click and drag to measure a distance on the image. By default, the distance is calculated using the image DPI. You can, however, can use the Calibrate tool in the Annotation Options section of the ribbon bar to adjust the calculation for this image. You can optionally save this annotation with the image.
 Angle - Enable this tool and select the image to work with. Then, click to select the first point of the angle. Drag your cursor, and click to select a second point. Finally, drag and click the third point. An annotation that includes two lines and the measured angle between them is added to your image. You can optionally save this annotation with the image.
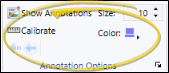
Use the Annotation Options section of the ribbon bar to adjust the color and size of the drawing tools found in the Viewing Tools section of the ribbon, calibrate image measurements, show / hide annotations you have added to your images, and remove annotations you have previously applied to an image. Before using these options, please consider these important points:
The color and size settings are used for all drawing tools in the Viewing Tools section of the ribbon bar (pencil, angle, etc.) until you choose to change them again.
The Calibrate tool should be used with extreme care to assure accurate measurement. Calibration adjustments affect the current image measurement only: The tool is restored to its original DPI default when the image / page is refreshed.
The Undo and Undo All tools remove annotation(s) you have applied to the selected image, even if those annotations have previously been saved. To permanently remove annotations, you must save the image again.
Color - Click  Color, then choose the color to use when annotating the image.
Size - Use the Size field to adjust the width of the annotation tool you are using.
Calibrate Image - (Use with care.) If your annotation measurements do not appear to be correct, you may need to use the  Calibrate tool to re-calibrate the measurement scale for the image. By default, measurements use the DPI of the image. If you want to use a different scale, click Calibrate, then select the DPI option, and enter the appropriate DPI setting. If your image includes a standard measuring scale, such as a ruler at the edge, you can instead select the Measurement option. You are prompted to click and drag a sample line on the image that corresponds to the measurement value. Edge Imaging will then calculate the appropriate DPI for this image. You can also click the Reset link to return the image to the default calibration. Calibration changes affect this image only, and measurements already in place on the image will not change to reflect the new scale.
Show / Hide Annotations - Enable / disable this option to show / hide the annotations you have made to all images on the current layout.
Undo / Undo All - Click  Undo Last (or press Ctrl-Z) to erase the most recent annotation you have applied, or click
  Unto All to erase all of your annotations from the image. The Show Annotations tool must be enabled before you can use the undo tool. In addition, if you have saved annotations to the image, and then use Undo, you must save the image again to permanently remove the annotations from the image.
View Patient Folder & Images Simultaneously - Click  Other Actions then select
  Reopen from the Patient section of the Patient ribbon bar to open a second session of the patient folder. If you have multiple screens, you can then drag one of the folder tabs to another screen. This feature is particularly useful for systems with dual monitors that want to keep the patient folder information available while viewing images (or any other page of the patient folder) on another screen.
View Image Properties - Right-click and select  Properties to view the image file details. You cannot edit any details while viewing images. To change the Date Taken and Notes fields, you must first open Edit mode. See "Image Properties" for details.
Print an Image - Right-click an image and select  Print to print the image on any printer available to your workstation. Or, choose Print from the File ribbon bar or the Quick Access toolbar.(See "Print Patient Images & Layouts" for details.)
![]()
www.ortho2.com │ 1107 Buckeye Ave. │ Ames, IA 50010 │ 800.346.4504 │ Contact Us
Chat with Software Support │ Chat with Network Engineering │ Chat with New Customer Care
Remote Support │ Email Support │ Online Help Ver. 11/11/2019


