Timeclock Tracker
Use the Timeclock Tracker to see which employees are clocked in and out, review any messages, and edit time stamps.
![]() Timeclock Security - Use the Time Clock security group options of your Security editor to set up the level of access employees have to timesheets, time stamps, and Timeclock reports.
Timeclock Security - Use the Time Clock security group options of your Security editor to set up the level of access employees have to timesheets, time stamps, and Timeclock reports.
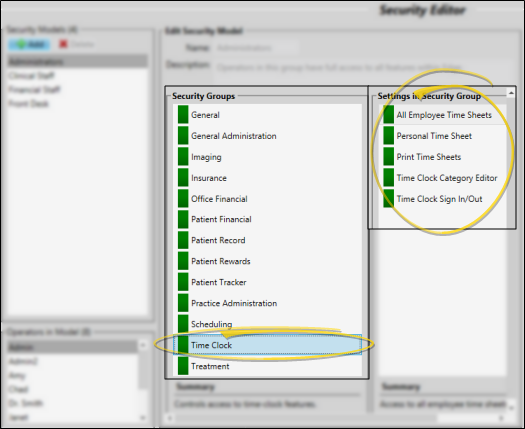
All Employee Time Sheets - This setting defines the access someone has to view and edit everyone's timesheet and time stamps in the Timeclock Tracker. If you want someone to be able to see other employees' time stamps, but not edit them, select Read Only. To prevent someone from even looking at other people's timesheet and time stamps, set this option to No Access. Regardless of the security setting, everyone can see whether an employee is clocked in or out (unless that employee is flagged with "Hide From Timeclock Tracker / Hr Manager" in the Operator editor).
Even if this option is set to Read Only or Full Access, the operator must also have Full Access to the Timeclock Sign In / Out option to be able to open the Timeclock Tracker and view time stamps.
Personal Time Sheet - This setting defines the access someone has to view and edit their own timesheet and time stamps in the Timeclock Tracker. If you want someone to be able to see their own time stamps, but not edit them, select Read Only. To prevent someone from even looking at their own timesheet and time stamps, set this option to No Access.
Even if this option is set to Read Only or Full Access, the operator must also have Full Access to the Timeclock Sign In / Out option to be able to open the Timeclock Tracker and view time stamps.
If you set the Personal Time Sheet option to No Access, but the All Employee Time Sheets option is Full Access or Read Only, the employee will be able to see everyone's timesheets and time stamps, including their own.
Print Time Sheets - This option must be set to Full Access for someone to be able to open and print any Timesheet report.
Security models with an All Employee Time Sheets access of No Access should likely also have the Print Time Sheets option set to No Access Otherwise, users will be able to access other people's time stamp details via the Timesheet report.
Timeclock Category Editor - This setting defines the access someone has to view and edit the Timeclock Category editor. If you want someone to be able to see the editor, but not save any changes, select Read Only. To prevent someone from even opening the editor, set this option to No Access. Regardless of the security setting, everyone will be able to select any active category as they clock into Timeclock.
Timeclock Sign In / Out - This setting defines whether an operator can use your Timeclock. This option must be set to Full Access in order for someone to be able to clock in / out, request time off, and open the Timeclock Tracker.
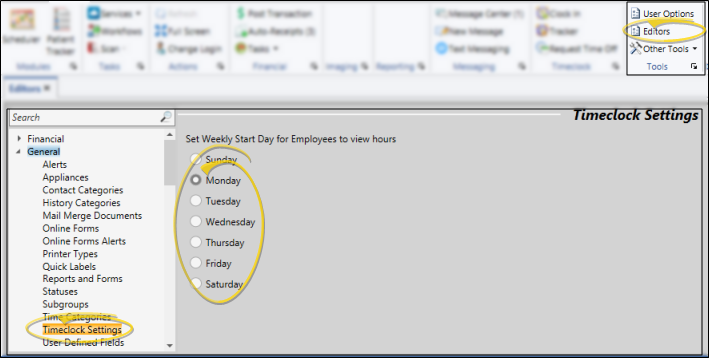
![]() Set Up Start of Week - Use the Timeclock Settings
Set Up Start of Week - Use the Timeclock Settings
Select ![]() Timeclock Tracker from either the Timeclock section of the Edge Cloud Home ribbon bar, or the General section of the HR Manager ribbon bar.
Timeclock Tracker from either the Timeclock section of the Edge Cloud Home ribbon bar, or the General section of the HR Manager ribbon bar.
![]()
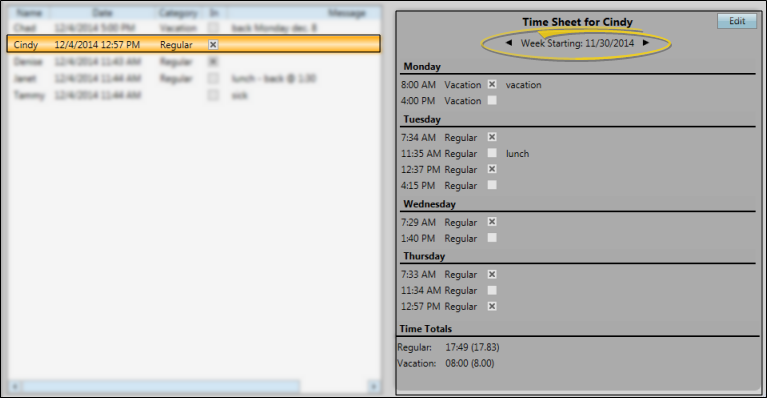
Employee Status / Message - All Edge Cloud

Time Sheet Details - Click an employee name to see that person's time sheet details at the right of the window. Use the arrows beside the date to choose a different week to view. The time sheet shows you the hours worked for the selected employee, totaled in both decimal and hour:minute format. Time stamps with checkmarks are "clock in" stamps; time stamps without checkmarks are "clock out" stamps.
Initiate Edit - Choose the employee to work with, then click Edit at the right of the window. (The Edit button appears only if you have appropriate time clock security rights.)

Select Date - Select the date to work with.
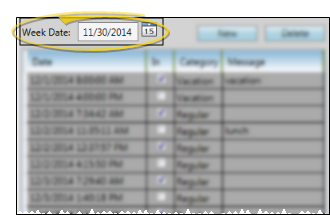
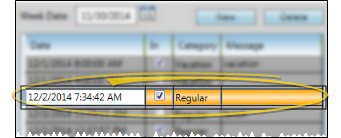
Edit Time Stamp - Click the column to edit, and make your changes. You can edit the date, time, "in / out" status, category, and message. Pay special attention to the "AM" or "PM" designation.
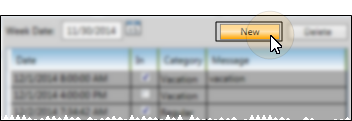
Insert a New Time Stamp - Click New to add a time stamp to this employee record. Then enter the time, category, and optionally a message. This feature provides a way for supervisors to add vacation and sick leave hours to the system, as well as add records for employees that simply forgot to clock in or out. You can also add time stamps into the future if needed, for example, to enter vacation hours before you leave.
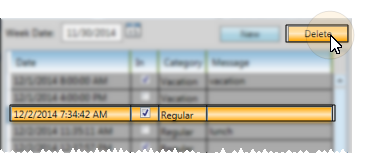
Delete a Time Stamp - Click a time stamp, then click Delete to remove the stamp from the employee record. When deleting stamps, be sure to delete both the "in" and "out" record.
Save Your Changes - Click Ok to save the changes you have made and close the editing window.
![]() View Employee Status from Timeclock App
View Employee Status from Timeclock App
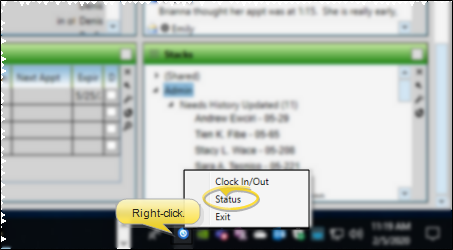
If the Timeclock app is running on your computer, you can right-click the  Timeclock icon and select Status to open a view-only Timeclock Tracker widget. (See "Clock In & Out of Timeclock" for details about starting the Timeclock app.)
Timesheets - Run a Timesheet report to obtain the details about when employees clocked in and out, as well as the total hours worked, for any range of dates. All timesheet reports, except Timesheet Edits, can be run for selected employees or all employees, and can optionally include inactive employee records. See "Timesheet Reports" for details.
Time Off Requests - Run a Time Off Requests report to obtain a list of requests created by employees. You can choose to include requests received by one or more employees, or include all employees, as well as filter the requests status to show on the report. See "Time Off Requests Report" for details.